# Overview

Create and publish AI-native documentation your users will love. GitBook gives you intelligent tools to build product guides, API references, and documentation that improves over time.

<table data-card-size="large" data-view="cards"><thead><tr><th></th><th></th><th data-hidden data-type="image">Cover image (dark)</th><th data-hidden data-type="image">Cover image (dark)</th><th data-hidden data-type="image">Cover image (dark)</th><th data-hidden data-type="image">Cover image (dark)</th><th data-hidden data-card-cover-dark data-type="image">Cover image (dark)</th><th data-hidden data-card-target data-type="content-ref"></th><th data-hidden data-card-cover data-type="image">Cover image</th></tr></thead><tbody><tr><td><strong>Quickstart</strong></td><td>Get up and running with GitBook in just a few minutes</td><td><a href="/files/iuQzSs10N2B09IKNSn6N">/files/iuQzSs10N2B09IKNSn6N</a></td><td></td><td></td><td></td><td><a href="/files/xuYYEi9GOFjz34mx8rwJ">/files/xuYYEi9GOFjz34mx8rwJ</a></td><td><a href="/pages/LeZB5bRRRrTrkSl678Cp">/pages/LeZB5bRRRrTrkSl678Cp</a></td><td><a href="/files/QbVBImJwrA69yjwwaY86">/files/QbVBImJwrA69yjwwaY86</a></td></tr><tr><td><strong>Git Sync</strong></td><td>Sync with a Git repository to enable docs-as-code workflows</td><td></td><td><a href="/files/ZqNtFc7X9jpeNpt7xRVf">/files/ZqNtFc7X9jpeNpt7xRVf</a></td><td></td><td></td><td><a href="/files/NfaksvU8IDsXlMsvZpYM">/files/NfaksvU8IDsXlMsvZpYM</a></td><td><a href="/pages/HzpkoWwYu6eCKccs3i93">/pages/HzpkoWwYu6eCKccs3i93</a></td><td><a href="/files/NxPeEVgxZw0iNq1sTsA7">/files/NxPeEVgxZw0iNq1sTsA7</a></td></tr><tr><td><strong>Create content</strong></td><td>Create and format your docs using our block-based editor</td><td></td><td></td><td><a href="/files/QPQwWWPi9Kj6uTWVWUBf">/files/QPQwWWPi9Kj6uTWVWUBf</a></td><td></td><td><a href="/files/Ip117gadKsUrTcCWFa73">/files/Ip117gadKsUrTcCWFa73</a></td><td><a href="/pages/m5Yqxmw2ZT0HNZdTJPvi">/pages/m5Yqxmw2ZT0HNZdTJPvi</a></td><td><a href="/files/TCsSotUzkpHXfsiITXwR">/files/TCsSotUzkpHXfsiITXwR</a></td></tr><tr><td><strong>Publish your docs</strong></td><td>Publish your docs site to share with others</td><td></td><td></td><td></td><td><a href="/files/YytByXjf9asxOazY8QFV">/files/YytByXjf9asxOazY8QFV</a></td><td><a href="/files/QGUFPJo987lHWyywP4nJ">/files/QGUFPJo987lHWyywP4nJ</a></td><td><a href="/pages/LhRX6q09LqLQChgHEgh8">/pages/LhRX6q09LqLQChgHEgh8</a></td><td><a href="/files/WJF7hXUYFl95qQfmsqAW">/files/WJF7hXUYFl95qQfmsqAW</a></td></tr></tbody></table>

<table data-view="cards"><thead><tr><th></th><th></th></tr></thead><tbody><tr><td><strong>Essentials</strong></td><td><ul><li><a href="/pages/C3gjS9FbT1OkHdD01UJd">Concepts</a></li><li><a href="/pages/xm6T8EpV4FqtdPLzZ8qN">Blocks</a></li><li><a href="/pages/d9NivHBiVedTIKopEvBl">Customization</a></li><li><a href="/pages/Yn7gzayRYsbHAIeByLZu">Authenticated access</a></li><li><a href="/pages/Uw6wR2SFhrBGaAVOYbTG">Custom domains</a></li></ul></td></tr><tr><td><strong>AI-native docs</strong></td><td><ul><li><a href="/pages/KHHFlE1MtpVIaZboN8b2">GitBook Agent</a></li><li><a href="/pages/m6LOhkgWYpmL4u1LYydz">GitBook Assistant</a></li><li><a href="/pages/biYvWYyOTbkQs94S5MI1">MCP</a></li><li><a href="/pages/MCMfIAhwG9Os2PywCGB1">AI Search</a></li><li><a href="/pages/BPVA2SImqxaDTjQZPl7Y">LLM-ready docs</a></li></ul></td></tr><tr><td><strong>Popular topics</strong></td><td><ul><li><a href="/pages/ULsdJhvtNCAWeVUgImcP">Adaptive content</a></li><li><a href="/pages/HzpkoWwYu6eCKccs3i93">GitHub &#x26; GitLab Sync</a></li><li><a href="/pages/qt1ABAgInf3SoswVGWOD">Migrate to GitBook</a></li><li><a href="/pages/Cxth7vTEkFBerVk2ifJf">Content structure</a></li><li><a href="/pages/SCIhFLnUtEbtkZm5zN9x">Translations</a></li></ul></td></tr></tbody></table>


# Quickstart

Get up and running in GitBook and publish your first docs site in minutes

This quickstart guide explains how to get set up in GitBook and publish your first docs site in minutes.

At the end of this guide, you’ll have a live documentation site, ready to expand and customize.

{% stepper %}
{% step %}
**Getting started**

You’ll need to [create an account](https://app.gitbook.com/join) before you can get started with your first documentation site.

After creating your account, you’ll automatically see a new docs site that’s ready for you to edit and customize. Choose how you want to add content to your site before you publish from the on-screen options.

{% hint style="success" %}
Your content isn’t published yet — so you can edit, customize and preview your docs site before making it live. Hit **Publish** to make it live immediately.

<i class="fa-arrow-down">:arrow-down:</i> [Jump to the ‘Publishing’ section on this page](#publish-your-documentation)
{% endhint %}
{% endstep %}

{% step %}
**Edit your content**

There are two ways to edit and update your content in GitBook — in our visual editor, or following a docs-as-code workflow. **You can choose one, or use a combination of both**.

Whichever workflow you prefer, you’ll edit your content using a **branch-based editing flow**. Find out more on [the Concepts page](/docs/resources/concepts).

<details>

<summary>Use the visual editor</summary>

GitBook’s what-you-see-is-what-you-get (WYSIWYG) editor lets you edit content visually, drag content blocks to reorganize them and see how your content will look as you work.

This visual editing workflow is ideal for users who don’t want to work in a code editor, or who have experience working with tools like Notion or Google Docs.

**1. Edit your docs in a change request**

First, find your docs site in the sidebar and click the item below it. This takes you to the space where your content lives.

Click **Edit** in the top-right. This opens a change request where you can edit the content of the space.

Click **Add new…** in the table of contents on the left-hand side to add a page, and give it a title.

<div data-with-frame="true"><figure><img src="/files/nFSSpszSOZdID8OMllDJ" alt="A screenshot of the Editor in the GitBook app, zoomed in to show the menu that lets you add new pages, groups, links and more to a GitBook space."><figcaption></figcaption></figure></div>

**2. Preview your changes**

Along the top of the web app you’ll see tabs for **Editor**, **Changes** and **Preview**. These switch between different views for your content.

Click **Preview** to see a live preview of what your docs site will look like with all the changes in your change request, on both desktop and mobile.

<div data-with-frame="true"><figure><img src="/files/1pHABstnmgbOI0HYxO5I" alt="A screenshot of the GitBook app with the Preview tab open, showing a docs site being previewed on a mobile-size display"><figcaption></figcaption></figure></div>

**3. Merge your changes**

Once you’re happy with your changes, click the **Merge** button in the top-right corner.

This will update the primary version of your content with all the edits from the change request. If the content is part of a live docs site, the site will be updated immediately.

</details>

<details>

<summary>Code-based editing</summary>

Sync your documentation with a GitHub or GitLab repository to enable code-based editing. Once synced, you can edit your docs in your existing developer environment.

This workflow is ideal for technical users who don’t want to switch tools and prefer to manage their documentation alongside other code.

**1. Set up Git Sync**

If you haven’t already set up Git Sync when creating your site, first find your docs site in the sidebar and click the name of the content below it. This takes you to the space where your content lives.

Click the **Set up Git Sync** button in the top-right and follow the instructions to sync your space to your chosen Git repository.

Head to the [Git Sync pages](/docs/getting-started/git-sync) to find out more.

**2. Edit your docs from your developer environment**

Once you’ve synced your space to your Git repository, you can update the content of your docs from that repository in your development environment.

Open the repository, create a pull request and make the changes you want.

{% hint style="info" %}

#### Markdown editing

GitBook supports [Markdown editing](/docs/creating-content/formatting/markdown), so you can create and format content using common syntax.

Every standard block in GitBook can be written and formatted using Markdown syntax.
{% endhint %}

**3. Preview your changes**

You can [preview your changes](/docs/getting-started/git-sync/github-pull-request-preview) on your published docs site from the pull request in GitHub or GitLab.

In your pull request, you’ll see a status with a unique preview URL. Click **Details** on that status to open the preview URL and see how your site will look when the pull request is merged and your site is updated.

**4. Merge your changes**

You’re good to go. Merge your pull request and your content will be updated both in the GitBook app and on your docs site, if it’s live.

In the GitBook app, every commit and your merged pull request will be synced to your space as updates in the version history.

<div data-with-frame="true"><figure><img src="/files/3cJAH6NsakKJ94H57QsU" alt="A screenshot of the GitBook app showing the version history side panel open. In the side panel the highlighted entry shows a pull request from GitHub that was merged as part of the history, with a link to view the pull request on GitHub."><figcaption></figcaption></figure></div>

</details>
{% endstep %}

{% step %}
**Customize your docs**

<details>

<summary>Organize your site navigation</summary>

You can add more content to your site — such as an API reference, a help center or a changelog — at any time. When you add content, you can organize your site’s navigation bar to help users easily find what they’re looking for.

Head to [the Concepts page](/docs/resources/concepts) to find out more about site navigation.

Head to [the Site structure page](/docs/docs-site/site-structure) to find out more about adding content to your site.

<div data-with-frame="true"><figure><img src="/files/UiKvDW92qBM2fb8iKz1m" alt="A screenshot of a published docs site hosted on GitBook. The top of the site has a navigation bar, and the cursor is hovering over a drop-down in that bar, with a submenu open below it showing links to more pages"><figcaption></figcaption></figure></div>

</details>

<details>

<summary>Customize the look and feel of your docs site</summary>

Your docs site will look great out of the box, but you can also customize many settings that change the look and feel of your published site.

You can customize your site’s [logo, colors and font](/docs/docs-site/customization/icons-colors-and-themes), add to your site navigation bar using [site sections](/docs/docs-site/site-structure/site-sections) and [variants](/docs/docs-site/site-structure/variants), update your [site’s visibility](/docs/docs-site/site-settings#audience) settings and much more.

<div data-with-frame="true"><figure><img src="/files/K6hVWsLCioI8Ida8Xvp3" alt="An illustration showing five docs sites hosted in GitBook, each with distinct visual customizations"><figcaption></figcaption></figure></div>

</details>
{% endstep %}

{% step %}
**Publish your documentation**

<details>

<summary>Publish your docs</summary>

You can publish your site with a click at any time.

Open your site’s dashboard by clicking the site’s name in the sidebar. Then click **Publish** in the top-right corner to make it live.

Once your site is live, the dashboard will update with a link to the live site.

<div data-with-frame="true"><figure><img src="/files/kraMfmr1Ow5P1NDy1ZM3" alt="A screenshot of the GitBook app showing a dashboard for a docs site. The dashboard shows the public URL, site status, site content, some top-level analytics for the site, and other options in tabs along the top of the screen."><figcaption></figcaption></figure></div>

{% hint style="success" %}
Want to explore publishing in more detail? Check out [our complete guide to creating and publishing content in GitBook](/docs/guides/editing-and-publishing-documentation/complete-guide-to-publishing-docs-gitbook).
{% endhint %}

</details>

<details>

<summary>Add a custom domain</summary>

By default, you site will be published with a unique URL with this format:

```
https://[organization-name].gitbook.io/[site-title]
```

While this may be suitable for some teams, many choose to change their URL to [a custom domain](/docs/docs-site/custom-domain) or [a custom subdirectory](/docs/docs-site/custom-domain/setting-a-custom-subdirectory).

To do this, open your site dashboard by clicking the site’s name in the sidebar, then open the **Settings** tab and choose **Domain and URL**.

<figure><img src="/files/gBx8HUjPDtH7vGKcHK6G" alt="A screenshot of the GitBook app showing the menu that guides you through the process of setting up a custom domain for your docs site."><figcaption></figcaption></figure>

Use the buttons on the screen to choose the option you want, and follow the instructions to configure the DNS settings with your domain provider.

{% hint style="info" %}
It can take up to 48 hours for your DNS changes to take effect — although they typically propagate much faster.
{% endhint %}

</details>
{% endstep %}
{% endstepper %}

### Next steps

<table data-view="cards"><thead><tr><th></th><th></th><th data-hidden data-card-cover data-type="image">Cover image</th><th data-hidden data-card-target data-type="content-ref"></th><th data-hidden data-type="image">Cover image (dark)</th><th data-hidden data-type="image">Cover image (dark)</th><th data-hidden data-type="image">Cover image (dark)</th><th data-hidden data-type="image">Cover image (dark)</th><th data-hidden data-card-cover-dark data-type="image">Cover image (dark)</th></tr></thead><tbody><tr><td><strong>Invite your team to collaborate</strong></td><td>Add team members to your organization and set permissions</td><td><a href="/files/boSE6uoGRCnWmEVO1lwK">/files/boSE6uoGRCnWmEVO1lwK</a></td><td><a href="/pages/2IjHSoo984e0KPONLbMx">/pages/2IjHSoo984e0KPONLbMx</a></td><td><a href="/files/5763ldGNUM1aipXpZhKZ">/files/5763ldGNUM1aipXpZhKZ</a></td><td><a href="/files/5763ldGNUM1aipXpZhKZ">/files/5763ldGNUM1aipXpZhKZ</a></td><td></td><td></td><td></td></tr><tr><td><strong>Change site visibility</strong></td><td>Control who can see your content with share links and authenticated access</td><td><a href="/files/VAl1sjKGCGeAoQieVGg3">/files/VAl1sjKGCGeAoQieVGg3</a></td><td><a href="/pages/LhRX6q09LqLQChgHEgh8#publish-a-docs-site">/pages/LhRX6q09LqLQChgHEgh8#publish-a-docs-site</a></td><td><a href="/files/EE4BNQA0v0QzJ5BQPfPG">/files/EE4BNQA0v0QzJ5BQPfPG</a></td><td></td><td><a href="/files/EE4BNQA0v0QzJ5BQPfPG">/files/EE4BNQA0v0QzJ5BQPfPG</a></td><td><a href="/files/EE4BNQA0v0QzJ5BQPfPG">/files/EE4BNQA0v0QzJ5BQPfPG</a></td><td></td></tr><tr><td><strong>Add auto-translations</strong></td><td>Create one-click translations that update automatically</td><td><a href="/files/PxPSu5Hb292CN2FgRVSF">/files/PxPSu5Hb292CN2FgRVSF</a></td><td><a href="/pages/di5bPxdPZTwjAkWJ9PRP">/pages/di5bPxdPZTwjAkWJ9PRP</a></td><td><a href="/files/43YsUmShh5g6uYcX0PFx">/files/43YsUmShh5g6uYcX0PFx</a></td><td></td><td></td><td><a href="/files/43YsUmShh5g6uYcX0PFx">/files/43YsUmShh5g6uYcX0PFx</a></td><td></td></tr><tr><td><strong>Install integrations</strong></td><td>Integrate with your stack and extend functionality with powerful integrations</td><td><a href="/files/iA8rttMzo0QdTEG0fQi6">/files/iA8rttMzo0QdTEG0fQi6</a></td><td><a href="/pages/b29aoPwtKZKkAO7zajgr">/pages/b29aoPwtKZKkAO7zajgr</a></td><td><a href="/files/y24wuSVoiaipw3T939jf">/files/y24wuSVoiaipw3T939jf</a></td><td></td><td></td><td></td><td><a href="/files/y24wuSVoiaipw3T939jf">/files/y24wuSVoiaipw3T939jf</a></td></tr><tr><td><strong>Add an API reference</strong></td><td>Create auto-updating, interactive API reference docs from an API spec</td><td><a href="/files/KrUFb2yZnpDLLJhEDTSs">/files/KrUFb2yZnpDLLJhEDTSs</a></td><td><a href="/pages/EAZLjjyX6jX76NFnj71P">/pages/EAZLjjyX6jX76NFnj71P</a></td><td><a href="/files/lJTO1SoH2ad08ZOv1z4c">/files/lJTO1SoH2ad08ZOv1z4c</a></td><td></td><td></td><td></td><td></td></tr><tr><td><strong>Track docs analytics</strong></td><td>Use the built-in insights to measure success and understand user behavior</td><td><a href="/files/O33Ubu0DNt20sSrtvZ45">/files/O33Ubu0DNt20sSrtvZ45</a></td><td><a href="/pages/26Gxb8Al3EJRM41yVVxc">/pages/26Gxb8Al3EJRM41yVVxc</a></td><td><a href="/files/HuUUylHiQWCdaQfmJXhZ">/files/HuUUylHiQWCdaQfmJXhZ</a></td><td></td><td></td><td></td><td></td></tr></tbody></table>

### FAQs

<details>

<summary>What is GitBook?</summary>

GitBook is a collaborative, AI-native documentation platform where teams can create, review, and publish branded docs as websites. Docs sites hosted on GitBook can offer a built-in AI Assistant and connect to other AI tools via MCP.

You can edit content using the advanced visual editor using Markdown, sync your docs with a Git repository for a docs as code workflow — or use a combination of the two. However your team chooses to use GitBook, you’ll use a Git-like branching workflow with a full version history, which protects your primary content while encouraging collaboration and feedback across your entire team.

</details>

<details>

<summary>How do you publish documentation with GitBook?</summary>

Publishing in GitBook is a simple process once your content is ready to go live:

1. Create a new docs site (or open an existing one) and choose the content you want to publish.
2. Choose your site audience. You can publish to everyone with the **public** setting, or limit the audience with **share links** or **authenticated access**.
3. (Optional) Customize the branding, domain, and theme using the built-in options.
4. Click **Publish**. Congrats — your docs are live! You can add more spaces later as site sections or variants.

To find out more, check out [our Quickstart guide](#getting-started) above, or read [the complete guide to creating and publishing documentation in GitBook](/docs/guides/editing-and-publishing-documentation/complete-guide-to-publishing-docs-gitbook).

</details>

<details>

<summary>Is GitBook open source?</summary>

GitBook itself is not open source. However, GitBook’s published docs platform — which is used to host and display documentation on a docs site — is open source. You can [visit the repository](https://github.com/GitbookIO/gitbook) to see the code and submit changes for review.

While GitBook itself isn’t open source, **open source projects can publish documentation on GitBook for free**. Teams can sign up for [the Community plan](/docs/account-management/plans/community) and publish content using [a Sponsored site plan](/docs/account-management/plans/community/sponsored-site-plan), both of which are free to qualifying teams.

</details>

<details>

<summary>What’s the difference between a site and a space in GitBook?</summary>

In GitBook, a **docs site** is your overall documentation hub, hosting all content accessible to your audience and featuring customizable options like theme and domain.

Each site contains one or more **spaces**, which serve as individual sections within the site, organizing related content for better modularity and ease of management. Spaces let you focus your collaboration on specific topics, and you can combine multiple spaces on a single site to build structure or enable options like translations (for localized documentation) or multi-product support.

</details>

<details>

<summary>What are the differences between GitBook’s visual editor and Git Sync?</summary>

GitBook offers two main methods for editing documentation — the visual editor and Git Sync. The **visual editor** is an advanced, block-based editor that allows you to create and modify content directly within GitBook using a traditional user interface that includes Markdown support. It's ideal for those who prefer a more intuitive, hands-on editing experience without directly dealing with code.

**Git Sync** integrates your documentation workflow with a Git repository, enabling a ‘docs as code’ approach. This option is ideal for developers and teams who prefer managing documentation alongside their codebase, using familiar Git commands and workflows.

Your team can choose one of these workflows, or use a combination of them both. And whichever method they prefer, editing follows a consistent, Git-like branching workflow with a full version history and content review process. This doesn’t just promote collaboration and quality across your docs — it also safeguards primary content from accidental edits.

</details>


# AI-native documentation

Learn how AI documentation helps your users find answers, your team maintain docs efficiently, and your docs be more discoverable by AI tools like ChatGPT

Documentation hosted on GitBook benefits from built-in AI features and optimizations out of the box.

These AI-native features help your users find the information they need faster — whether they’re asking the built-in AI Assistant trained on your docs, or using other AI tools like ChatGPT. At the same time, they help your team maintain your docs more efficiently, so they’re always accurate and up to date.

## How AI in GitBook improves your documentation <a href="#what-makes-your-documentation-ai-native" id="what-makes-your-documentation-ai-native"></a>

### Help users find information <a href="#reading" id="reading"></a>

As well as just reading your docs, your users can chat with the [AI Assistant](/docs/ai-and-search/gitbook-ai-assistant) in your docs to get answers to questions. It's trained on your documentation and can provide detailed information to help guide users to the solution they need. But you can also [connect it to other tools via MCP](/docs/ai-and-search/gitbook-ai-assistant#extend-gitbook-assistant-with-mcp-servers), allowing the Assistant to give answers from more sources, or even carry out actions like opening support tickets or filing bug reports from users.

You can also [embed your GitBook docs into your product or website](/docs/docs-site/embedding) using Docs Embed, which includes both the Assistant and a docs browser, giving users access to documentation without having to switch tools.

And you can take this even further by allowing the Assistant to understand what your users are currently working on using [adaptive content](/docs/site-access/adaptive-content). By passing data securely between your product and GitBook, Assistant can provide personalized, context-aware answers and even proactively suggest relevant questions.

### Maintain docs more efficiently <a href="#writing" id="writing"></a>

[GitBook Agent](/docs/gitbook-agent/what-is-gitbook-agent) helps you write and maintain your documentation — and you can use to create and auto-update localized versions of your docs with a click.

GitBook Agent will create content based on your prompts, allowing you to jumpstart your docs process with a first draft to review. Or you can ask the Agent to review your own work before you merge.

You can add a style guide and custom instructions that apply across your organization, reference other pages to add context, and ask for help on individual blocks — or your entire page.

And soon, the Agent will suggest and generate docs improvements based on support tickets, GitHub issues and other connected services. You’ll be able to browse through it’s suggestions, review the change requests it opens and edit or merge them if they’re useful.

If you prefer to edit your GitBook docs locally using [Git Sync](/docs/getting-started/git-sync) and AI coding assistants like Claude Code and Cursor, you can also use GitBook's [skill.md](https://gitbook.com/docs/skill.md) file to provide all of the needed context to create, edit, and manage your documentation in your own environment using all of GitBook’s features and blocks.

And if you want to translate your docs site into other languages, all you have to do is choose the language you want. [GitBook’s built-in AI Translation tool](/docs/gitbook-agent/translations) will handle the translation, duplicating all your primary content and localizing it ready for you to add to your site. When you update your primary content, the translated versions automatically update to reflect your changes — no effort or review needed.

### Improve docs discovery in ChatGPT and other tools <a href="#discovering" id="discovering"></a>

Your published docs site is [automatically optimized for AI tools](/docs/ai-and-search/llm-ready-docs) and search engines to help users discover your documentation when using tools like ChatGPT, Claude and Google AI Overview.

Your docs site sends pages to AI agents as Markdown rather than HTML, which are easier for AI tools to process and use fewer tokens. And you can view every page as Markdown by adding `.md` to the URL.

GitBook also automatically creates `llms.txt` and `llms-full.txt` files for your docs site. These files are becoming industry-standard, and help LLMs index your documentation so they can respond to user questions quickly with relevant answers.

Plus, GitBook [automatically hosts an MCP server](/docs/ai-and-search/llm-ready-docs#mcp-server) for every docs site. This lets users connect their AI tools directly to the information in your docs so they can get the latest, most accurate product information rigt when they need it without needing to switch tools.

## Use GitBook’s AI documentation features <a href="#enable-ai-features" id="enable-ai-features"></a>

Choose a feature below to find out more:

<table data-card-size="large" data-view="cards"><thead><tr><th></th><th></th><th></th><th data-hidden data-card-target data-type="content-ref"></th></tr></thead><tbody><tr><td><i class="fa-sparkles">:sparkles:</i></td><td><strong>AI Assistant</strong></td><td>Embed the Assistant in your product and give users relevant answers trained on your docs — and other tools you choose to connect.</td><td><a href="/pages/m6LOhkgWYpmL4u1LYydz">/pages/m6LOhkgWYpmL4u1LYydz</a></td></tr><tr><td><i class="fa-robot">:robot:</i></td><td><strong>GitBook Agent</strong></td><td>Get proactive suggestions for docs updates based on support tickets, release notes and more — or ask the Agent to review your work.</td><td><a href="/pages/KHHFlE1MtpVIaZboN8b2">/pages/KHHFlE1MtpVIaZboN8b2</a></td></tr><tr><td><i class="fa-language">:language:</i></td><td><strong>Translations</strong></td><td>Translate your docs into any language with a click, and watch them automatically update every time you edit your primary content.</td><td><a href="/pages/SCIhFLnUtEbtkZm5zN9x">/pages/SCIhFLnUtEbtkZm5zN9x</a></td></tr><tr><td><i class="fa-server">:server:</i></td><td><strong>MCP server integration</strong></td><td>Your site’s hosted MCP server lets users connect your docs to other tools so they can pull knowledge whenever they need it.</td><td><a href="/pages/biYvWYyOTbkQs94S5MI1">/pages/biYvWYyOTbkQs94S5MI1</a></td></tr></tbody></table>


# Migrate to GitBook

How to import existing content into GitBook from Confluence, Notion, Git and more

You can migrate and unify existing documentation in GitBook using the import tool.

You have the option to import single or multiple pages using our built-in import tool — or [an entire Git repository using Git Sync](#import-using-git-sync).

## Using the Import panel

The Import panel makes it easy to migrate your content into your GitBook organization from another documentation website or from existing files.

When you choose to import from another online documentation site, all you have to do is add the URL of the site and GitBook will handle the rest.

By default, GitBook uses AI to streamline the import process. This will intelligently refine and clean up imported content that doesn’t perfectly match GitBook’s formats — meaning the output will be more polished and use GitBook’s blocks more effectively. You can disable this from the menu.

### Supported import formats

GitBook supports imports from docs websites or files in the following formats:

* Markdown (`.md` or `.markdown`)
* HTML (`.html`)
* Microsoft Word (`.docx`)

GitBook also support imports from:

* Confluence
* Notion
* GitHub Wiki
* Quip
* Dropbox Paper
* Google Docs

If you want to **import multiple pages**, you can upload a ZIP file containing HTML or Markdown files, or use the **Online docs** import option.

{% hint style="info" %}
GitBook is Markdown-based, so importing content in Markdown format will yield the best results. If your current tools support exporting in Markdown, we recommend using that format for a smoother import process.
{% endhint %}

### The Import panel

<figure><img src="/files/c4tZZ2Hrro3Lx3GNlZNb" alt="A GitBook screenshot showing the import panel"><figcaption><p>The import panel in GitBook.</p></figcaption></figure>

When you create a new space, you’ll have the option to import content in the modal that appears. If you create an empty space, you can also import using the **Quickstart** section at the bottom of the new empty page when you click **Edit**.

Alternatively, you can always import a page or subpage by selecting **Add new** > **Import pages** at the bottom of the [table of contents](/docs/resources/gitbook-ui#table-of-contents), or by opening the **Actions menu** <picture><source srcset="/files/YjlF3Z9KMYv9aQiFzZKD" media="(prefers-color-scheme: dark)"><img src="/files/Zw9q37vPYF03vQIqywTy" alt="The Actions menu icon in GitBook"></picture> for a page and choosing **Import subpages**.

After choosing an input source, you can select the file you’d like to import.

{% hint style="warning" %}
GitBook imports content from various sources, but differences in product features and document formats may cause variations in the imported content compared to the original source.
{% endhint %}

### Limitations

GitBook currently has the following limits for imported content:

* The maximum number of pages that can be uploaded in a single import is **20**.
* The maximum number of files (images etc.) that can be uploaded in a single import is **20**.

***

## Import from a GitHub or GitLab repo using Git Sync <a href="#import-using-git-sync" id="import-using-git-sync"></a>

When importing large volumes of content into GitBook, we recommend using [Git Sync](/docs/getting-started/git-sync). While our built-in migration tool can handle most imports, Git Sync is better suited for handling larger migrations efficiently.

{% hint style="info" %}
You’ll find the essential steps to import your content below. For more detailed steps and a video demo, head over to our dedicated guide for [importing content into GitBook using Git Sync](/docs/guides/editing-and-publishing-documentation/import-or-migrate-your-content-to-gitbook-with-git-sync).
{% endhint %}

{% stepper %}
{% step %}
**Convert your content into Markdown**

GitBook is Markdown-based, so importing content in Markdown format will yield the best results. If your current tools support exporting in Markdown, we recommend using that format for a smoother import process.

If your content isn’t already in Markdown files, we recommend using a script (like [Markitdown](https://github.com/microsoft/markitdown)) or an online tool to convert your content.
{% endstep %}

{% step %}
**Organize your content in GitHub or GitLab**

When setting up your GitBook site, it’s crucial to organize your content in your GitHub or GitLab repository efficiently. Since Git Sync occurs at the space level, carefully plan how to group your content. Create multiple repositories or folders, ensuring the necessary Markdown files are in the correct locations.
{% endstep %}

{% step %}
**Set up spaces and configure Git Sync**

To organize your content, create one or more spaces in GitBook as needed. Install the [GitHub Sync](https://www.gitbook.com/integrations/github-sync) or [GitLab Sync](https://www.gitbook.com/integrations/gitlab-sync) integrations in your organization and configure it for those spaces. You’ll need to synchronize your space with the folder or repository you set up in the previous step.
{% endstep %}

{% step %}
**Run Git Sync in the direction GitHub → GitBook**

When following the configuration process, make sure you select the direction of GitHub → GitBook. This will result in the contents of your folder or repository being pulled from GitHub or GitLab into GitBook.
{% endstep %}
{% endstepper %}


# GitHub & GitLab Sync

Synchronize your GitBook content with GitHub or GitLab with GitBook’s bi-directional integration

<figure><img src="/files/srCPa1fOMtCN41SHbx2q" alt="A GitBook screenshot showing the Git Sync setup"><figcaption><p>Set up Git Sync for your GitBook space.</p></figcaption></figure>

### Overview

Git Sync allows technical teams to synchronize GitHub or GitLab repositories with GitBook and turn Markdown files into beautiful, user-friendly docs. Edit directly in GitBook’s powerful editor while keeping content synchronized with your codebase on GitHub or GitLab.

Git Sync is bi-directional, so changes you make directly in GitBook’s editor are automatically synced, as are any commits made on GitHub or GitLab. This allows developers to commit directly from GitHub or GitLab and technical writers, instructional designers and product managers to edit, discuss and feedback changes directly in GitBook.

{% hint style="info" %}
Git Sync supports IP allowlisting for Enterprise customers. If your GitHub, GitLab, or internal network only accepts traffic from approved IPs, allowlist these outbound Git Sync IPs before you enable the integration:

* `34.136.22.210`
* `34.29.189.57`
* `35.223.181.150`
* `34.72.115.112`
* `136.116.236.109`
  {% endhint %}

{% hint style="info" %}
Only [administrators and creators](/docs/collaboration/member-management/roles) can enable and configure Git Sync.
{% endhint %}

### skill.md

When working on your docs locally with Git Sync, you can use GitBook's [skill.md file](/docs/creating-content/ai-coding-assistants-and-skillmd) to provide an AI coding assistant with context about GitBook's blocks, features, and best practices.


# Enabling GitHub Sync

Set up and authorize the GitHub integration for GitBook

### Getting started

In the space you want to sync with your GitHub repo, head to the [space header](/docs/resources/gitbook-ui#space-header) in the top right, and select **Configure**. From the provider list, select **GitHub Sync**.

<figure><img src="/files/6l7iXXhAVJ8FHxjMv5pe" alt="A GitBook screenshot showing GitHub Sync configuration options"><figcaption><p>GitHub Sync configuration options.</p></figcaption></figure>

### Authenticate with GitHub

If you’re setting up GitHub Sync for the first time and haven’t already linked a GitHub account, you’ll be prompted to do that when you begin configuring Git Sync. If you’ve already linked your account, you may still need to authenticate via GitHub.

{% hint style="warning" %}
If you see a **'Potential duplicated accounts'** error message at this step, this means your GitHub account is already linked with another GitBook user account.

To help you identify which accounts are linked, you will have to log out from this session and log in using the sign-in with GitHub method.

If you already know your GitBook account associated with GitHub you can log into that user account and unlink your GitHub account (done in settings) before logging back in and linking your current account.

Read more on our [troubleshooting page](/docs/getting-started/git-sync/troubleshooting#potential-duplicated-accounts-when-signing-in).
{% endhint %}

### Install the GitBook app to your GitHub account

If you haven’t already done so, you’ll see a prompt to add the [GitBook app](https://github.com/apps/gitbook-com) to your GitHub account.

Follow the instructions in the GitHub popover and either give GitBook specific repository permissions, or allow access to all repositories, depending on your needs.

### Select a repository and branch

Select the account and repository you want to keep in sync with your GitBook content.

{% hint style="info" %}
**Can’t see your repository?** If you can't find your repository in the list, make sure that you've installed the [GitBook GitHub app](https://github.com/apps/gitbook-com) in the right scope (i.e. your personal account or the GitHub org where the repository lives). You should also check that you’ve configured the correct repository access in the GitBook GitHub app.
{% endhint %}

Once you’ve selected the correct repository, choose which branch you want commits to be pushed to and synced from.

### Perform an initial sync

When syncing for the first time, you’ll have the option to sync in one of two directions:

1. GitBook -> GitHub will sync your space’s content **to** the selected branch. This is great if you’re starting from an empty repository and want to get your GitBook content in quickly.
2. GitHub -> GitBook will sync your space’s content **from** the selected branch. This is great if you have existing Markdown content in a repository and want to bring it into GitBook.

### Write and commit

You’re good to go. You’ll notice that if your space was in [live edit](/docs/collaboration/live-edits) mode, live edits are now locked. This allows us to reliably sync content to your repository when someone in your team merges a[ change request](/docs/collaboration/change-requests) in GitBook.

When you edit on GitBook, every change request merge will result in a commit to your selected GitHub branch.

When you commit to GitHub, every commit will be synced to your GitBook space as a history commit.

{% hint style="warning" %}
The GitHub app that powers our GitHub integration is currently not available to customers on GitHub Enterprise Server instances.
{% endhint %}


# Enabling GitLab Sync

Set up and authorize the GitLab integration for GitBook

### Getting started

In the space you want to sync with your GitLab repo, head to the space menu in the top right, and select **Synchronize with Git**. From the provider list, select **GitLab Sync**, and click **Configure**.

<figure><img src="/files/Srm9GX4G9hYZw5UQ6y4y" alt="A GitBook screenshot showing GitLab Sync configuration options"><figcaption><p>GitLab Sync configuration options.</p></figcaption></figure>

### Generate and enter your API access token

You can generate an API access token in your GitLab user settings.

{% hint style="info" %}
There are two types of access tokens in GitLab: Project and Personal. Note that in order for the integration to work you’ll need to use a Personal token, which you can generate from your GitLab user preferences menu.
{% endhint %}

Ensure that you enable the following access for your token:

* `api`
* `read_repository`
* `write_repository`

If the tokens you create also have a specific role attached to them, also make sure that it has a `Maintainer` or `Admin` role.

Then you can paste the token into the API access token field when configuring your GitLab integration.

### Select a repository and branch

Select the repository you want to keep in sync with your GitBook content.

{% hint style="info" %}
**Can’t see your repository?** Ensure you’ve set the correct permissions when creating your API token.
{% endhint %}

Once you’ve selected the correct repository, choose which branch you want commits to be pushed to and synced from.

{% hint style="warning" %}
For many GitLab repositories, the `main` branch might be automatically set to protected. If this is the case, we recommend adding a specific branch to sync your content between. You can then merge this into `main` and keep the protection in place.
{% endhint %}

### Perform an initial sync

When syncing for the first time, you’ll have the option to sync in one of two directions:

1. GitBook -> GitLab will sync your space’s content **to** the selected branch. This is great if you’re starting from an empty repository and want to get your GitBook content in quickly.
2. GitLab -> GitBook will sync your space’s content **from** the selected branch. This is great if you have existing markdown content in a repository and want to bring it into GitBook.

### Write and commit

You’re good to go. You’ll notice that if your space was in [live edit](/docs/collaboration/live-edits) mode, live edits are now locked. This allows GitBook to reliably sync content to your repository when someone in your team merges a[ change request](/docs/collaboration/change-requests) in GitBook.

When you edit on GitBook, every change request merge will result in a commit to your selected GitLab branch.

When you commit to GitLab, every commit will be synced to your GitBook space as a history commit.


# Content configuration

Configure Git Sync with extra functionalities

If you’d like to configure Git Sync further, you can add a `.gitbook.yaml` file at the root of the content synced for that space to tell GitBook how to parse your Git repository. In a monorepo, that file lives in the space’s configured [Project directory](/docs/getting-started/git-sync/monorepos).

{% code title=".gitbook.yaml" %}

```yaml
root: ./

​structure:
  readme: README.md
  summary: SUMMARY.md​

redirects:
  previous/page: new-folder/page.md
```

{% endcode %}

### Root

The path to lookup for your documentation defaults to the root directory of the repository. Here’s how you can tell GitBook to look into a `./docs` folder:

{% code title=".gitbook.yaml" %}

```yaml
root: ./docs/
```

{% endcode %}

{% hint style="warning" %}
**All other options that specify paths will be relative to this root folder**. So if you define root as `./docs/` and then `structure.summary` as `./product/SUMMARY.md`, GitBook will actually look for a file in `./docs/product/SUMMARY.md`.‌
{% endhint %}

{% hint style="info" %}
In a monorepo, `root` is resolved relative to the synced space’s Project directory, not the repository root. Path-based configuration only applies inside that space’s synced scope. It doesn’t make sibling directories or repository-level folders available to other spaces automatically. For multi-space repository setups, see [Monorepos](/docs/getting-started/git-sync/monorepos).
{% endhint %}

### ​Structure‌ <a href="#structure" id="structure"></a>

The structure accepts two properties:‌

* **`readme`**: Your documentation’s first page. Its default value is `./README.md`
* **`summary`**: Your documentation’s table of contents. Its default value is `./SUMMARY.md`

The value of those properties is a path to the corresponding files. The path is relative to the “root” option. For example, here’s how you can tell GitBook to look into a `./product` folder for the first page and summary:

{% code title=".gitbook.yaml" %}

```yaml
structure:
  readme: ./product/README.md
  summary: ./product/SUMMARY.md
```

{% endcode %}

{% hint style="warning" %}
When Git Sync is enabled, **remember not to create or modify readme files** through GitBook's UI. The readme file should be managed exclusively in your GitHub/GitLab repository to avoid conflicts and duplication issues.
{% endhint %}

### Summary‌ <a href="#summary" id="summary"></a>

The `summary` file is a Markdown file (`.md`) that should have the following structure:

{% code title="./SUMMARY.md" %}

```markdown
‌# Summary​

## Use headings to create page groups like this one​

* [First page’s title](page1/README.md)
    * [Some child page](page1/page1-1.md)
    * [Some other child page](part1/page1-2.md)

* [Second page’s title](page2/README.md)
    * [Some child page](page2/page2-1.md)
    * [Some other child page](part2/page2-2.md)

## A second-page group​

* [Another page](another-page.md)
```

{% endcode %}

Providing a custom summary file is optional. By default, GitBook will look for a file named `SUMMARY.md` in your `root` folder if specified in your config file, or at the root of the repository otherwise.

If you don’t specify a summary, and GitBook does not find a `SUMMARY.md` file at the root of your docs, GitBook will infer the table of contents from the folder structure and the Markdown files below.‌

{% hint style="info" %}
The summary markdown file is **a mirror of the** **table of contents** of your GitBook space. So even when no summary file is provided during an initial import, GitBook will create one and/or update it whenever you update your content using the GitBook editor.

Because of this, it’s not possible to reference the same Markdown file twice in your `SUMMARY.md` file, because this would imply that a single page lives at two different URLs in your GitBook space.
{% endhint %}

#### Table of contents (sidebar) titles <a href="#sidebar-titles" id="sidebar-titles"></a>

If you want your pages to have a different title in the table of contents sidebar than on the page itself, you can define an optional **page link title** in your `SUMMARY.md` file.

If you’re using Git Sync, the page link title is set on the page link:

{% code title="./SUMMARY.md" %}

```markdown
# Summary

* [Page main title](page.md "Page link title")
```

{% endcode %}

The text inside the quotes (`"Page link title"`) will be used:

* In the table of contents (sidebar)
* In the pagination buttons at the bottom of each page
* In any relative links you add to that page

Page link titles are optional — if you don’t manually add one, GitBook will use the page’s standard title everywhere by default.


# GitHub pull request preview

See a preview of your content when making a pull request in GitHub

When you submit a pull request (PR) to a GitHub branch that has been synced to a GitBook space, you can preview the content before merging. This allows you to check the impact of changes before merging them.

You can use this feature to have a final layer of checks before merging a PR, allowing you to see your changes in a non-production environment before merging it into your synced branch.

### How to access preview links

This behavior works out of the box, provided you have given the [GitBook GitHub app](https://github.com/apps/gitbook-com) the necessary read-only permissions to PRs.

For every PR create using a target branch synced with a GitBook space, you’ll see a status added to the PR with a unique preview URL. Clicking the **Details** link on the status will take you to the preview URL for your content. You can then make sure the content is as expected before merging the PR.

{% hint style="info" %}
Preview links are only accessible by users with a GitBook account.
{% endhint %}

### Security considerations

For security reasons, by default GitBook doesn’t currently generate previews for PRs opened from forks of your repository. Because the content of the PR preview is accessible under your own domain, whether on `.gitbook.io` or your custom domain, a user could generate malicious content in a fork of your public repository and have it served under your name.

We allow users to explicitly configure this through an option in the Git Sync settings.

### FAQ

#### Why can’t I see a preview of my GitBook documentation in my pull request?

Common causes:

* **Your site isn’t published.** PR preview URLs are served from your published docs site (on `.gitbook.io` or your custom domain).
* **Your site is behind authenticated access.** Git Sync PR previews aren’t available for sites published behind [authenticated access](/docs/site-access/authenticated-access).


# Commit messages & Autolink

By default, when exporting content from GitBook to the Git repository, GitBook will generate a commit message based on the merged change request:

```
GITBOOK-14: Improve documentation about users management
```

## Autolink `GITBOOK-<num>` in GitHub and GitLab

If you want to automatically resolve your GitBook change request IDs (e.g. *GITBOOK-123*) in commits to links, you can enable this using GitHub’s *Autolink references* feature. See instructions on [GitHub](https://help.github.com/en/github/administering-a-repository/configuring-autolinks-to-reference-external-resources).

Use the following URL format, where `spaceId` corresponds to your space’s URL:

`<https://app.gitbook.com/s/{spaceId}/~/changes/<num>/`

<div data-full-width="false"><figure><img src="/files/UuU87okJqvCnc8Tjdovw" alt="A GitBook screenshot showing autolink setup"><figcaption><p>Autolink setup.</p></figcaption></figure></div>

## Customize the commit message template

When using GitBook with a [monorepo](/docs/getting-started/git-sync/monorepos), or when you have specific guidelines for commit messages; you might want to customize the message used by GitBook when pushing a commit to Git.

The template can contain the following placeholders:

* `{change_request_number}` unique numeric ID for the change request
* `{change_request_subject}` the subject of the change request when merged, or `No subject` if none has been provided.

The default template is:

```
GITBOOK-{change_request_number}: {change_request_subject}
```


# Monorepos

GitBook supports monorepos. A monorepo is a repository that contains more than one logical project (e.g. an iOS client and a web application).

GitBook can synchronize multiple directories from the same repository with multiple spaces. When enabling Git Sync on a space, you can configure a "Project directory". It will be used to lookup the `.gitbook.yaml` file for the directory to synchronize with this space.

Example of a repository structure:

```
/
  package.json
  packages/
     styleguide/
        .gitbook.yaml
        README.md
        SUMMARY.md
     app/
        README.md
        SUMMARY.md
     api/
        .gitbook.yaml
        README.md
        SUMMARY.md
```

In this example, three spaces can be created on GitBook and configured with different Project directories:

* `packages/styleguide`
* `packages/app`
* `packages/api`

The "Project directory" option at the Git Sync level differs from the [`root` option](/docs/getting-started/git-sync/content-configuration#root) in the `.gitbook.yaml` configuration file. The first is used to lookup `.gitbook.yaml` itself, then both are combined to lookup the rest of the files in the directory. If no `.gitbook.yaml` exists in the "Project directory", the synchronization will use the default configuration scoped to this directory.

### How directories and assets work in multi-space repos

Each synced space has its own **Project directory**. GitBook reads that space’s `.gitbook.yaml` from the configured Project directory. It then resolves `root`, `README.md`, `SUMMARY.md`, Markdown files, and asset paths from that space’s synced scope.

In a monorepo, each synced space is scoped to its own directory and files. A different space synced from another directory doesn’t inherit or reuse files from elsewhere in the repository automatically.

Assets follow the same rule. A repository-level `.gitbook/assets` folder isn’t shared automatically across spaces if those spaces use different Project directories.

If multiple spaces need the same files, use one of these patterns:

* Place the assets inside each space’s directory.
* Reorganize the repository so each space’s synced scope contains the assets it references.

When you set up a new space in a monorepo, create the directory structure you want in the repository first. GitBook doesn’t infer a shared multi-space layout or create a shared asset area for you.

For more detail on how `root` is resolved inside a space’s synced scope, see [Content configuration](/docs/getting-started/git-sync/content-configuration#root).

Here’s a concrete example:

```
/
  packages/
    docs-en/
      .gitbook.yaml
      README.md
      SUMMARY.md
      .gitbook/
        assets/
          logo.png
    docs-fr/
      .gitbook.yaml
      README.md
      SUMMARY.md
      .gitbook/
        assets/
          logo.png
```

In this repository, `packages/docs-en` and `packages/docs-fr` are two separate synced spaces. A file referenced from `packages/docs-en/.gitbook/assets/logo.png` isn’t automatically available to the space synced from `packages/docs-fr`.

## Updating the Project directory <a href="#updating" id="updating"></a>

{% hint style="info" %}
In most cases, we recommend the following step to update the Project directory:

1. Disable the existing Git Sync
2. Move the files in the Git repository to the Project directory
3. Reconfigure the Git Sync with the new Project directory
   {% endhint %}

In some cases, you might have started with a typical repository synchronizing with only one space, but then decided to transition into a monorepo with multiple spaces synchronizing with it; or might have to rename the Project directory.

Changing the Project directory on an existing Git Sync can have an unexpected impact on the content, the change will only be propagated during the next synchronization (edit made on GitBook or new commit in the Git repository).

GitBook expects all GitBook-related files for that space to exist inside the configured Project directory. This includes Markdown files, `README.md`, `SUMMARY.md`, and any assets used by that space.

#### **If the next operation is an import from the Git repository**:

GitBook will expect to find the pages and files in the Project directory. If the files have not already been moved into the repository’s Project directory, the result of the synchronization would be an empty space with no content.

We recommend having the next operation to be a commit moving all GitBook-related files (markdown files, README/SUMMARY, and assets) in the repository to their correct new location, in the Project directory. If assets remain outside the new Project directory, don’t expect them to resolve for that space.

**If the next operation is an export from GitBook to the Git repository**:

GitBook will generate or update new files in the new Project directory. Files synchronized with GitBook will be moved to the new Project directory (with the best attempt); it might cause side effects if other parts of your system depend on these files.


# Troubleshooting

## I have a GitHub sync error <a href="#i-have-a-github-sync-error" id="i-have-a-github-sync-error"></a>

### Be sure to only create readme files in your repo

When Git Sync is enabled, be careful not to create readme files through the GitBook UI. Creating readme files through the GitBook UI:

* Creates duplicate README files in your repository
* Causes rendering conflicts between GitBook and GitHub
* May break builds and deployment processes
* Results in unpredictable file precedence

This includes files named README.md, readme.md, Readme.md, and README (without extension). Instead, remember to manage your README file directly in your git repository.

### Still facing errors?

Make sure that:‌

* Your repository **has a** `README.md` **file** at its root (or at the `root` folder specified in your `.gitbook.yaml`) that was created directly in your git repository. This file is required and is used as the homepage for your documentation. For more details, refer to our [content configuration](/docs/getting-started/git-sync/content-configuration).
* If you have YAML frontmatters in your Markdown files, make sure they are valid using a [linter](http://www.yamllint.com).​

## ​GitBook is not using my `docs` folder <a href="#gitbook-is-not-using-my-docs-folder" id="gitbook-is-not-using-my-docs-folder"></a>

By default, GitBook uses the root of the repository as a starting point. A specific directory can be specified to scope the markdown files. Take a look at our documentation on [content configuration](/docs/getting-started/git-sync/content-configuration) for more details.‌

## GitBook is creating new markdown files <a href="#gitbook-is-creating-new-markdown-files" id="gitbook-is-creating-new-markdown-files"></a>

**When synchronizing and editing from GitBook** with an existing Git repository, GitBook may create new markdown files instead of using the existing ones.‌ This is done to ensure GitBook doesn't overrite files that existed in your repository before.

## Redirects aren't working correctly

The YAML file needs to be correctly formatted for the redirects to work. Errors such as incorrect indentation or whitespace can result in your redirects not working. [Validating your YAML file](https://www.yamllint.com/) can ensure that the redirects will work smoothly.

When setting redirects, do not add any leading slashes. For example, trying to redirect to `./misc/support.md` will not work.

It's also important to consider that as long as a page exists for a path, GitBook won’t be looking for a possible redirect. So if you're setting up a redirect for an old page to a new one, you will need to remove the old page in order for the redirect to work.

## ​My repository is not listed <a href="#my-repository-is-not-listed" id="my-repository-is-not-listed"></a>

### For GitHub repositories

Make sure that you have installed the GitBook GitHub app to the correct locations (when installing the app, you can choose to install it to your personal GitHub, or to any organization you have permissions for) and that you have given the app the correct repository permissions.

### For GitLab repositories

Make sure that your access token has been configured with the following access:

* `api`
* `read_repository`
* `write_repository`

## ​Nothing happens on GitBook after adding a new file to my repository <a href="#nothing-happens-on-gitbook-after-adding-a-new-file-to-my-repository" id="nothing-happens-on-gitbook-after-adding-a-new-file-to-my-repository"></a>

{% hint style="warning" %}
**This section specifically addresses problems when a `SUMMARY.md` file already exists**

If your repository does not include a `SUMMARY.md` file, GitBook will automatically create one upon the first sync. This means that if you edited your content from GitBook at least once after setting up Git sync, GitBook should have created this file automatically.‌
{% endhint %}

If after updating your repository by adding or modifying a markdown file, you do not see the update reflected on GitBook and the sidebar doesn’t indicate an error during the sync, your modified file(s) is probably not listed in [your `SUMMARY.md` file](/docs/getting-started/git-sync/content-configuration#summary).‌

This could either be because you created the file manually, or because you made an edit on GitBook and the GitBook to Git export phase of the sync created it for you.

The content of this file mirrors your [table of contents](/docs/resources/gitbook-ui#table-of-contents) on GitBook and is used during the Git to GitBook import phase of the sync to recreate your table of contents and re-conciliate upcoming updates from the repository with your existing content on GitBook.‌

If after ensuring that all your files are included in the `SUMMARY.md` file there’s still nothing happening on GitBook, don’t hesitate to [contact support](https://gitbook.com/docs/help-center/further-help/how-do-i-contact-support) for assistance.

## GitHub preview is not showing

If your GitHub preview is not showing, it might be because your GitSync integration was configured before January 2022. Versions of GitSync configured before this date do not include GitHub Preview.

You should have received a notification requesting you to accept an updated permission request to enable read-only access to PRs.

In case you did not receive the notification, to troubleshoot you need to update to the new version:

1. Uninstall the GitSync integration from your organization.
2. Reinstall the new version with the updated permissions.

Please note that uninstalling the GitSync integration will require reconfiguring the integration again on any spaces it was previously connected to.

## Potential duplicated accounts when signing in

This error usually occurs when the GitHub account that you use to set up the sync is already associated with a different GitBook user account.

A good way to identify which GitBook account the GitHub account is already linked to is:

1. Log out from your current GitBook user session (i.e. `name@email.com`)
2. Log out from any GitHub user sessions.
3. Go to [the Log in page](https://app.gitbook.com/login).
4. Select the "Sign in with GitHub" option.
5. Enter your GitHub credentials.
6. Once logged in, go to [the account settings](https://app.gitbook.com/account) and either:
   1. Unlink the account from the "Third-party Login > GitHub" section in the Personal setting
   2. Delete the account altogether if you do not need it.
7. Log out from the session.
8. Log back in using your `name@email.com` GitBook account.
9. Try to set up Git Sync again.


# Site settings

Customize and edit settings across your published site

{% hint style="info" %}
Certain customization features are only available on [Premium and Ultimate site plans](https://www.gitbook.com/pricing).
{% endhint %}

<figure><img src="/files/FAaYfZWBPcbViZwN7IrL" alt="A GitBook screenshot showing site settings"><figcaption><p>Update the settings for your published documentation.</p></figcaption></figure>

### General

<details>

<summary>Site title</summary>

Change the name of your site, if you don't have a custom logo this is the name that your site visitors will see.

</details>

<details>

<summary>Analytics cookie</summary>

If you want to use GitBook’s [site analytics](https://app.gitbook.com/o/d8f63b60-89ae-11e7-8574-5927d48c4877/sites/site_p4Xo4/s/NkEGS7hzeqa35sMXQZ4X/~/diff/~/changes/1088/docs-site/insights), your site will use cookies to identify returning visitors and gather the data needed to view your analytics.You can choose to disable these cookies, but it will prevent you from using site analytics.\
\
The cookies notice appears when your site has analytics enabled through an integration, especially **Google Analytics**.

To remove the notice, open **Site settings → Integrations** <i class="fa-puzzle-piece">:puzzle-piece:</i> in the top-right. Then disable or remove **Google Analytics**

Disabling these cookies also turns off [site analytics](/docs/docs-site/insights) for that site.

</details>

<details>

<summary>Unpublish site</summary>

Unpublish your site, but keep its settings and customizations. You can publish your site again at any time.

</details>

<details>

<summary>Delete site</summary>

Unpublish and remove your site from the **Docs site** section in the GitBook app.

**Note:** Deleting a site is a permanent action and cannot be undone. Any settings and customizations will be lost, but your content will remain in its [space](/docs/creating-content/content-structure/space).

</details>

<details>

<summary>Access</summary>

Manage who can access and administer your docs site.

Open **Access** and click **Manage permissions**. You can also use **Share** from the site’s **Overview** page.

Site permissions are available on all plans.

By default, new sites derive permissions from their linked [spaces](/docs/creating-content/content-structure/space), until you update permissions from the site permissions modal.

Site permissions can also affect the permissions of linked spaces that use **Inherited** mode. In this case, each inherited space receives the highest permission level granted by the organization, any parent collection, and any site that includes it.

</details>

### Agents

{% content-ref url="/pages/QEdtUjQ47A0aK7o8HIzN" %}
[What is GitBook Agent?](/docs/gitbook-agent/what-is-gitbook-agent)
{% endcontent-ref %}

### Audience

<details>

<summary>Audience</summary>

Choose who sees your published content. See [Publish a docs site](/docs/docs-site/publish-a-docs-site) for more info.

</details>

<details>

<summary>Adaptive content <mark style="background-color:purple;">Ultimate</mark></summary>

Turn on adaptive content for your site pages, variants, and sections. [Adaptive content](/docs/site-access/adaptive-content) lets you hide or show content for different visitors, depending on their permissions.

Your visitor token signing key will also be displayed here.

</details>

### Domain and URL

<details>

<summary>Custom domain</summary>

Configure a custom domain to unify your site with your own branding. See [Set a custom domain](/docs/docs-site/custom-domain) for more info.

</details>

<details>

<summary>GitBook Subdirectory</summary>

Publish your content on a subdirectory (e.g. `yourcompany.com/docs`). See [#gitbook-subdirectory](#gitbook-subdirectory "mention") for more info

</details>

### Redirects

{% content-ref url="/pages/rcmnyzKOgcYE9OgyZD2Y" %}
[Site redirects](/docs/docs-site/site-redirects)
{% endcontent-ref %}

### Features

<details>

<summary>PDF export <mark style="background-color:purple;">Premium &#x26; Ultimate</mark></summary>

Let your visitors to export your GitBook as PDF. See [PDF export](/docs/docs-site/pdf-export) for more info.

</details>

<details>

<summary>Page ratings <mark style="background-color:purple;">Premium &#x26; Ultimate</mark></summary>

Choose whether or not visitors to your published content can leave a rating on each page to let you know how they feel about it. They’ll be able to choose a sad, neutral, or happy face.

You can review the results of these ratings by opening [site analytics](/docs/docs-site/insights) from your docs site dashboard and selecting **Pages & feedback**.

</details>

### AI & MCP

AI settings have different plan entitlements. AI Search is available on Premium and Ultimate site plans. GitBook Assistant and MCP connectors are available on Ultimate.

<details>

<summary>Choose the AI experience <mark style="background-color:purple;">Premium &#x26; Ultimate</mark></summary>

Choose the search experience for your site. AI Search is available on Premium and Ultimate site plans. GitBook Assistant is available on Ultimate site plans. See [AI Search](/docs/docs-site/ai-search) for more info.

</details>

<details>

<summary>Extend GitBook Assistant with MCP connectors <mark style="background-color:purple;">Ultimate</mark></summary>

Configure MCP servers that GitBook Assistant can use when answering questions inside your docs. This setting is available on Ultimate site plans. See [AI Search](/docs/docs-site/ai-search#how-do-i-use-gitbook-ai) for more info.

</details>

### Connections

{% content-ref url="/pages/p6K5x8aCszGQ0xYf96Z2" %}
[Connections](/docs/ai-and-search/connections)
{% endcontent-ref %}

### Structure

{% content-ref url="/pages/1XRw1GP3RDSWHxEE1tQb" %}
[Site structure](/docs/docs-site/site-structure)
{% endcontent-ref %}

### Plan

{% content-ref url="/pages/yshuePqcxELaw0iNFK7a" %}
[Plans](/docs/account-management/plans)
{% endcontent-ref %}


# Site customization

Create branded documentation with a custom logo, fonts, colors, links and more

{% hint style="info" %}
Certain customization features are only available on [Premium and Ultimate site plans](https://www.gitbook.com/pricing).
{% endhint %}

You can customize the appearance of your published documentation, match the user interface to the language of your content, and more.

You can apply customizations to your entire docs site as a site-wide theme, or to individual variants and site sections.

<figure><img src="/files/K6hVWsLCioI8Ida8Xvp3" alt="A GitBook screenshot showing a customized docs site"><figcaption><p>You can create all kinds of site designs using GitBook’s built-in customization options.</p></figcaption></figure>

### Customizing sites with multiple sections or variants

If you have a docs site with with multiple sections or variants, you can control the customization of each one individually.

Select the whole site or a specific site section using the drop-down menu at the top of the **Customization** panel.

* **Site-wide settings** – These automatically apply to all linked spaces.
* **Section or variant specific settings** – If you’re using site sections or variants, you’re can set specific customization that will override the default site-wise setting.

<figure><img src="/files/WS4H56gzTqQzaKo49mzZ" alt="A GitBook screenshot showing the customization panel"><figcaption><p>The customization panel in GitBook.</p></figcaption></figure>

{% hint style="warning" %}
Changes you make to specific site sections will override the site-wide customization settings, even if you change the site-wide setting again later.

You can reset customization overrides back to the site-wide default by clicking the **Reset** button <picture><source srcset="/files/pqrwkdhGuOQlk1cWXLgI" media="(prefers-color-scheme: dark)"><img src="/files/YGtV9ZQy2dN2hgcaccbp" alt="The Reset icon in GitBook"></picture> next to the space selector.
{% endhint %}

### What counts as ‘Advanced customization’?

Every GitBook user can take advantage of basic customization options on their docs site. Premium or Ultimate site plan users can also use advanced customization features to further tweak their docs to match their brand.

Advanced customization options include:

* **Custom logo** – Add a logo that replaces the emoji and title at the top of your docs site.
* **Icon style** - Change the weight and style of page icons in your docs site.
* **Custom fonts** – Change the primary font and monospace of your docs site.
* **Footer** – Add a custom logo, copyright text and navigation to a footer at the bottom of your documentation.
* **Bold and Gradient themes** – Change the background color for your header, or add a gradient background to your entire site with these new themes.
* **Semantic colors** – Change the background color of hint blocks and the styling of code blocks within your published content.
* **Code themes** – Change the appearance of code and API blocks in your published documentation using either preset themes or adaptive themes that use your site's colors.

### What cannot be customized?

The options above provide lots of ways for you to customize your space, but there are a few things that you won’t be able to customize, regardless of [your chosen plan](/docs/account-management/plans).

1. It’s not possible to customize the layout of the elements on the page (However, it *is* possible to [hide certain elements on specific pages](/docs/creating-content/content-structure/page)).
2. It’s not possible to insert custom code (such as CSS, HTML or JS) directly into your GitBook site. We already integrate with a number of popular tools, and offer [rich embeds](/docs/creating-content/blocks/embed-a-url) for many more.
3. It’s not possible to remove the small “Powered by GitBook” link that appears in published documentation.


# Icons, colors, and themes

Customize icons, colors, themes and more granular settings across your published documentation

## Title, icon and logo

<figure><img src="/files/szyPdgEyLvDDf9kCdmp5" alt="A GitBook screenshot showing title, icon and logo customization"><figcaption></figcaption></figure>

### Title

You can set any title you choose for your space. Note: this setting will only affect the title that displays *in the published documentation*. If you want to edit the title in the GitBook app, close the customize menu and edit it at the top of the space.

### Icon

You can set an emoji, or upload an icon of your own. The icon you set in the **Customization** menu will be used as the favicon for your docs site.

{% hint style="info" %}
This setting will only affect the icon that displays *in the published documentation*. If you want to edit the icon used within the GitBook app, you can do so when editing content in the space itself.
{% endhint %}

### Custom logo <mark style="background-color:purple;">(Premium & Ultimate)</mark>

You can replace *both* the published space’s title and icon with a custom logo so that your documentation better reflects your own branding — and you can upload two versions: one for light mode, and one for dark mode.

{% hint style="info" %}
**What’s the difference between the icon and logo options?**

The icon setting lets you upload a small, 132×132 px image, which will appear *alongside* your space title and function as your site’s favicon. The custom logo option lets you upload a larger image (we recommend at least 600 px wide), which will completely replace any icon and title you’ve set.
{% endhint %}

## Themes

Themes let you customize the color scheme of your published content for both light and dark mode. There are four themes to choose from. The colors of your site will be directly impacted by the **primary color** and **tint** that you choose. These two selections affect various parts of the interface and can completely change the look and feel of your site.

<figure><img src="/files/IJzZsFDCs7fKxpzXOIwW" alt="A GitBook screenshot showing theme options"><figcaption></figcaption></figure>

### Clean

A modern theme featuring translucency and minimally styled elements. Your primary color (or tint) affects links and other highlighted interface elements.

*Clean is available for all sites and is the default theme.*

### Muted

A sophisticated theme with decreased contrast between elements. The site background is more pronounced and blends in with the foreground, and some elements feature an inverted look — all based on your primary color (or tint).

*Muted is available for all sites.*

### Bold <mark style="background-color:purple;">(Premium & Ultimate)</mark>

A high‑impact theme with prominent colors and strong contrasts. Your primary color (or tint) will be used for the header of the site, and other highlighted elements like icons are colored along with it.

*Bold is only available for Premium or Ultimate sites.*

### Gradient <mark style="background-color:purple;">(Premium & Ultimate)</mark>

A trendsetting theme featuring a gradient background and splashes of color. The gradient and highlighted elements will be colored by your primary color (or tint).

*Gradient is only available for Premium or Ultimate sites.*

## Colors

<figure><img src="/files/FW6lgqR6Zi2fbaOhcNMt" alt="A GitBook screenshot showing color customization"><figcaption></figcaption></figure>

### Primary color

Your site’s primary color will affect the styling of highlighted interface items and navigational elements like links, the current page and section, breadcrumbs, and primary header buttons.

GitBook automatically adjusts colors on individual elements for readability if the contrast with the background is too low or when a visitor’s system requests higher contrast.

### Tint color

Your site’s tint color will subtly change the color of all text and icons across your entire site — including header links, icon color, and UI elements like the **Ask or search** bar.

The tint color will *not* affect navigational elements like links and buttons, which always use the primary color.

In the **Tint color** section you’ll see suggested colors based on your primary color selection. You can select one to preview it, choose your primary color as your tint, or pick a completely custom color with the color picker.

### Semantic colors <mark style="background-color:purple;">(Premium & Ultimate)</mark>

Semantic colors are applied to hint blocks within your published content, and can also be applied to code blocks.

You can change the background color of each hint style; these changes will be reflected on the published site you’re customizing.

{% hint style="info" %}
**Note:** Hint blocks in the GitBook editor will always remain in their standard colors and will not match your site’s semantic colors.
{% endhint %}

### Code theme <mark style="background-color:purple;">(Premium & Ultimate)</mark>

Code themes change the appearance of code and API blocks in your published documentation.

The themes list includes:

* **Adaptive themes** – These standard light and dark mode themes use your site’s color palette to match your brand.
* [**Shiki**](https://shiki.style/themes) **themes** – Choose from more than 60 theme presets in both light and dark modes.

You can choose individual code themes for your docs’ light and dark mode. And you can use any light or dark color scheme in any mode — e.g. a dark code theme when your docs are in light mode.

By default, your chosen theme will apply to both code blocks and OpenAPI blocks. If you want to set a different theme for OpenAPI blocks, click the **Customize per block type** <picture><source srcset="/files/CG9bVSmdbJnQxrYiNbRI" media="(prefers-color-scheme: dark)"><img src="/files/Z6mVPT1qwXi4oXlarEpK" alt=""></picture> button.

## Modes

### Show mode toggle

Enable this if you want visitors to manually toggle between light and dark mode. Readers can find the toggle at the bottom of any published page, on both desktop and mobile.

### Default mode

Choose whether visitors see your content in light or dark mode by default. If **Show mode toggle** is enabled, they can switch modes; if disabled, they’ll only see the mode you choose here.

*Note: to change the theme within the GitBook app, go to your Settings menu at the bottom of the sidebar.*

## Site styles

<figure><img src="/files/5luFIUJuCq9yRMcRFQly" alt="A GitBook screenshot showing site style settings"><figcaption></figcaption></figure>

### Font family <mark style="background-color:purple;">(Premium & Ultimate)</mark>

Choose a standard and monospace font family for your published content from a curated list of popular options.

{% hint style="info" %}
Monospace fonts are used in code blocks and OpenAPI blocks on your docs site.
{% endhint %}

### Custom fonts <mark style="background-color:purple;">(Ultimate only)</mark>

Upload your own standard and monospace fonts to align your published content with your brand’s style guide. To upload a font, click **Add custom font** and follow the instructions. You must upload a font file for both regular and bold weights.

GitBook currently supports `.woff` and `.woff2`. For other formats, please contact <support@gitbook.com>.

### Icons <mark style="background-color:purple;">(Premium & Ultimate)</mark>

When using page icons, set the weight and style of the displayed icons here.

### Corner style

Choose either rounded or straight corners to match your brand’s style preferences.

### Depth style

Choose between two depth styles, which apply to cards, buttons and any other element with a shadow:

* **Subtle:** Some shadows and elevation.
* **Flat:** No shadows or elevation.

### Link style

Choose between two link designs:

* **Default:** highlights the entire link in your primary or tint color.
* **Accent:** adds a colored underline to the link, leaving the text color unchanged.

## Sidebar styles

<figure><img src="/files/QK1HQ7GNucG3R8UGxZu3" alt="A GitBook screenshot showing sidebar style options"><figcaption><p>This menu gives you a visual idea of how the different styles will change the look of your sidebar.</p></figcaption></figure>

### Background style

Choose the background style for the sidebar container. The color is derived from your selected theme.

There are two options — **Default** and **Filled** — each with a visual representation of how they’ll change your table of contents.

### List style

Choose the style for the sidebar list and its selected items. There are three options — **Default**, **Pill** and **Line** — each with a visual representation showing how they’ll change your table of contents.


# Layout and structure

Customize the layout and structure of your published documentation

### Header

<figure><img src="/files/j1U93CK0TdqViqdnusbQ" alt="A GitBook screenshot showing header customization settings"><figcaption></figcaption></figure>

**Search bar**

Change the position and look of the search bar between prominent (centered in the header) and subtle (located in the upper right corner). Turning off the header entirely will place the search bar in the sidebar instead.

**Navigation**

Add header links to your site. You could use header links to point to important parts of your documentation, or link back to your main website.

You can choose what appearance you would like your link to have—normal link, primary button, or secondary button. When enabled, simply add a title and a URL for each link. We support two levels of header navigation, meaning you can have sub‑links that appear in a dropdown menu.

### Announcement (Premium & Ultimate)

Toggle this option on to add an announcement banner to the top of your published site. You can add a message and optionally include a link and call to action, which will appear after your message in the banner.

You can also change the announcement style using the same options as hint blocks—Info, Warning, Danger, and Success. The color of these styles is determined by your semantic colors settings.

### Pagination

Control the display of the “previous” and “next” buttons that appear at the bottom of each page in your space. You can also set this feature for specific pages.

### Footer (Premium & Ultimate)

<figure><img src="/files/GU6nKQcnchMnyp91tiZ5" alt="A GitBook screenshot showing footer customization settings"><figcaption></figcaption></figure>

**Logo**

Add your logo or another image in the footer.

**Copyright text**

Add copyright information to your footer.

**Navigation**

Add links in your footer, organized into multiple sections. Similar to the header, add a title and URL for each link, and include a section title for each group of links.


# Sharing and social

Customize the social account metadata and sharing options for your site

### Social accounts

You can add social accounts to your site’s metadata and footer from the **Sharing** tab in the customization menu.

Click **+ Add account** and choose an account type from the list of included options — such as X, GitHub, LinkedIn, Discord and Bluesky. Adding a social account in this menu also adds it to your site’s metadata.

For each social account, you can toggle its visibility in your docs site’s footer on or off, without affecting the metadata.

<figure><img src="/files/E47jLqqm0MddKEBNBOaE" alt="Social accounts settings in Site customization"><figcaption></figcaption></figure>

### Social preview

Here, you can upload a custom social preview image for your site. This will set the site’s `og:image` to your uploaded image, and it’ll show when the site’s link is shared to any platform or product that supports OpenGraph images, such as Slack or X.

If you don’t add a social preview, GitBook will automatically generate one using your theme color, page title and description.

If your site has multiple [site sections](/docs/docs-site/site-structure/site-sections), you can use the drop-down menu at the top of the Customization screen to switch between each section and add a custom social preview image for each one.


# Extra configuration

Configure extra options for your published documentation

In the **Configuration** tab you can change other settings associated with your site. For example, you can set up interface localization, link behavior, and page actions that help your users add your content to AI tools like ChatGPT.

On this page you’ll learn what each of these options does and how to enable or disable them.

### Localize user interface

You can select from a list of languages to localize the user interface of your published content. This applies translations to the non-custom areas of the interface.

This setting will *not* auto-translate your actual content, but it can help match the interface to the language you’re writing in. To learn more about translating your content, head to the [Translations](/docs/gitbook-agent/translations) section.

Is there a language we don’t yet offer that you’d like to see included? [Let us know](https://github.com/GitbookIO/gitbook/issues), or [contribute your own translation](https://www.gitbook.com/solutions/open-source)!

### Primary link

In the **Primary link** section of the **Configure** tab, you can set a custom URL for the logo in the top-left corner of your docs site.

By default, clicking the logo or site title will lead users back to the first page of your docs site. You can set a custom URL outside your site — or a page, section or variant on your site — to be opened instead. If your docs are part of a larger website this can help visitors navigate back to your own landing page.

### External links

The **External links** section in the **Configure** tab controls the behavior when your site users click a link to an external URL. By default, these links will open in the same tab, but you can switch this to open in a new tab if that’s your preference.

### Page actions

Page actions adds a page-level dropdown to every page of your docs, allowing users to perform quick actions on a page's content — ideal for using your docs content as context within an AI prompt.

You can disable this option from the **Configure** tab if you do not wish to show page options in your published docs.

If you disable **Page actions**, GitBook also disables the MCP server at `~gitbook/mcp`. To use MCP, keep **Page actions** enabled in **Site customization** → **Page actions**.

<figure><img src="/files/jqayIaqgv0ToGcZczNTb" alt=""><figcaption></figcaption></figure>

#### Open in AI providers

Enable this option to display an action to open ChatGPT or Claude with the page content.

#### Copy/View as Markdown

Enable this option to display an action to copy or view the page as Markdown.

#### Connect with MCP server

Enable this option to display the MCP server link in the page actions menu.

This option does not enable the MCP server itself. The MCP server works only when **Page actions** is enabled. To learn more, see [MCP servers for published docs](/docs/ai-and-search/mcp-servers-for-published-docs).

#### Edit on GitHub/GitLab

If your space is connected to a Git repository, you can enable this option in the **Configure** tab to show a link for your users to contribute to your documentation from your linked repository.

#### Export PDF

Enable this option to allow visitors to [export a PDF](/docs/docs-site/pdf-export) of your documentation.

### Privacy policy

In the **Privacy policy** section of the **Configure** tab, you can link to your own privacy policy to help visitors understand how your GitBook content uses cookies and how you protect their privacy. If you choose not to set one, your site will default to [GitBook’s privacy policy](https://gitbook.com/docs/policies/privacy-and-security/statement/cookies).


# Site structure

Add structure to your published documentation using site sections and variants

The content on your site comes from [spaces](/docs/creating-content/content-structure/space) in your organization. You can link one or multiple spaces. GitBook will publish each one and handle the navigation between spaces.

## Content types

Linked spaces can serve as one of two different content types, which determine how GitBook treats them in relation to each other and shows them to visitors.

<table data-card-size="large" data-view="cards"><thead><tr><th></th><th></th><th data-hidden data-type="image">Cover image (dark)</th><th data-hidden data-card-cover data-type="image">Cover image</th><th data-hidden data-card-target data-type="content-ref"></th><th data-hidden><select></select></th><th data-hidden data-card-cover-dark data-type="image">Cover image (dark)</th></tr></thead><tbody><tr><td><strong>Site sections</strong></td><td>Split your site into distinct parts — ideal for multiple products or parts of your organization.</td><td><a href="/files/jCp95LXOba5SJ05eragF">/files/jCp95LXOba5SJ05eragF</a></td><td><a href="/files/R89ivAvJAE76NMEwpYNr">/files/R89ivAvJAE76NMEwpYNr</a></td><td><a href="/pages/BhYaMwXvRKZYVdHgZM5T">/pages/BhYaMwXvRKZYVdHgZM5T</a></td><td></td><td><a href="/files/84E3evM3hCGW0RAWhn3C">/files/84E3evM3hCGW0RAWhn3C</a></td></tr><tr><td><strong>Content variants</strong></td><td>Publish multiple versions of the same content — ideal for localization, versioning, and more.</td><td><a href="/files/S17Cf7AIte2wqtwrQJ2f">/files/S17Cf7AIte2wqtwrQJ2f</a></td><td><a href="/files/ztYwJupTRWGUjAvs9Kxs">/files/ztYwJupTRWGUjAvs9Kxs</a></td><td><a href="/pages/VYD1uYVNjSTqX4nw00s3">/pages/VYD1uYVNjSTqX4nw00s3</a></td><td></td><td><a href="/files/rhJWb29YSNvxnb5BrpMf">/files/rhJWb29YSNvxnb5BrpMf</a></td></tr></tbody></table>

## Managing your site structure

By managing the structure of your site, you can also manage your site’s top navigation bar. This navigation bar allows users to jump to different site sections and site section groups.

From your docs site’s dashboard, open the **Settings** tab in the site header, then click **Structure**. Here you can see all the content of your site, divided into sections and variants.

Your site starts out with a single section with your site's name and a single variant with the space you linked during your site's set-up.

<figure><img src="/files/uv8N0dTIdn5xKJQcQ6Ii" alt="A GitBook screenshot showing a docs site&#x27;s structure"><figcaption><p>The structure of a published docs site.</p></figcaption></figure>

### Linking a space to your docs site

To add a [site section](/docs/docs-site/site-structure/site-sections), click the **Add section** button underneath the table and choose a space to link as a section. The new section is then added to the table and will be available to visitors as a tab at the top of your site.

To add a [variant](/docs/docs-site/site-structure/variants), click the **Add variant** button in the section you’d like to add to, then choose a space to link. The new variant is then added to the list of variants within the chosen section and will be available to visitors in the variant dropdown on your site.

When you add a space — as a variant or a section — a name and slug will be generated based on the space’s title.

### Changing sections or variants

<div data-full-width="false"><figure><img src="/files/aHcGdc91AyZhUxWgDGto" alt="A GitBook screenshot showing how to edit a variant"><figcaption><p>Update a site section or variant.</p></figcaption></figure></div>

You can change the name and slug of each of sections and variants by clicking the **Edit** <picture><source srcset="/files/kN09oTFtAuyaxNIwWuCt" media="(prefers-color-scheme: dark)"><img src="/files/WNXq6RcD2e4WTRcZEz4f" alt="The Edit icon in GitBook"></picture> button in the table row of the item you’d like to edit. This will open a modal. Edit the field(s) you’d like to change, then click the **Save** button to save.

{% hint style="info" %}
Changing a linked space's slug will change the space's canonical URL. GitBook will create an automatic redirect from the old URL to the new one. You can also [manually create redirects](/docs/docs-site/site-redirects).
{% endhint %}

To replace a section or variant, first delete it by clicking its **Edit** <picture><source srcset="/files/kN09oTFtAuyaxNIwWuCt" media="(prefers-color-scheme: dark)"><img src="/files/WNXq6RcD2e4WTRcZEz4f" alt="The Edit icon in GitBook"></picture> button, then click the **Delete** button in the lower left of the modal. Once the item is deleted, click the **Add section** or **Add variant** button to add it again.

### Reordering sections or variants

Your site displays sections and variants in the order that they appear in your **Site structure** table. They can be reordered by grabbing the **Drag handle** <picture><source srcset="/files/QLUQj6waZRiK6FpSqrt6" media="(prefers-color-scheme: dark)"><img src="/files/mmXesAh49D5J1O4wUAyK" alt="The Options menu icon in GitBook"></picture> and moving it up or down. The changed order will be reflected on your site immediately.

You can also use the keyboard to select and move content. Select a section or variant with the space bar, then use the arrow keys to move it up or down. Hit the space bar again to confirm the new position.

### Setting default content

If you have multiple sections in your site, one section will be marked as **Default**. This section is shown when visitors arrive on your site, and is served from your site’s root URL. Other sections each have a slug that is appended to the root URL.

If you have multiple variants within a section, one variant will be marked as the default. Like sections, the default variant is shown when visitors arrive on your site, or when they visit a section. Other variants each have a slug that’s appended to the section’s URL.

To set a space as default, click on the **Actions menu** <picture><source srcset="/files/YjlF3Z9KMYv9aQiFzZKD" media="(prefers-color-scheme: dark)"><img src="/files/Zw9q37vPYF03vQIqywTy" alt="The Actions menu icon in GitBook"></picture> in the space’s table row and then click **Set as default**.

{% hint style="info" %}
Setting a space as default removes its slug field, as it will be served from the section root instead. GitBooks redirects the space’s slug to the appropriate path, to ensure visitors keep seeing your content.
{% endhint %}

### Remove content from a site

To remove the content of a space from a site, open the **Settings** tab from your docs site dashboard, then click **Structure** to find the content you want to remove.

Open the **Actions menu** <picture><source srcset="/files/YjlF3Z9KMYv9aQiFzZKD" media="(prefers-color-scheme: dark)"><img src="/files/Zw9q37vPYF03vQIqywTy" alt="The Actions menu icon in GitBook"></picture> for the space you want to remove and choose **Remove**.

{% hint style="success" %}
Removing a space from your site will remove it from the published site, but **will not delete the space or the content within it**.
{% endhint %}


# Site sections

Add multiple products to your site as site sections and create a content hub with tabs to access all your content

{% hint style="info" %}
This feature is available on the [Ultimate site plan](https://www.gitbook.com/pricing).
{% endhint %}

<figure><img src="/files/idv5YoRxzBLcoERxUG2F" alt="A GitBook screenshot showing site sections on a docs site"><figcaption><p>Example of a GitBook site with site sections</p></figcaption></figure>

With site sections, you can centralize all your documentation and create a seamless experience for your users.

Site sections are perfect for organizing your documentation — whether you’re managing separate products, or catering to both end-users and developers with content tailored to each.

You can also [group site sections together](#create-a-site-section-group). Doing so will create a drop-down menu in your navigation bar — ideal for adding hierarchy to your site sections.

{% hint style="info" %}
**Sections or variants?**

Each site section is a space in GitBook. You can create site sections from any space you like, but we recommend you use sections as semantically different parts of your docs.

If you want to add variations of the same content — such as localizations or historical versions of the same product — consider using [content variants](/docs/docs-site/site-structure/variants) instead.
{% endhint %}

### Adding a section to your docs site

From your docs site’s dashboard, open the **Settings** tab in the site header, then click **Structure**. Here you can see all the content of your site.

To add a site section, click the **New section** button underneath the table and choose a space to link as a section. The new section is then added to the table and will be available to visitors as a tab at the top of your site.

<figure><img src="/files/eNMMXoZw4y8kR1uv9p6X" alt="A GitBook screenshot showing site section structure"><figcaption><p>Add structure to your docs with site sections.</p></figcaption></figure>

### Create a site section group

You can group site sections together under a single heading. Site section groups will appear as a drop-down in your site’s nav. Site sections in a group can also include an optional description, which appears below the section title in the drop-down menu.

To create a group, click the arrow next to the **New section** button and choose **New section group**. Give your new group a name, then click **Add section** in the modal to add sections to your group. You can add existing sections of your site to the new group, or select another space you want to add using the menu.

If your site supports multiple languages, you can also translate section group titles, along with section titles and descriptions. See [Multilingual sections](/docs/docs-site/site-structure/multilingual-sections).

### Editing a section

You can change the name, icon and slug of each of your sections by tapping the <picture><source srcset="/files/kN09oTFtAuyaxNIwWuCt" media="(prefers-color-scheme: dark)"><img src="/files/WNXq6RcD2e4WTRcZEz4f" alt="The Edit icon in GitBook"></picture> **Edit** button in the table row of the section you’d like to edit. This will open a modal. Edit the field(s) you’d like to change, then click the **Save** button. You can also delete the variant by clicking the **Delete variant** button in the lower left.

{% hint style="info" %}
Changing a section’s slug will change its canonical URL. GitBook will create an automatic redirect from the old URL to the new one. You can also [manually create redirects](/docs/docs-site/site-redirects).
{% endhint %}

Site sections within a group can also optionally display a description, which will appear in the drop-down menu of your site’s nav bar when the section group is hovered. See the image at the top of this page to see an example of how this can look in your published documentation.

If your site supports multiple languages, you can translate section titles and descriptions so they match the reader’s selected language. See [Multilingual sections](/docs/docs-site/site-structure/multilingual-sections).

### Reordering sections

Your site displays sections in the order that they appear in your Site structure table. Sections can be reordered by grabbing the **Drag handle** <picture><source srcset="/files/QLUQj6waZRiK6FpSqrt6" media="(prefers-color-scheme: dark)"><img src="/files/mmXesAh49D5J1O4wUAyK" alt="The Options menu icon in GitBook"></picture> and moving it up or down. All the spaces within that section will be moved with it. The changed order will be reflected on your site immediately.

You can also use the keyboard to select and move content: select a section with the space bar, then use the arrow keys to move it up or down. Hit the space bar again to confirm the new position.

### Setting a default section

If you have multiple sections in your site, one section will be marked as the default. This section is shown when visitors arrive on your site, and is served from your site’s root URL. Other sections each have a slug that is appended to the root URL.

To set a section as default, click on the **Actions menu** <picture><source srcset="/files/YjlF3Z9KMYv9aQiFzZKD" media="(prefers-color-scheme: dark)"><img src="/files/Zw9q37vPYF03vQIqywTy" alt="The Actions menu icon in GitBook"></picture> in the section's table row and then click **Set as default**.

### Remove a section

To remove a section from a site, click the **Settings** <picture><source srcset="/files/CG9bVSmdbJnQxrYiNbRI" media="(prefers-color-scheme: dark)"><img src="/files/Z6mVPT1qwXi4oXlarEpK" alt="The Settings icon in GitBook"></picture> button from your docs site dashboard, then click **Structure** to find the content you want to remove. Click the **Edit** <picture><source srcset="/files/kN09oTFtAuyaxNIwWuCt" media="(prefers-color-scheme: dark)"><img src="/files/WNXq6RcD2e4WTRcZEz4f" alt="The Edit icon in GitBook"></picture> button next to the section you want to remove, then click the **Delete** button in the lower left of the modal. This will remove the section, along with all the variants within it, from the published site. It will not delete the spaces itself, or the content within them.

To remove a section from a site, open the **Settings** tab from your docs site dashboard, then click **Structure** to find the content you want to remove.

Open the **Actions menu** <picture><source srcset="/files/YjlF3Z9KMYv9aQiFzZKD" media="(prefers-color-scheme: dark)"><img src="/files/Zw9q37vPYF03vQIqywTy" alt="The Actions menu icon in GitBook"></picture> for the space you want to remove and choose **Remove**.

{% hint style="success" %}
Removing a section from your site will remove it — and all variants within it — from the published site, but **will not delete any of the spaces or the content within them**.
{% endhint %}


# Content variants

Publish documentation for multiple product versions or languages in a single site

You can publish multiple versions of the same documentation as part of a single docs site. These variants will be available to the end users via the space switcher in the top-left corner of the published site.

<figure><img src="/files/LKjO8P94NyhF6ME2u7wp" alt="A GitBook screenshot showing a docs site&#x27;s structure"><figcaption></figcaption></figure>

### Add multiple languages or versions

A site with multiple variants is useful if you need to group together the content of your spaces — such as if you’re documenting multiple versions of an API (v1, v2, v3, etc.), or documenting your content in different languages.

{% hint style="info" %}
The spaces you link can contain any content, but it’s recommended to use variants as *variations of the same content*. If the spaces you link are semantically different from each other, consider adding them as [site sections](/docs/docs-site/site-structure/site-sections) instead.
{% endhint %}

When adding a translation or multiple languages as a variant, it’s best practice to set the language of your variant to give your users the best experience when navigating your docs.

Adding multiple variants with languages set will move the language picker to the upper right, giving a cleaner, more direct experience from the default variant picker.

### Adding a variant to your docs site

From your docs site’s dashboard, open the **Settings** tab in the site header, then click **Structure**. Here you can see all the content of your site.

To add a variant, click the **Add variant** button in the section you'd like to add to, then choose a space to link. The new variant is then added to the list of variants within the chosen section and will be available to visitors in the variant dropdown on your site.

### Changing a variant

You can change the name and slug of each of your variants by clicking the <picture><source srcset="/files/kN09oTFtAuyaxNIwWuCt" media="(prefers-color-scheme: dark)"><img src="/files/WNXq6RcD2e4WTRcZEz4f" alt="The Edit icon in GitBook"></picture> **Edit** button in the table row of the variant you’d like to edit. This will open a modal. Edit the field(s) you'd like to change, then click the **Save** button to save. You can also delete the variant by clicking the **Delete variant** button in the lower left.

If your site supports multiple languages, you can also translate variant titles so the picker shows localized labels. See [Multilingual sections](/docs/docs-site/site-structure/multilingual-sections).

{% hint style="info" %}
Changing a linked space's slug will change the space's canonical URL. GitBook will create an automatic redirect from the old URL to the new one. You can also [manually create redirects](/docs/docs-site/site-redirects).
{% endhint %}

To replace a variant’s linked space with a different space, first delete it by clicking its **Edit** <picture><source srcset="/files/kN09oTFtAuyaxNIwWuCt" media="(prefers-color-scheme: dark)"><img src="/files/WNXq6RcD2e4WTRcZEz4f" alt="The Edit icon in GitBook"></picture> button, then click the **Delete** button in the lower left of the modal. Once the variant is deleted, click the **Add variant** button to add the new space.

### Reordering variants

Your site displays variants in the order that they appear in your **Site structure** table. Variants can be reordered by grabbing the **Drag handle** <picture><source srcset="/files/QLUQj6waZRiK6FpSqrt6" media="(prefers-color-scheme: dark)"><img src="/files/mmXesAh49D5J1O4wUAyK" alt="The Options menu icon in GitBook"></picture> and moving it up or down. The changed order will be reflected on your site immediately.

You can also use the keyboard to select and move content: select a section or variant with the space bar, then use the arrow keys to move it up or down. Hit the space bar again to confirm the new position.

### Setting a default variant

If you have multiple variants within a section, one variant will be marked as the default. This variant is shown when visitors arrive on your site (or when they visit a section). Other variants each have a slug that is appended to the site's URL.

To set a variant as default, click on the **Actions menu** <picture><source srcset="/files/YjlF3Z9KMYv9aQiFzZKD" media="(prefers-color-scheme: dark)"><img src="/files/Zw9q37vPYF03vQIqywTy" alt="The Actions menu icon in GitBook"></picture> in the variant’s table row and then click **Set as default**.

{% hint style="info" %}
Setting a variant as default removes its slug field, as it will be served from the section root instead. GitBook will redirect the variant's slug to the appropriate path, to ensure visitors keep seeing your content.
{% endhint %}

### Remove a variant from a site

To remove a variant from a site, open the **Settings** tab from your docs site dashboard, then click **Structure** to find the content you want to remove.

Open the **Actions menu** <picture><source srcset="/files/YjlF3Z9KMYv9aQiFzZKD" media="(prefers-color-scheme: dark)"><img src="/files/Zw9q37vPYF03vQIqywTy" alt="The Actions menu icon in GitBook"></picture> for the variant you want to remove and choose **Remove**.

{% hint style="success" %}
Removing a variant from your site will remove it from the published site, but **will not delete the space or the content within it**.
{% endhint %}


# Multilingual sections

Set localized titles for your site, sections, and section groups

Localized titles let you show different titles for different languages on your published site.

Visitors see the title that matches the language they’re browsing in. If a translation isn’t set, GitBook shows the fallback title instead.

{% hint style="info" %}
Localized titles only appear when your site includes spaces with more than one language.
{% endhint %}

{% embed url="<https://files.gitbook.com/v0/b/gitbook-x-prod.appspot.com/o/spaces%2FNkEGS7hzeqa35sMXQZ4X%2Fuploads%2FlEY5s6qXpEy6k1ivmeL6%2Flocalized.mp4?alt=media&token=d8221dc1-54e1-401b-8699-3acd65343fc3>" %}

### Set up localized titles

{% stepper %}
{% step %}

#### Open your site customization settings

From your docs site, open **Settings** and go to **Structure** settings
{% endstep %}

{% step %}

#### Find the title you want to translate

Open the title field for your site, a section, or a section group.
{% endstep %}

{% step %}

#### Set the fallback title

By default, the fallback title is set to the current section name.
{% endstep %}

{% step %}

#### Add each translated title

Open the language selector again and choose a language.

Enter the title for that language, then repeat for each language you support.
{% endstep %}
{% endstepper %}


# AI Search

Help your users find the information they need faster with powerful AI search tools for your published content

Help your users find the information they need faster with powerful knowledge discovery tools for your published content

### Choose your site’s search experience

GitBook sites offer different search experiences depending on what you want for your users:

* **Keyword search** – A standard search experience based on keywords. Automatically enabled on all sites.
* **GitBook AI search** – Users get short answers to questions directly from the search box. Available on Premium and Ultimate site plans.
* **GitBook Assistant** – Users get an advanced, interactive chat experience with GitBook’s AI agent. Available on Ultimate site plans. Head to [GitBook Assistant](/docs/ai-and-search/gitbook-ai-assistant) to learn more.

AI Search is available on Premium and Ultimate site plans. GitBook Assistant is available on Ultimate site plans.

To choose your site’s search experience, open your site’s dashboard, navigate to the **Settings** page and choose **AI & MCP** from the menu on the left. Here you can choose your preferred experience.

<figure><img src="/files/JXRB9Ug5cfgwo3AYWBaT" alt=""><figcaption><p>Choose the search experience you want in your published docs</p></figcaption></figure>

{% hint style="warning" %}
When GitBook Assistant is enabled, AI search is disabled. Standard keyword searches will always provide the results in the search bar no matter which experience you choose.
{% endhint %}

## Searching published documentation

**​**Users can open the **Ask or search…** bar by pressing <kbd>⌘</kbd> + <kbd>K</kbd> on Mac or <kbd>Ctrl</kbd> + <kbd>K</kbd> on PC.

Your users can search for keywords within your docs site and jump quickly to specific pages or page sections across your entire site.

If your docs site has multiple [sections](/docs/docs-site/site-structure/site-sections), the search results will contain pages from all of these sections so that you users can jump straight to the page they need.

## GitBook AI search

{% hint style="info" %}
This feature is available on [Premium and Ultimate site plans](https://www.gitbook.com/pricing).
{% endhint %}

GitBook AI search offers basic AI-powered answers in the **Search and find…** bar of your site. It’s trained on the content of your docs site, but cannot pull in information from external sources.

### Using GitBook AI search

If you have enabled GitBook AI search from your site’s settings page, your users can access it by asking a question directly in the **Ask or search…** bar at the top of the page.

They can open this by clicking it directly, or by pressing <kbd>⌘</kbd> + <kbd>K</kbd> on a Mac or <kbd>Ctrl</kbd> + <kbd>K</kbd> on a PC.

As well as a summarized answer, below your users will also see an expandable section that shows the sources that GitBook AI used to create its answer, plus related questions you can click as a follow-up.

{% hint style="warning" %}
GitBook AI does not work across individual published spaces on different [docs sites](/docs/docs-site/publish-a-docs-site).

Multi-space search is only available when viewing published spaces that live as [site sections](/docs/docs-site/site-structure/site-sections) within the same site.
{% endhint %}

* Press <kbd>⌘</kbd> + <kbd>I</kbd> on Mac or <kbd>Ctrl</kbd> + <kbd>I</kbd> on PC
* Click the **GitBook Assistant** ![](/files/cfqd7Ny5fKRNXla8foeP) button next to the **Ask or search…** bar
* Type a question into the **Ask or search…** bar and choose the ‘Ask…’ option at the top of the menu.


# Set a custom domain

Set a custom domain for your docs sites

{% hint style="info" %}
This feature is available on [Premium and Ultimate site plans](https://www.gitbook.com/pricing).
{% endhint %}

{% hint style="warning" %}
This page shows how to configure a custom domain and subdomain. If you would like to configure a custom subdirectory (such as `example.com/docs`), see the [Setting a custom subdirectory](/docs/docs-site/custom-domain/setting-a-custom-subdirectory) page.
{% endhint %}

By default, your sites are accessible on a `[subdomain].gitbook.io` domain.

You can customize this by setting a custom domain, meaning your audience can access your documentation on a chosen domain.

{% stepper %}
{% step %}

#### Choose a subdomain

When choosing a subdomain, you can either use `www` or a custom one. Some commonly used subdomains are:

* `docs.example.com`
* `help.example.com`
* `developers.example.com`
  {% endstep %}

{% step %}

#### Initiate the custom domain setup

Navigate to the site for which you want to set the custom domain. Click **Settings,** then choose **Set up a custom domain.**

From here, you'll see a window where you can enter the custom domain you chose in the first step. Type it out and click **Next.**
{% endstep %}

{% step %}

#### Configure the DNS

At this stage, you'll see a window with three fields: **Type, Name, Target.**

Those are the details you'll use to set your custom domain in your DNS provider. This is done *outside* GitBook, in the provider you are using for your domain.

Copy the contents of the **Name** and **Target** fields to use in your DNS provider. Each provider is different, so when in doubt, check directly with them how to add this record. You should be able to pick the **Type** of record from a list in your provider.

After adding the record, it might take some time for the changes to propagate. We recommend **waiting at least 1 hour** before moving to the next step. Click **Next** when you are ready.
{% endstep %}

{% step %}

#### Finalize your setup

After adding the record and it being propagated, it's time to go live! GitBook will verify the domain, the record you added and will automatically configure the SSL certificate for your domain.

Once done, you'll receive a notification and can click **Finish**. You can also close the window if you need, and we'll send you a notification once the process is done on our side.
{% endstep %}
{% endstepper %}

### Troubleshooting

Setting up a custom domain can occasionally run into obstacles. Below, we outline frequent problems encountered during this process and provide detailed solutions to each of them.

<details>

<summary>SSL error: an error occurred when provisioning your SSL certificate.</summary>

When a custom domain is set for your organization, collection, or space, we set up an SSL certificate on our end so that your documentation will load securely, over HTTPS.\
\
This happens automatically when you set your custom domain — you do not need to purchase or configure an SSL certificate.

Occasionally errors occur at this stage, usually when the CNAME record for the custom domain hasn't propagated.

In these cases, we can recommend the following:

1. Check that your CNAME record is set up correctly.\
   Please review our page about configuring DNS to help you with this.\
   If the CNAME record is incorrect, we won't be able to configure the SSL certificate and complete the custom domain set-up.
2. Allow ***at least one hour*** between configuring the CNAME record and finalizing the custom domain setup.
3. Verify if the CNAME has propagated. You can try using a third-party DNS lookup tool, such as [WhatsMyDNS](https://www.whatsmydns.net/), to find out what the servers believe to be correct for your correct CNAME record.
4. If you are using Cloudflare, please confirm that you don’t have the record proxied [as explained here](https://developers.cloudflare.com/fundamentals/setup/manage-domains/pause-cloudflare/#disable-proxy-on-dns-records).

</details>

<details>

<summary>Domain already connected error: your subdomain is already configured for different content.</summary>

A custom domain assigned to a site must be unique. Attempting to use the same custom domain in more than one location will result in an error.

If this happens, you can click the link within the error message to look at the content the custom domain is already connected to. This may help you to decide what to do next.

It’s also possible that you might not have access to the content — if that’s the case, contact the support team and they can help you with your next steps.

The solution to this error will always be one of two things, however:

1. Choose a different custom domain; or
2. Disconnect the custom domain from the content it is already connected to, then reconnect it to the new content.

</details>


# Setting a custom subdirectory

Set a custom subdirectory for your docs sites

{% hint style="info" %}
This feature is available on the [Ultimate site plan](https://www.gitbook.com/pricing).
{% endhint %}

With a custom subdirectory, you can make your docs site accessible at `example.com/docs`. This is different from a [custom domain](/docs/docs-site/custom-domain) which lets you make your docs site accessible at `docs.example.com`.

One reason to do this is so that your docs URL is formatted in a consistent way with your other site URLs. Using a subdirectory may also be beneficial for SEO.

To configure a subdirectory, you'll need to set things up in your website's backend, then finalize the process in your GitBook site settings.

<table data-view="cards"><thead><tr><th></th><th data-hidden data-card-target data-type="content-ref"></th><th data-hidden data-card-cover data-type="image">Cover image</th><th data-hidden data-type="image">Cover image (dark)</th><th data-hidden data-type="image">Cover image (dark)</th><th data-hidden data-card-cover-dark data-type="image">Cover image (dark)</th></tr></thead><tbody><tr><td>Configuring a subdirectory with Cloudflare</td><td><a href="/pages/YKhnnDBGRdiG0J9NrQ2q">/pages/YKhnnDBGRdiG0J9NrQ2q</a></td><td><a href="/files/cNDCU8Ykl27ZQthgXvCl">/files/cNDCU8Ykl27ZQthgXvCl</a></td><td><a href="/files/A0XGOp4BDPkL62ScLfRL">/files/A0XGOp4BDPkL62ScLfRL</a></td><td><a href="/files/A0XGOp4BDPkL62ScLfRL">/files/A0XGOp4BDPkL62ScLfRL</a></td><td><a href="/files/HM0FsOPWw2bUEqwORRay">/files/HM0FsOPWw2bUEqwORRay</a></td></tr><tr><td>Configuring a subdirectory with Vercel</td><td><a href="/pages/4YDmCzJDaEnyghAUtKuL">/pages/4YDmCzJDaEnyghAUtKuL</a></td><td><a href="/files/0SPPyHkRUU8jz3DhrRnu">/files/0SPPyHkRUU8jz3DhrRnu</a></td><td><a href="/files/4PfSotd6WoWit4gyCcad">/files/4PfSotd6WoWit4gyCcad</a></td><td><a href="/files/4PfSotd6WoWit4gyCcad">/files/4PfSotd6WoWit4gyCcad</a></td><td><a href="/files/wX5dnvisXzuUNmD8nOLQ">/files/wX5dnvisXzuUNmD8nOLQ</a></td></tr><tr><td>Configuring a subdirectory with AWS</td><td><a href="/pages/V84lyzF3H4YEMHlzA2wa">/pages/V84lyzF3H4YEMHlzA2wa</a></td><td><a href="/files/LbBjBevnm2BvX1gU1RaI">/files/LbBjBevnm2BvX1gU1RaI</a></td><td></td><td><a href="/files/Ck2ktsqVtDj9Kk5zriQI">/files/Ck2ktsqVtDj9Kk5zriQI</a></td><td><a href="/files/JtVbcTzLsmcJf8QcpoAm">/files/JtVbcTzLsmcJf8QcpoAm</a></td></tr></tbody></table>


# Configuring a subdirectory with Cloudflare

Host your documentation with a /docs subdirectory using Cloudflare

{% hint style="info" %}
This feature is available on the [Ultimate site plan](https://www.gitbook.com/pricing).
{% endhint %}

{% stepper %}
{% step %}

#### Configuring your GitBook site

In your GitBook organization, click on your docs site name in the sidebar, then click **Manage site** or open the **Settings** tab. Open the **Domain and redirects** section and under ‘Subdirectory’, click **Set up a subdirectory**.

Enter the URL where you would like to host your docs. Then specify the subdirectory for docs access, e.g. `tomatopy.pizza/docs`, and click **Configure**.

Under **Additional configuration**, you will now see a proxy URL. You'll use this in the next step when configuring your Cloudflare worker. Copy it to your clipboard.
{% endstep %}

{% step %}

#### Create your Cloudflare worker

Sign into your Cloudflare account and navigate to **Workers & Pages**

Click the **Create** button.

On the ‘Create an application’ screen, click the **Hello world** button in the ‘Start from a template’ card.

Give the worker a more descriptive name, like `mydocs-subpath-proxy`. Once you finish renaming the worker, click **Deploy**.
{% endstep %}

{% step %}

### Configure your custom domain

Your worker will get a default URL that you can use. To configure your custom domain instead (such as `tomatopy.pizza`), click **Settings.** Then, in the ‘Domains & Routes’ section, click **+ Add**.

In the ‘Domains & Routes’ tray that opens, click **Custom domain**, then enter your custom domain in the textbox that follows. When you specify the custom domain, *do not* include the subdirectory. For example, `tomatopy.pizza` is correct, while `tomatopy.pizza/docs` is not.
{% endstep %}

{% step %}

#### Update the worker code

When the worker is finished deploying, click **Edit code**, or click **Continue to project**, and then the **Edit code** button in the upper right.

In the code editor that opens, replace the sample code with the following snippet:

{% code lineNumbers="true" %}

```javascript
export default {
  fetch(request) { 
    const SUBDIRECTORY = '/docs';
    const url = new URL(request.url);
    const target = "<INSERT YOUR PROXY URL FROM GITBOOK>" + url.pathname.slice(SUBDIRECTORY.length);
    const proxy = new URL(
      target.endsWith('/') ? target.slice(0, -1) : target 
    )
    proxy.search = url.search;
    return fetch(new Request(proxy, request));
  }
};
```

{% endcode %}

{% hint style="info" %}
Be sure to update the URL on line 5 with the proxy URL you got from GitBook in the first step.
{% endhint %}

Once that’s done, click **Deploy**. This process may take a few moments. Once it’s complete, when visiting the URL, you should see your docs site!
{% endstep %}
{% endstepper %}


# Configuring a subdirectory with Vercel

Host your documentation with a /docs subdirectory using Vercel

{% hint style="info" %}
This feature is available on the [Ultimate site plan](https://www.gitbook.com/pricing).
{% endhint %}

{% stepper %}
{% step %}

#### Configuring your GitBook site

In your GitBook organization, click on your docs site name in the sidebar, then **Manage site**, then **Domain and redirects**. Under ‘Subdirectory’, click **Set up a subdirectory**.

Enter the URL where you would like to host your docs. Then specify the subdirectory for docs access, e.g. `tomatopy.pizza/docs`, and click **Configure**.

Under **Additional configuration**, you will now see a proxy URL. You’ll use this in the next step when configuring your Vercel settings. Copy it to your clipboard.
{% endstep %}

{% step %}

#### Update your vercel.json

In your Vercel app, open your `vercel.json`file (or create one in the root directory if you don't already have one). Then, add the following:

```json
{
    "rewrites": [
        {
            "source": "/docs",
            "destination": "<INSERT YOUR PROXY URL FROM GITBOOK>"
        },
        {
            "source": "/docs/:match*",
            "destination": "<INSERT YOUR PROXY URL FROM GITBOOK>/:match*"
        }
    ]
}
```

*Be sure to update the URL* on line 5 with the proxy URL you got from GitBook in the first step.
{% endstep %}

{% step %}

#### Re-deploy your app and try it out!

Re-deploy your Vercel app with the update configuration. This may take a few moments. Now, when visiting the URL, you should see your docs site!
{% endstep %}
{% endstepper %}


# Configuring a subdirectory with AWS using CloudFront and Route 53

Host your documentation with a /docs subdirectory using AWS CloudFront and Route 53.

{% hint style="info" %}
This feature is available on the [Ultimate site plan](https://www.gitbook.com/pricing).
{% endhint %}

{% hint style="info" %}
This guide covers setting up a subdirectory using AWS CloudFront and Lambda\@Edge. This is one approach for AWS users. If you have a different AWS setup (such as a load balancer with EC2 instances running NGINX), you may need to configure your reverse proxy differently. Contact [support](https://gitbook.com/docs/help-center/further-help/how-do-i-contact-support) if you need guidance for alternative configurations.
{% endhint %}

{% stepper %}
{% step %}
**Configuring your GitBook site**

In your GitBook organization, click on your docs site name in the sidebar, then click **Manage site** or open the **Settings** tab. Open the **Domain and redirects** section and under ‘Subdirectory’, click **Set up a subdirectory**.

Enter the URL where you would like to host your docs. Then specify the subdirectory for docs access, e.g. `example.com/docs`, and click **Configure**.

Under **Additional configuration**, you will now see a proxy URL. You’ll use this in the next step when configuring your Lambda function. Copy it to your clipboard.
{% endstep %}

{% step %}
**Create your Lambda\@Edge function**

Sign into your AWS Console and navigate to **Lambda**.

Click the **Create function** button.

Choose **Author from scratch**, then:

* Give your function a descriptive name, like `gitbook-subpath-proxy.`
* Select **Node.js** as the runtime (use the latest available version).
* Leave the architecture and other settings as default.

Click **Create function**.
{% endstep %}

{% step %}
**Update the Lambda function code**

In the Lambda function editor, replace the default code with the following:

{% code lineNumbers="true" %}

```javascript
export const handler = async (event) => {
	const request = event.Records[0].cf.request;
	
	// update if your subdirectory is not /docs
	const subdirectory = '/docs';
	
	// update with your proxy URL below
	const target = new URL('<proxy URL you got from GitBook>');

	// rewrite: /docs* -> proxy.gitbook.site
	if (request.uri.startsWith(subdirectory)) {
		request.uri = target.pathname + request.uri.substring(subdirectory.length);

		// Remove trailing slash if present
		if (request.uri.endsWith('/')) {
			request.uri = request.uri.slice(0, -1);
		}

		request.origin = {
			custom: {
				domainName: target.host,
				port: 443,
				protocol: 'https',
				path: '',
				sslProtocols: ['TLSv1.2'],
				readTimeout: 30,
				keepaliveTimeout: 5,
				customHeaders: {},
			},
		};

		request.headers['host'] = [{ key: 'host', value: target.host }];
		request.headers['x-forwarded-host'] = [{ key: 'x-forwarded-host', value: target.host }];
	}
    
	return request;
};
```

{% endcode %}

{% hint style="warning" %}
Be sure to update `target` on line 8 with the proxy URL you got from GitBook in the first step. This will look like `https://proxy.gitbook.site/sites/site_XXXX`
{% endhint %}

{% hint style="warning" %}
Also be sure to update `subdirectory` on line 5 if you’re using a different subdirectory path than `/docs`.
{% endhint %}

Click **Deploy** to save your changes.
{% endstep %}

{% step %}
**Configure Lambda permissions for Lambda\@Edge**

Before you can use your Lambda function with CloudFront, you need to configure the execution role to allow Lambda\@Edge to assume it.

1. In your Lambda function, click on the **Configuration** tab
2. Click **Permissions** in the left sidebar
3. Under **Execution role**, click on the role name to open it in IAM
4. Click the **Trust relationships** tab
5. Click **Edit trust policy**
6. Replace the trust policy with the following:

```json
{
    "Version": "2012-10-17",
    "Statement": [
        {
            "Effect": "Allow",
            "Principal": {
                "Service": [
                    "edgelambda.amazonaws.com",
                    "lambda.amazonaws.com"
                ]
            },
            "Action": "sts:AssumeRole"
        }
    ]
}
```

Click **Update policy** to save.
{% endstep %}

{% step %}
**Publish your Lambda function**

Lambda\@Edge requires a published version (not just `$LATEST`).

1. In your Lambda function, click the **Actions** dropdown in the upper right
2. Select **Publish new version**
3. Optionally add a description like “Initial version for CloudFront”
4. Click **Publish**
5. **Important:** Copy the ARN of the published version that appears at the top of the page (it will include a version number at the end, like `arn:aws:lambda:us-east-1:123456789:function:gitbook-subpath-proxy:1`)

{% hint style="warning" %}
Lambda\@Edge functions must be created in the **us-east-1** (N. Virginia) region. If you created your function in a different region, you’ll need to recreate it in us-east-1.
{% endhint %}
{% endstep %}

{% step %}
**Create your CloudFront distribution**

Navigate to **CloudFront** in the AWS Console and click **Create distribution**.

Configure the following settings. Where settings are not specified, keep the default settings.

**Specify origin**

| Setting           | Value                                          |
| ----------------- | ---------------------------------------------- |
| **Origin type**   | Other                                          |
| **Custom origin** | Your main website domain (e.g., `example.com`) |

**Cache settings**

| Setting                   | Value                     |
| ------------------------- | ------------------------- |
| **Cache policy**          | CachingDisabled           |
| **Origin request policy** | AllViewerExceptHostHeader |

Click **Next,** select your preferred security protections, then click **Next** again.

Click **Create distribution**.

Wait for the distribution to deploy (status will change from “In Progress” to “Enabled”). This may take several minutes.
{% endstep %}

{% step %}
**Associate Lambda\@Edge with CloudFront**

Once your CloudFront distribution is deployed:

1. Click on your distribution ID to open its settings
2. Go to the **Behaviors** tab
3. Select the default behavior and click **Edit**
4. Scroll down to **Function associations**
5. Under **Origin request**, select **Lambda\@Edge**
6. In the **Lambda function ARN** field, paste the ARN of your published Lambda function (from step 5)
7. Check **Include body** to allow the function to access request bodies if needed
8. Click **Save changes**
   {% endstep %}

{% step %}
**Configure domain and DNS records**

1. On the main page of your CloudFront distribution, click the **General** tab, and under **Alternate domain names**, click **Add domain**
2. Enter the domain for which you are configuring your subdirectory e.g. `example.com` and click **Next**
3. Select your existing TLS certificate, or create a new one, if needed, and click **Next** again
   {% endstep %}

{% step %}
**Configure Route 53 DNS records from CloudFront**

If you’re using Route 53 for DNS, you’ll need to create or update your DNS records to point to your CloudFront distribution.

1. While remaining on the main page for your CloudFront distribution, make sure you are on the **General** tab, then below the URL that you have configured in **Alternate domain names,** click **Route domains to CloudFront.**
2. Click on **Set up routing automatically** to create A and AAAA DNS records for your domain

{% hint style="info" %}
If you’re not using Route 53, you’ll need to update your DNS provider’s settings to point your domain to your CloudFront distribution domain name. You can find this in the CloudFront distribution details under “Distribution domain name”.
{% endhint %}
{% endstep %}

{% step %}
**Test your configuration**

Once all changes have propagated (this can take 10–15 minutes):

1. Open a browser and navigate to your domain with the subdirectory path (e.g., `https://example.com/docs`)
2. You should see your GitBook documentation site!

If the site doesn’t load immediately, try:

* Waiting a few more minutes for DNS propagation
* Clearing your browser cache or trying an incognito window
* Running `nslookup yourdomain.com` in terminal to verify DNS is resolving correctly
* Checking CloudFront distribution status is “Enabled” and not “In Progress”

{% hint style="success" %}
Congratulations! Your GitBook documentation is now accessible via your custom subdirectory.
{% endhint %}
{% endstep %}
{% endstepper %}

### Troubleshooting

**Lambda function not triggering:**

* Ensure you published a version of your Lambda function (not using `$LATEST`)
* Verify the Lambda function is in the us-east-1 region
* Check that the trust policy includes `edgelambda.amazonaws.com`

**DNS not resolving:**

* DNS changes can take time to propagate (up to 48 hours, though usually much faster)
* Verify your Route 53 records are pointing to the correct CloudFront distribution
* Check that you deleted any old conflicting DNS records

**SSL certificate errors:**

* Ensure your SSL certificate in AWS Certificate Manager includes your custom domain
* Certificates for CloudFront must be created in the us-east-1 region

**Subdirectory not working:**

* Verify the `SUBDIRECTORY` value in your Lambda function matches what you configured in GitBook
* Check that the `target` in your Lambda function is correct
* Review CloudFront logs to see if requests are reaching the distribution


# Publish a docs site

Publish your documentation to the internet as a docs site

When you finish writing, editing, or importing your content, you can publish it to a docs site and make it available to your selected audience.

The content on your docs site comes from [spaces](/docs/creating-content/content-structure/space) in your organization. When you create a site, you can create a new space or link an existing one.

<figure><img src="/files/PV6bHTaqdQhANGNqFTNw" alt="A GitBook screenshot showing the docs sites homepage"><figcaption><p>GitBook's docs sites homepage.</p></figcaption></figure>

### Create a docs site

To create a docs site, click the plus **+** icon next to Docs site in the sidebar to launch the docs site wizard.

Give your site a name, choose a starting point for your content, and select whether you want to publish your site now or later.

If you already have content in a space that you would like to use, you can create a docs site directly from that space by opening the space and clicking **Share** in the top-right corner of the window. Then choosing **Publish as a docs site** from the share modal.

{% hint style="info" %}
**Note:** You can also manage permissions at the site level — allowing you to control who can view or edit each site independently of your organization settings. See [Roles](/docs/collaboration/member-management/roles) for more details.
{% endhint %}

### Publish a docs site

By default, your site will be published publicly. You can change your site’s visibility in your [site’s settings](/docs/docs-site/site-settings).

There are three primary options to choose from when publishing your site:

<table data-view="cards"><thead><tr><th></th><th></th><th></th><th data-hidden data-card-cover data-type="image">Cover image</th><th data-hidden data-card-target data-type="content-ref"></th><th data-hidden data-type="image">Cover image (dark)</th><th data-hidden data-type="image">Cover image (dark)</th><th data-hidden data-card-cover-dark data-type="image">Cover image (dark)</th></tr></thead><tbody><tr><td><strong>Public</strong></td><td>Publish your docs publicly to the web.</td><td></td><td><a href="/files/47vaeglRmjg9U9XaHhvE">/files/47vaeglRmjg9U9XaHhvE</a></td><td><a href="/pages/vNPy4P2eYrZWKuUu8zFz">/pages/vNPy4P2eYrZWKuUu8zFz</a></td><td><a href="/files/iHKxWZZLBnk7N1CSSbdl">/files/iHKxWZZLBnk7N1CSSbdl</a></td><td></td><td><a href="/files/iHKxWZZLBnk7N1CSSbdl">/files/iHKxWZZLBnk7N1CSSbdl</a></td></tr><tr><td><strong>Privately with share links</strong></td><td>Publish your docs with private share links.</td><td></td><td><a href="/files/qK0AXRwT4Lq7gbRZ8yiF">/files/qK0AXRwT4Lq7gbRZ8yiF</a></td><td><a href="/pages/g5jAmnNJPWR6JjBFis2I">/pages/g5jAmnNJPWR6JjBFis2I</a></td><td></td><td><a href="/files/dY3MZAa1zAI2NbIE90Pn">/files/dY3MZAa1zAI2NbIE90Pn</a></td><td><a href="/files/mgBprbZYBZ6nW42ewzHx">/files/mgBprbZYBZ6nW42ewzHx</a></td></tr><tr><td><strong>Authenticated Access</strong></td><td>Protect your published docs behind an OAuth sign in.</td><td></td><td><a href="/files/j20Zpf48GM8QbfO86jQX">/files/j20Zpf48GM8QbfO86jQX</a></td><td><a href="/pages/Yn7gzayRYsbHAIeByLZu">/pages/Yn7gzayRYsbHAIeByLZu</a></td><td></td><td></td><td><a href="/files/5oN43u01wtVPnHfvq2ko">/files/5oN43u01wtVPnHfvq2ko</a></td></tr></tbody></table>

### Delete or unpublish a docs site

To delete a docs site, open your site’s dashboard, then open [**Site settings**](/docs/docs-site/site-settings#delete-site) from the top-right corner.


# Public publishing

Publish your docs publicly to the web so that everyone can access them

If you created your docs for a public audience, you can publish it on the web. Spaces that you publish on the web can be indexed by search engines and will be available to anyone. If you don’t want your content to be indexed by search engines, you can disable that too — read more about that [below](#publish-as-public).

However you publish your content, you’ll still retain control over who can *edit* your content. And only your primary content branch will be published, so any [change requests](/docs/collaboration/change-requests) will remain private until merged.

### Publish as public

To publish your docs publicly on the web head to the docs site you want to publish, click **Publish** button, and choose the **Public** option.

### **Publish without search engine indexing**

By default, your site will be indexed by search engines. You can alternatively choose to disable this — meaning the docs are still available to everyone on the web, but they *won’t* be indexed by search engines such as Google.

They will still be accessible to anyone with a the link to your documentation. Docs sites that aren’t indexed can be particularly helpful if you want to publish a beta version of your docs, or do large-scale user testing without impacting your SEO with potentially duplicate content.

### Page-level search indexing controls

You can also control search indexing at the individual page level. GitBook provides two types of search indexing controls:

#### Internal search indexing

Controls whether pages are indexed in GitBook's internal search engine and Ask AI feature. This affects:

* Content search within your GitBook space
* Ask AI's ability to reference the page content

**External search indexing (Web crawlers)**

Controls whether search engines and web crawlers (Google, ChatGPT, etc.) can index your pages. This affects:

* SEO and discoverability through search engines
* Web crawler access to your content

#### **Hierarchical inheritance behavior**

**Search indexing settings follow a hierarchical inheritance pattern:**

* **Parent page controls**: When you disable search indexing on a parent page, it automatically disables indexing for ALL sub-pages beneath it.
* **Children cannot override**: Sub-pages cannot re-enable search indexing if their parent page has it disabled.
* **Cascading effect**: This creates a cascading effect down the entire page hierarchy - disabling indexing on a top-level page will disable it for the entire section.

This hierarchical behavior ensures consistent indexing policies across related content sections and prevents accidental exposure of content that should remain private within a section.

{% hint style="info" %}
This feature is available on [Premium and Ultimate site plans](https://www.gitbook.com/pricing).
{% endhint %}


# Private publishing with share links

Add greater control over who can view your published GitBook documentation

{% hint style="info" %}
This feature is available on [Premium and Ultimate site plans](https://www.gitbook.com/pricing).
{% endhint %}

You can share you content privately with customers or partners without needing to invite them to your organization by using share links.

### Publish with share links

To publish your docs privately, head to the [docs site’s ](/docs/docs-site/site-settings)settings, click **Audience settings** button, and choose the **Share links** option.

Next, click on **Create link** to create a share link. You can review and name your share links, customize your domain and copy the link.

Once the link is active, a private token is generated within your URL, which is unique to your space. Sharing this link will give non-GitBook users access to your content in read mode only, with an interface that looks like any other published content.

You can generate as many links as you need from **Audience settings**.

{% hint style="info" %}
You can [revoked](#revoke-a-link) and regenerate share links at any time.
{% endhint %}

### Access and permissions

The content will be accessible to **anyone following the link**. Your team members can access your content from the **Docs sites** section of the sidebar, or by navigating to the space directly.

### Revoke a link

You can disable or regenerate your shareable by revoking it. You can see and revoke any previously generated link by opening the visibility menu and clicking through to link and domain settings.

Once you revoke a link, anyone with that outdated link to your content will no longer have access.


# Site redirects

Set up site redirects to route traffic to content anywhere on your site

{% hint style="info" %}
This feature is available on [Premium and Ultimate site plans](https://www.gitbook.com/pricing).
{% endhint %}

<figure><img src="/files/F8anOsFJ5QEvuxPMSrRz" alt="A GitBook screenshot showing site redirects"><figcaption><p>Site redirects are useful when migrating documentation or restructuring content to avoid broken links, which can impact SEO.</p></figcaption></figure>

Redirects are commonly used when you are migrating your documentation from one provider to another — like when you just moved docs to GitBook. Broken links can impact SEO so we recommend setting up redirects where needed.

In addition to [automatic redirects created by GitBook](#about-automatic-redirects), you can create a redirect from any path in your site’s domain.

Redirects can be created as either **Live** or **Draft**. Draft redirects allow you to prepare and review redirect rules before publishing them. Drafts do not affect your live site until they are enabled.

## Managing redirects on your site

To get started, view your site’s dashboard in GitBook and open the **Settings** tab, then click **Domain & redirects**.

### Creating redirects

Click **Add redirect** and select the **Manual** option.

Fill in the **source path** — the URL slug you want to redirect — and the **destination** content you want visitors to be sent to. You can select any section, variant, or page on your site.

Click **Enable redirect** to immediately enable the redirect.

If you want to create the redirect without making it live yet, click **Save as draft** instead. Draft redirects appear in the **Draft** tab and can be enabled later.

You can also create **wildcard redirects** by adding \* at the end of the source path, for example:

* /docs/\* to match everything under /docs/
* /changelog\* to match paths that start with /changelog

When your source path includes a wildcard (\*), you can enable **Replace wildcard with matched text**.

* **On:** the part matched by \* is appended to the destination path.
  * Example: source /docs/\* → destination /help\
    /docs/install redirects to /help/install
* **Off:** all matched URLs redirect to the same fixed destination.
  * Example: source /docs/\* → destination /help\
    /docs/install redirects to /help

If you want to add another redirect to the same page, toggle **Add another redirect** before clicking **Enable redirect** or **Save as draft**.

When you add the redirect, the modal will remain open with the destination content set to your previous selection so you can quickly add another source path.

### Editing redirects

To edit a redirect, click the **Edit** icon next to it in the list. Update the redirect and click **Enable redirect** to publish your changes.

If the redirect is currently a **draft**, you can also publish it directly from the edit modal by clicking **Enable redirect**.

### Enabling draft redirects

Draft redirects appear in the **Draft** tab of the redirects table.

You can publish a draft redirect in two ways:

• Open the redirect and click **Enable redirect** in the edit modal.\
• Use the **toggle in the table** to enable the redirect directly.

Once enabled, the redirect moves to the **Live** tab and immediately starts routing visitors.

### Import redirects from a CSV

Click **Add redirect** and choose **Upload CSV**.

Upload a CSV with the columns `source`, `destination`, and optional `intent`.

* `source` is the path you want to redirect, for example /docs/site-redirects
* `destination` can be:
  * a specific page, using the page’s admin URL as shown in the screenshot below
  * an external URL
  * empty, depending on the intent
* `intent` can be:
  * live, left blank, or omitted entirely, to create, update, or remove a live redirect
  * draft to create, update, or remove a draft redirect
  * publish to publish an existing draft redirect to live, `destination` must be empty.

<div data-with-frame="true"><figure><img src="/files/KDbBKHlGoiX5h94pRpw6" alt=""><figcaption><p>You can find the GitBook admin URL for a page in this menu</p></figcaption></figure></div>

A maximum of 500 rows is supported per import.

If your CSV includes duplicate source values, only the first row is processed. The import runs as an upsert: existing redirects with the same source are updated, and new redirects are created for sources that don’t exist yet.

If any rows fail, an error CSV is available from the bottom-right toast. It includes source, destination, and a short explanation of each error so you can fix, delete the errors column and re-import.

#### CSV Examples

| source               | destination                | intent  | Result                                      |
| -------------------- | -------------------------- | ------- | ------------------------------------------- |
| /docs/site-redirects | <https://example.com/page> | blank   | Create or update a live redirect            |
| /docs/site-redirects | <https://example.com/page> | live    | Create or update a live redirect            |
| /docs/site-redirects | <https://example.com/page> | draft   | Create or update a draft redirect           |
| /docs/site-redirects | empty                      | blank   | Remove the live redirect                    |
| /docs/site-redirects | empty                      | live    | Remove the live redirect                    |
| /docs/site-redirects | empty                      | draft   | Remove the draft redirect                   |
| /docs/site-redirects | empty                      | publish | Publish the existing draft redirect to live |

## About automatic redirects

Whenever pages are moved or renamed, their canonical URL changes with them. In order to keep your content accessible, GitBook automatically creates a [HTTP 307](https://developer.mozilla.org/en-US/docs/Web/HTTP/Reference/Status/307) redirect from the old URL to the new one.

Every time a URL is loaded, GitBook resolves it through the following steps:

1. Site content is resolved to its canonical URL by following any of the automatically created redirects.
2. If the URL cannot be resolved, the URL is checked against [space-level redirects](/docs/getting-started/git-sync/content-configuration#redirects), defined in your repository's `.gitbook.yaml` file.
3. Finally, the URL is checked against site-level redirects, created via [the process above](#creating-redirects).


# Embed in your product

Embed your documentation in your product or website using the Docs Embed.

The Docs Embed is a powerful window into your product knowledge that you can add to any product or website. Users can ask questions to the [GitBook Assistant](/docs/ai-and-search/gitbook-ai-assistant), search your docs, or browse pages directly, without leaving your product. You can open the embed with a button, put it in any component you want, or control it completely programmatically.

<div data-with-frame="true"><figure><img src="/files/suxLXpBBcC0RXgHF9j0F" alt="Embed GitBook Assistant into your product or website"><figcaption><p>Embed your docs into your product or website</p></figcaption></figure></div>

## Overview

The Docs Embed can contain three tabs:

* **Assistant**: The [GitBook Assistant](/docs/ai-and-search/gitbook-ai-assistant) - an AI-powered chat interface to help users find answers
* **Search**: A search-focused surface for quickly finding pages and asking scoped questions
* **Docs**: A browser for navigating your documentation site

All tabs are enabled by default. If you set `tabs`, the embed shows only the tabs you list.

You can customize and override the default configuration with custom actions, tools, suggested questions, [Authenticated Access](/docs/site-access/authenticated-access), and more.

## Get started

{% stepper %}
{% step %}
**Prerequisites**

Before embedding your docs, ensure:

1. **Your docs are published** and accessible at a URL (e.g., `https://docs.company.com`).
2. **You have retrieved the embed script URL** from your site settings (Settings → AI & MCP → Embed).

{% hint style="info" %}
If you want to use the Assistant tab, [GitBook Assistant must be enabled](/docs/ai-and-search/gitbook-ai-assistant) for your docs site (Settings → AI & MCP).
{% endhint %}
{% endstep %}

{% step %}
**Implementation**

Use our skill to quickly implement GitBook Assistant into your product using your existing stack.

{% file src="/files/mcDIGLYgsZlaBs75S7k6" %}

Alternatively, continue reading through the docs for the approach that matches your setup:

<table data-view="cards"><thead><tr><th></th><th></th><th></th><th data-hidden data-card-target data-type="content-ref"></th></tr></thead><tbody><tr><td><i class="fa-code">:code:</i></td><td><strong>Standalone script tag</strong></td><td>Drop in a &#x3C;script> tag for the fastest setup, then customize its appearance</td><td><a href="/pages/ouLg49uGmmRI4GNPjfEd">/pages/ouLg49uGmmRI4GNPjfEd</a></td></tr><tr><td><i class="fa-box">:box:</i></td><td><strong>Node.js/NPM</strong></td><td>Install via NPM for server-side rendering or build-time control</td><td><a href="/pages/efDLEfySio5adqVBlQ9V">/pages/efDLEfySio5adqVBlQ9V</a></td></tr><tr><td><i class="fa-react">:react:</i></td><td><strong>React component</strong></td><td>Use prebuilt React components for seamless integration</td><td><a href="/pages/GH6SGgYGRjfMQZnvf1UP">/pages/GH6SGgYGRjfMQZnvf1UP</a></td></tr></tbody></table>

{% hint style="info" %}
If your docs use [Authenticated Access](/docs/site-access/authenticated-access), follow the steps in [how to set up the embed with authenticated docs](/docs/docs-site/embedding/using-with-authenticated-docs).
{% endhint %}
{% endstep %}

{% step %}
**Configuration**

* [Customizing the Embed](/docs/docs-site/embedding/configuration/customizing-docs-embed) – Add welcome messages, custom actions, and suggestions
* [Creating custom tools](/docs/docs-site/embedding/configuration/creating-custom-tools) – Connect Assistant to your product APIs
  {% endstep %}
  {% endstepper %}

## Further reading

For the complete API reference and source code, see the [`@gitbook/embed` package on GitHub](https://github.com/GitbookIO/gitbook/tree/main/packages/embed).


# Implementation


# Script tag

Learn how to add the Docs Embed widget to any website or web app using a single script tag

The simplest way to add Docs Embed to your website or app is with a standalone script that you include in your HTML. Each GitBook docs site provides a ready-to-use embed script that loads the widget automatically and connects it to your docs. This page tells you how to do that.

No SDK, build step, or framework integration is required. Just include the script and the widget appears on your page.

## Get started

{% stepper %}
{% step %}

#### Copy your embed script URL

Navigate to your docs site in the GitBook app, navigate to the **Settings** tab and then to **AI & MCP** and copy the embed script URL.

You can also build it manually:

```
https://YOUR_DOCS_DOMAIN/~gitbook/embed/script.js
```

Replace your `YOUR_DOCS_DOMAIN` with your real docs site’s domain.
{% endstep %}

{% step %}

#### Add the script to your HTML

Add the following tag in your page HTML. Put it inside `<head>` or just before `</body>`.

```html
<script src="https://YOUR_DOCS_DOMAIN/~gitbook/embed/script.js"></script>
<script>window.GitBook('show');</script>
```

{% endstep %}

{% step %}

#### If your docs require authentication

If your docs [are behind auth](/docs/site-access/authenticated-access), the script must include a signed JWT token.

Append it as a query parameter:

```html
<script src="https://YOUR_DOCS_DOMAIN/~gitbook/embed/script.js?jwt_token=YOUR_TOKEN"></script>
```

{% endstep %}

{% step %}

#### Verify

Reload your page.

The widget should appear in the bottom right corner.
{% endstep %}
{% endstepper %}

### Optionally configure the embed

You can customize the widget before displaying it. Call `configure` after loading the script and before calling `window.GitBook('show')`.

```html
<script src="https://YOUR_DOCS_DOMAIN/~gitbook/embed/script.js"></script>
<script>
  window.GitBook('configure', {
    button: {
      label: 'Ask',
      icon: 'assistant' // assistant | sparkle | help | book
    },
    trademark: false,
    tabs: ['assistant', 'search', 'docs'],
    actions: [
      {
        icon: 'circle-question',
        label: 'Contact support',
        onClick: () => window.open('https://support.example.com', '_blank')
      }
    ],
    greeting: {
      title: 'Welcome',
      subtitle: 'How can I help?'
    },
    assistantName: 'Support Copilot',
    closeButton: true,
    suggestions: [
      'What is GitBook?',
      'How do I get started?'
    ]
  });

  window.GitBook('show');
</script>
```

Using this method, you can customize the:

* Button label and icon
* Visible tabs inside the widget
* Custom action buttons
* Greeting title and subtitle
* Assistant name shown in the UI
* Close button inside the Assistant
* Suggested prompts shown to users.

Search is enabled by default. If you set `tabs`, list every tab you want to keep.

### Set the color scheme

By default, the embed follows the iframe's CSS `color-scheme`. This lets it inherit your app theme or the browser preference automatically.

If you want to force a mode, initialize the embed and pass `colorScheme` in `frameOptions`:

```html
<script src="https://YOUR_DOCS_DOMAIN/~gitbook/embed/script.js"></script>
<script>
  window.GitBook(
    'init',
    { siteURL: 'https://YOUR_DOCS_DOMAIN' },
    { colorScheme: 'dark' }
  );

  window.GitBook('show');
</script>
```

Use this pattern when you need frame-level options such as `colorScheme` or `visitor`.

### Control widget visibility

You can control visibility and state at runtime through the API.

```html
<script>
  // Make the widget visible
  window.GitBook('show');

  // Remove the widget from the page
  window.GitBook('hide');

  // Open the widget panel
  window.GitBook('open');

  // Close the widget panel
  window.GitBook('close');

  // Toggle open or closed
  window.GitBook('toggle');
</script>
```

This is useful when you want to connect the widget to your own UI triggers.

### Navigate and interact programmatically

You can drive the widget from your code to navigate, switch tabs, or send messages.

```html
<script>
  // Open a specific docs page inside the widget
  window.GitBook('navigateToPage', '/getting-started');

  // Switch to the assistant tab
  window.GitBook('navigateToAssistant');

  // Send a user message to the assistant
  window.GitBook('postUserMessage', 'How do I get started?');

  // Clear the current chat history
  window.GitBook('clearChat');
</script>
```

Typical uses for this functionality include:

* Adding a deep link to a docs page from your app
* Pre-filling a question
* Resetting the conversation between flows

### Load the embed script dynamically

If you only want to load the widget conditionally, or you need to attach an auth token at runtime, inject the script programmatically.

```html
<script>
  function loadGitBookEmbed() {
    var token = "" // Fill it with your JWT token if your site requires an auth
    var script = document.createElement('script');
    script.src = 'https://YOUR_DOCS_DOMAIN/~gitbook/embed/script.js'
      + token ? '?jwt_token=' + encodeURIComponent(token) : ';
    script.async = true;
    script.onload = function () {
      window.GitBook('show');
    };
    document.head.appendChild(script);
  }

  loadGitBookEmbed();
</script>
```

Use this pattern when the widget should load only after user action or feature flags

## API Reference

### Initialization

* `GitBook('init', options: { siteURL: string }, frameOptions?: { visitor?: {...}, colorScheme?: 'light' | 'dark' })` - Initialize widget with site URL and optional frame options

### Widget Control

* `GitBook('show')` - Show widget button
* `GitBook('hide')` - Hide widget button
* `GitBook('open')` - Open widget window
* `GitBook('close')` - Close widget window
* `GitBook('toggle')` - Toggle widget window

### Navigation

* `GitBook('navigateToPage', path: string)` - Navigate to a specific page in the docs tab
* `GitBook('navigateToAssistant')` - Navigate to the assistant tab

### Chat

* `GitBook('postUserMessage', message: string)` - Post a message to the chat
* `GitBook('clearChat')` - Clear chat history

### Configuration

* `GitBook('configure', settings: {...})` - Configure widget settings (see Configuration section below)
* `GitBook('unload')` - Completely remove the widget from the page

## Configuration Options

### `GitBook('configure')`

Most configuration options are available via `GitBook('configure', {...})`:

#### `tabs`

Override which tabs are displayed.

Search is enabled by default. If you set `tabs`, the embed shows only the tabs you list.

* **Type**: `('assistant' | 'search' | 'docs')[]`
* **Options**:
  * `['assistant', 'search', 'docs']` - Show all tabs
  * `['search', 'docs']` - Show search and docs only
  * `['docs']` - Show only the docs tab

#### `actions`

Custom action buttons rendered in the sidebar alongside tabs. Each action button triggers a callback when clicked.

**Note**: This was previously named `buttons`. Use `actions` instead.

* **Type**: `Array<{ icon: string, label: string, onClick: () => void }>`
* **Properties**:
  * `icon`: `string` - Icon name. Any [FontAwesome icon](https://fontawesome.com/search) is supported
  * `label`: `string` - Button label text
  * `onClick`: `() => void | Promise<void>` - Callback function when clicked

#### `greeting`

Welcome message displayed in the Assistant tab.

* **Type**: `{ title: string, subtitle: string }`

#### `assistantName`

Override the assistant name shown in the UI.

* **Type**: `string`
* **Max length**: `32` characters
* **Example**:

```javascript
window.GitBook('configure', {
  assistantName: 'Support Copilot'
});
```

#### `closeButton`

Display a close button inside the Assistant.

* **Type**: `boolean`
* **Example**:

```javascript
window.GitBook('configure', {
  closeButton: true
});
```

#### `suggestions`

Suggested questions displayed in the Assistant welcome screen.

* **Type**: `string[]`

#### `trademark`

Show or hide the GitBook trademark in the embed UI — including the Docs Embed footer and Assistant branding.

* **Type**: `boolean`
* **Default**: `true`
* **Example**:

```javascript
window.GitBook('configure', {
  trademark: false
});
```

#### `tools`

Custom AI tools to extend the Assistant. See [Creating custom tools](/docs/docs-site/embedding/configuration/creating-custom-tools) for details.

* **Type**: `Array<{ name: string, description: string, inputSchema: object, execute: Function, confirmation?: {...} }>`

#### `button`

Configure the widget button that launches the embed (standalone script only). This allows you to customize the label and icon of the button that appears in the bottom-right corner of your page.

* **Type**: `{ label: string, icon: 'assistant' | 'sparkle' | 'help' | 'book' }`
* **Properties**:
  * `label`: `string` - The text displayed on the button
  * `icon`: `'assistant' | 'sparkle' | 'help' | 'book'` - The icon displayed on the button
    * `assistant` - <i class="fa-gitbook-assistant">:gitbook-assistant:</i> Assistant icon
    * `sparkle` - <i class="fa-sparkle">:sparkle:</i> Sparkle icon
    * `help` - <i class="fa-circle-question">:circle-question:</i> Help/question icon
    * `book` - <i class="fa-book-open">:book-open:</i> Book icon

**Example:**

```javascript
window.GitBook('configure', {
  button: {
    label: 'Ask',
    icon: 'assistant'
  }
});
```

{% hint style="info" %}
**Note:** This option is only available when using the standalone script tag implementation. For React or Node.js implementations, you'll need to create your own button to trigger the embed.
{% endhint %}

### `frameOptions`

Some options are set on the frame instead of as configuration. Pass them in `frameOptions` when calling `GitBook('init', options, frameOptions)`.

#### `colorScheme`

Override the embed color scheme.

When omitted, the embed follows the iframe's CSS `color-scheme`, which lets it inherit the parent page or browser preference.

* **Type**: `'light' | 'dark'`
* **Example**:

```javascript
window.GitBook(
  'init',
  { siteURL: 'https://docs.company.com' },
  { colorScheme: 'dark' }
);
```

#### `visitor` (Authenticated Access)

Pass when initializing with `GitBook('init', options, frameOptions)`. Used for [Adaptive Content](/docs/site-access/adaptive-content) and [Authenticated Access](/docs/site-access/authenticated-access).

* **Type**: `{ token?: string, unsignedClaims?: Record<string, unknown> }`
* **Properties**:
  * `token`: `string` (optional) - Signed JWT token
  * `unsignedClaims`: `Record<string, unknown>` (optional) - Unsigned claims for dynamic expressions

## Common pitfalls

* **Script URL is incorrect** – Ensure you're using your actual docs URL, not the example `docs.company.com`.
* **Calling GitBook before script loads** – Wrap API calls in `script.onload` or place them after the script tag.
* **Authenticated docs not accessible** – If your docs require sign-in, you must provide the `visitor.token` when initializing. See [Using with authenticated docs](/docs/docs-site/embedding/using-with-authenticated-docs).
* **CORS or CSP errors** – Ensure your site's Content Security Policy allows loading scripts and iframes from your GitBook domain.
* **Widget not visible** – Check z-index conflicts with other elements on your page. The widget uses a high z-index by default.
* **Forgetting to initialize** – Make sure to call `GitBook('init', { siteURL: '...' })` before using other methods.


# Node.js/NPM

Integrate Docs Embed using the NPM package for full application-level control

If you need more control and want to work at the application level, you can install the GitBook embed package from npm. This approach is ideal for server-side rendering, build-time integration, or custom iframe management.

## Steps

{% stepper %}
{% step %}
**Install the package**

Add `@gitbook/embed` to your project:

```bash
npm install @gitbook/embed
```

For the complete API reference and source code, see the [`@gitbook/embed` package on GitHub](https://github.com/GitbookIO/gitbook/tree/main/packages/embed).
{% endstep %}

{% step %}
**Import the package**

In your application code, import the `createGitBook` function:

```javascript
import { createGitBook } from "@gitbook/embed";
```

Or using CommonJS:

```javascript
const { createGitBook } = require("@gitbook/embed");
```

{% endstep %}

{% step %}
**Initialize GitBook**

Create a GitBook instance with your docs site URL:

```javascript
const gitbook = createGitBook({
  siteURL: "https://docs.company.com",
});
```

{% endstep %}

{% step %}
**Create an iframe**

Generate an iframe element and set its source to the embed URL:

```javascript
const iframe = document.createElement("iframe");
iframe.src = gitbook.getFrameURL({
  visitor: {
    token: 'your-jwt-token', // Optional: for Adaptive Content or Authenticated Access
    unsignedClaims: { // Optional: custom claims for dynamic expressions
      userId: '123',
      plan: 'premium'
    }
  }
});
iframe.id = "gitbook-embed-container";
iframe.style.border = "none";
iframe.style.width = "100%";
iframe.style.height = "600px";
```

{% endstep %}

{% step %}
**Attach the frame**

Create a GitBook frame instance and mount it to your page:

```javascript
const frame = gitbook.createFrame(iframe);
document.getElementById("gitbook-embed-container").appendChild(iframe);
```

{% endstep %}

{% step %}
**Control the embed programmatically**

Use the frame instance to interact with the embed:

```javascript
// Navigate to a specific page in the docs tab
frame.navigateToPage("/getting-started");

// Switch to the assistant tab
frame.navigateToAssistant();

// Post a message to the chat
frame.postUserMessage("How do I get started?");

// Clear chat history
frame.clearChat();
```

{% endstep %}

{% step %}
**Configure the embed**

Configure the embed with customization options:

```javascript
frame.configure({
  trademark: false,
  tabs: ['assistant', 'search', 'docs'],
  actions: [
    {
      icon: 'circle-question',
      label: 'Contact Support',
      onClick: () => window.open('https://support.example.com', '_blank')
    }
  ],
  greeting: { title: 'Welcome!', subtitle: 'How can I help?' },
  assistantName: 'Support Copilot',
  closeButton: true,
  suggestions: ['What is GitBook?', 'How do I get started?'],
  tools: [/* ... */]
});
```

{% endstep %}

{% step %}
**Listen to events**

Register event listeners to respond to embed events:

```javascript
frame.on('close', () => {
  console.log('Frame closed');
});

// Unsubscribe when done
const unsubscribe = frame.on('navigate', (data) => {
  console.log('Navigated to:', data.path);
});
```

{% endstep %}
{% endstepper %}

## API Reference

### Client Factory

* `createGitBook(options: { siteURL: string })` → `GitBookClient`
* `client.getFrameURL(options?: { visitor?: {...}, colorScheme?: 'light' | 'dark' })` → `string` - Get the iframe URL with optional frame options
* `client.createFrame(iframe: HTMLIFrameElement)` → `GitBookFrameClient` - Create a frame client to communicate with the iframe

### Frame Client Methods

* `frame.navigateToPage(path: string)` → `void` - Navigate to a specific page in the docs tab
* `frame.navigateToAssistant()` → `void` - Switch to the assistant tab
* `frame.postUserMessage(message: string)` → `void` - Post a message to the chat
* `frame.clearChat()` → `void` - Clear chat history
* `frame.configure(settings: Partial<GitBookEmbeddableConfiguration>)` → `void` - Configure the embed
* `frame.on(event: string, listener: Function)` → `() => void` - Register event listener (returns unsubscribe function)

## Configuration Options

Most customization options are available via `frame.configure({...})`.

#### `tabs`

Override which tabs are displayed.

Search is enabled by default. If you set `tabs`, the embed shows only the tabs you list.

* **Type**: `('assistant' | 'search' | 'docs')[]`

#### `actions`

Custom action buttons rendered in the sidebar alongside tabs. Each action button triggers a callback when clicked.

**Note**: This was previously named `buttons`. Use `actions` instead.

* **Type**: `Array<{ icon: string, label: string, onClick: () => void }>`

#### `greeting`

Welcome message displayed in the Assistant tab.

* **Type**: `{ title: string, subtitle: string }`

#### `assistantName`

Override the assistant name shown in the UI.

* **Type**: `string`
* **Max length**: `32` characters

#### `closeButton`

Display a close button inside the Assistant.

* **Type**: `boolean`

#### `suggestions`

Suggested questions displayed in the Assistant welcome screen.

* **Type**: `string[]`

#### `trademark`

Show or hide the GitBook trademark in the embed UI — including the Docs Embed footer and Assistant branding.

* **Type**: `boolean`
* **Default**: `true`

#### `tools`

Custom AI tools to extend the Assistant. See [Creating custom tools](/docs/docs-site/embedding/configuration/creating-custom-tools) for details.

* **Type**: `Array<{ name: string, description: string, inputSchema: object, execute: Function, confirmation?: {...} }>`

### Frame URL options

Some options are passed to `getFrameURL({...})`.

#### `colorScheme`

Override the embed color scheme.

When omitted, the embed follows the iframe's CSS `color-scheme`, which lets it inherit the parent page or browser preference.

* **Type**: `'light' | 'dark'`

### `visitor` (Authenticated Access)

Pass to `getFrameURL({ visitor: {...} })`. Used for [Adaptive Content](/docs/site-access/adaptive-content) and [Authenticated Access](/docs/site-access/authenticated-access).

* **Type**: `{ token?: string, unsignedClaims?: Record<string, unknown> }`

## Common pitfalls

* **Forgetting to install the package** – Run `npm install @gitbook/embed` before importing.
* **Missing siteURL** – The `siteURL` option is required and must match your published docs site.
* **iFrame not rendering** – Ensure the parent container has sufficient width/height for the iframe to display.
* **Frame methods called before initialization** – Wait until `createFrame()` completes before calling frame methods.
* **Not unsubscribing from events** – Remember to call the unsubscribe function returned by `frame.on()` to prevent memory leaks.
* **Using old API methods** – Methods like `open()`, `close()`, `toggle()`, and `destroy()` are not available in the NPM package. Use the frame client methods instead.


# React

Use prebuilt React components to add the Docs Embed to your React application

For React projects, GitBook provides prebuilt components that make embedding your docs simple and idiomatic. The components handle state management, context, and lifecycle automatically.

## Steps

{% stepper %}
{% step %}
**Install the package**

Add `@gitbook/embed` to your React project:

```bash
npm install @gitbook/embed
```

For the complete API reference and source code, see the [`@gitbook/embed` package on GitHub](https://github.com/GitbookIO/gitbook/tree/main/packages/embed).
{% endstep %}

{% step %}
**Import the React components**

Import the `GitBookProvider` and `GitBookFrame` components:

```jsx
import {
  GitBookProvider,
  GitBookFrame,
} from "@gitbook/embed/react";
```

{% endstep %}

{% step %}
**Wrap your app with GitBookProvider**

Add the provider at the root of your component tree or where you need the embed:

```jsx
function App() {
  return (
    <GitBookProvider siteURL="https://docs.company.com">
      <YourAppContent />
    </GitBookProvider>
  );
}
```

{% endstep %}

{% step %}
**Add the GitBookFrame component**

Place the frame component where you want the embed to appear:

```jsx
function App() {
  return (
    <GitBookProvider siteURL="https://docs.company.com">
      <div className="app">
        <YourAppContent />
        <GitBookFrame
          visitor={{
            token: 'your-jwt-token', // Optional: for Adaptive Content or Authenticated Access
            unsignedClaims: { userId: '123' } // Optional: custom claims for dynamic expressions
          }}
        />
      </div>
    </GitBookProvider>
  );
}
```

{% endstep %}

{% step %}
**Customize the embed**

Pass configuration props to the frame component:

```jsx
<GitBookProvider siteURL="https://docs.company.com">
  <GitBookFrame
    trademark={false}
    tabs={['assistant', 'search', 'docs']}
    colorScheme="dark"
    greeting={{ title: 'Welcome!', subtitle: 'How can I help?' }}
    assistantName="Support Copilot"
    closeButton={true}
    suggestions={['What is GitBook?', 'How do I get started?']}
    actions={[
      {
        icon: 'circle-question',
        label: 'Contact Support',
        onClick: () => window.open('https://support.example.com', '_blank')
      }
    ]}
    tools={[/* ... */]}
    visitor={{
      token: 'your-jwt-token',
      unsignedClaims: { userId: '123' }
    }}
  />
</GitBookProvider>
```

If you omit `colorScheme`, the embed follows the iframe's CSS `color-scheme`. That lets it match your app theme automatically.
{% endstep %}

{% step %}
**Control the embed with the useGitBook hook**

Use the `useGitBook` hook to interact with the embed programmatically:

```jsx
import { useGitBook } from "@gitbook/embed/react";

function HelpButton() {
  const gitbook = useGitBook();
  const frameURL = gitbook.getFrameURL({ visitor: { token: '...' } });
  
  const handleNavigate = () => {
    const iframe = document.createElement('iframe');
    iframe.src = frameURL;
    const frame = gitbook.createFrame(iframe);
    frame.navigateToPage('/getting-started');
    frame.navigateToAssistant();
    frame.postUserMessage('How do I get started?');
  };

  return <button onClick={handleNavigate}>Get Help</button>;
}
```

{% endstep %}

{% step %}
**Conditionally render the embed**

Show the embed only when needed:

```jsx
function App() {
  const [showEmbed, setShowEmbed] = useState(false);

  return (
    <GitBookProvider siteURL="https://docs.company.com">
      <button onClick={() => setShowEmbed(true)}>Get Help</button>
      {showEmbed && <GitBookFrame />}
    </GitBookProvider>
  );
}
```

{% endstep %}

{% step %}
**Use with Next.js or server-side rendering**

Dynamically import the components to avoid SSR issues:

```jsx
import dynamic from "next/dynamic";

const GitBookProvider = dynamic(
  () => import("@gitbook/embed/react").then((mod) => mod.GitBookProvider),
  { ssr: false }
);

const GitBookFrame = dynamic(
  () => import("@gitbook/embed/react").then((mod) => mod.GitBookFrame),
  { ssr: false }
);
```

{% endstep %}
{% endstepper %}

## Props & Configuration

**GitBookProvider Props:**

| Prop       | Type        | Required | Default | Description                                                    |
| ---------- | ----------- | -------- | ------- | -------------------------------------------------------------- |
| `siteURL`  | `string`    | Yes      | N/A     | Your GitBook docs site URL (e.g., `https://docs.company.com`). |
| `children` | `ReactNode` | Yes      | N/A     | Child components to render within the provider.                |

**GitBookFrame Props:**

All configuration options can be passed as props to `<GitBookFrame>`. See the Configuration section below for available options.

| Prop            | Type                | Required | Default                          | Description                                     |
| --------------- | ------------------- | -------- | -------------------------------- | ----------------------------------------------- |
| `className`     | `string`            | No       | `null`                           | CSS class name to apply to the frame container. |
| `style`         | `object`            | No       | `{}`                             | Inline styles to apply to the frame container.  |
| `colorScheme`   | `'light' \| 'dark'` | No       | Inherits from CSS `color-scheme` | Override the embed color scheme.                |
| `assistantName` | `string`            | No       | `null`                           | Override the assistant name shown in the UI.    |
| `closeButton`   | `boolean`           | No       | `null`                           | Display a close button inside the Assistant.    |
| `visitor`       | `object`            | No       | `{}`                             | Authenticated access options (see below).       |

**useGitBook Hook:**

Returns a `GitBookClient` instance with the following methods:

* `getFrameURL(options?: { visitor?: {...}, colorScheme?: 'light' | 'dark' })` → `string` - Get the iframe URL
* `createFrame(iframe: HTMLIFrameElement)` → `GitBookFrameClient` - Create a frame client

The frame client provides:

* `navigateToPage(path: string)` → `void`
* `navigateToAssistant()` → `void`
* `postUserMessage(message: string)` → `void`
* `clearChat()` → `void`
* `configure(settings: {...})` → `void`
* `on(event: string, listener: Function)` → `() => void`

## Configuration Options

Configuration options are available as props on `<GitBookFrame>`:

### `tabs`

Override which tabs are displayed.

Search is enabled by default. If you set `tabs`, the embed shows only the tabs you list.

* **Type**: `('assistant' | 'search' | 'docs')[]`

### `colorScheme`

Override the embed color scheme.

When omitted, the embed follows the iframe's CSS `color-scheme`, which lets it inherit the parent page or browser preference.

* **Type**: `'light' | 'dark'`

### `actions`

Custom action buttons rendered in the sidebar alongside tabs. Each action button triggers a callback when clicked.

**Note**: This was previously named `buttons`. Use `actions` instead.

* **Type**: `Array<{ icon: string, label: string, onClick: () => void }>`

### `greeting`

Welcome message displayed in the Assistant tab.

* **Type**: `{ title: string, subtitle: string }`

### `assistantName`

Override the assistant name shown in the UI.

* **Type**: `string`
* **Max length**: `32` characters

### `closeButton`

Display a close button inside the Assistant.

* **Type**: `boolean`

### `suggestions`

Suggested questions displayed in the Assistant welcome screen.

* **Type**: `string[]`

### `trademark`

Show or hide the GitBook trademark in the embed UI — including the Docs Embed footer and Assistant branding.

* **Type**: `boolean`
* **Default**: `true`

### `tools`

Custom AI tools to extend the Assistant. See [Creating custom tools](/docs/docs-site/embedding/configuration/creating-custom-tools) for details.

* **Type**: `Array<{ name: string, description: string, inputSchema: object, execute: Function, confirmation?: {...} }>`

### `visitor` (Authenticated Access)

Used for [Adaptive Content](/docs/site-access/adaptive-content) and [Authenticated Access](/docs/site-access/authenticated-access).

* **Type**: `{ token?: string, unsignedClaims?: Record<string, unknown> }`

## Common pitfalls

* **Not wrapping with GitBookProvider** – The `GitBookFrame` requires a parent `GitBookProvider` to function.
* **Using with SSR without dynamic import** – The component uses browser APIs and must be dynamically imported in Next.js or other SSR frameworks.
* **siteURL not matching published docs** – Ensure the `siteURL` prop matches your live docs site URL exactly.
* **Calling useGitBook outside provider** – The `useGitBook` hook must be used within a component that's a child of `GitBookProvider`.
* **Multiple providers in the tree** – Avoid nesting multiple `GitBookProvider` instances, as this can cause context conflicts.
* **Using old component names** – The component is now `GitBookFrame`, not `GitBookAssistantFrame`.


# Authentication

Use the Docs Embed with sites that require authentication by passing visitor tokens or using authenticated access

If your GitBook documentation requires authentication (e.g., visitor authentication via OIDC, Auth0, or a custom backend), the embed cannot access your docs content unless the user's authentication token is provided.

There are two approaches:

1. **Pass the token directly** (recommended) - Initialize the embed with the visitor token
2. **Use cookie-based detection** - Check for the token in cookies before loading

## Approach 1: Pass token directly (Recommended)

When initializing the embed, pass the visitor token directly:

{% tabs %}
{% tab title="Standalone Script" %}

```html
<script src="https://docs.company.com/~gitbook/embed/script.js?jwt_token=your-jwt-token"></script>
<script>
  window.GitBook(
    "init",
    { siteURL: "https://docs.company.com" },
    { visitor: { token: "your-jwt-token" } }
  );
  window.GitBook("show");
</script>
```

{% endtab %}

{% tab title="NPM Package" %}

```javascript
import { createGitBook } from "@gitbook/embed";

const gitbook = createGitBook({
  siteURL: "https://docs.company.com",
});

const iframe = document.createElement("iframe");
iframe.src = gitbook.getFrameURL({
  visitor: {
    token: "your-jwt-token",
    unsignedClaims: { userId: "123", plan: "premium" },
  },
});
```

{% endtab %}

{% tab title="React Components" %}

```jsx
<GitBookProvider siteURL="https://docs.company.com">
  <GitBookFrame
    visitor={{
      token: "your-jwt-token",
      unsignedClaims: { userId: "123" },
    }}
  />
</GitBookProvider>
```

{% endtab %}
{% endtabs %}

{% hint style="info" %}
The Embed config API has not changed. Pass signed visitor tokens as `visitor.token`.

For authenticated sites, GitBook forwards this token to the site as `jwt_token` in the iframe/script URL. If you load the standalone script from an authenticated site, you must include `jwt_token` in the `<script src>` URL.
{% endhint %}

## Approach 2: Cookie-based detection

If your docs site stores the visitor token in cookies (as `gitbook-visitor-token`), you can check for it before loading the embed.

When a user signs in to your authenticated docs, GitBook stores a visitor token in their browser cookies under the key `gitbook-visitor-token`. The embed needs this token to fetch content from your docs.

**The flow:**

1. User signs in to your docs site
2. GitBook stores the visitor token in browser cookies
3. Your app checks for the token
4. If the token exists, load the embed and pass the token
5. If the token doesn't exist, prompt the user to sign in

{% tabs %}
{% tab title="Standalone Script" %}
**Copy-paste snippet**

Use this snippet to load the embed only after a user has signed in:

```html
<script>
  (function () {
    // Check for the visitor token in cookies
    function getCookie(name) {
      var value = "; " + document.cookie;
      var parts = value.split("; " + name + "=");
      if (parts.length === 2) return parts.pop().split(";").shift();
    }

    var token = getCookie("gitbook-visitor-token");

    if (!token) {
      console.warn("[Docs Embed] Please sign in to your docs first.");
      return;
    }

    // Token exists, load the embed
    var script = document.createElement("script");
    script.src =
      "https://docs.example.com/~gitbook/embed/script.js?jwt_token=" +
      encodeURIComponent(token);
    script.async = true;
    script.onload = function () {
      window.GitBook(
        "init",
        { siteURL: "https://docs.example.com" },
        { visitor: { token: token } }
      );
      window.GitBook("show");
    };
    document.head.appendChild(script);
  })();
</script>
```

{% hint style="warning" %}
Replace `docs.example.com` with your actual docs site URL.
{% endhint %}

**Alternative: Prompt users to sign in**

If the token is missing, you can prompt users to sign in:

```html
<script>
  (function () {
    function getCookie(name) {
      var value = "; " + document.cookie;
      var parts = value.split("; " + name + "=");
      if (parts.length === 2) return parts.pop().split(";").shift();
    }

    var token = getCookie("gitbook-visitor-token");

    if (!token) {
      // Redirect to docs or show a message
      alert("Please sign in to your docs to access help.");
      window.location.href = "https://docs.example.com";
      return;
    }

    // Load the embed with token
    var script = document.createElement("script");
    script.src =
      "https://docs.example.com/~gitbook/embed/script.js?jwt_token=" +
      encodeURIComponent(token);
    script.async = true;
    script.onload = function () {
      window.GitBook(
        "init",
        { siteURL: "https://docs.example.com" },
        { visitor: { token: token } }
      );
      window.GitBook("show");
    };
    document.head.appendChild(script);
  })();
</script>
```

{% endtab %}

{% tab title="NPM Package" %}
When using the NPM package, check for the token before initializing:

```javascript
import { createGitBook } from "@gitbook/embed";

function initializeEmbed() {
  // Check for token in cookies
  const getCookie = (name) => {
    const value = `; ${document.cookie}`;
    const parts = value.split(`; ${name}=`);
    if (parts.length === 2) return parts.pop().split(";").shift();
  };

  const token = getCookie("gitbook-visitor-token");

  if (!token) {
    console.warn("[Docs Embed] User must sign in first.");
    return null;
  }

  const gitbook = createGitBook({
    siteURL: "https://docs.example.com",
  });

  const iframe = document.createElement("iframe");
  iframe.src = gitbook.getFrameURL({
    visitor: { token: token },
  });
  const frame = gitbook.createFrame(iframe);

  document.getElementById("embed-container").appendChild(iframe);
  return frame;
}

initializeEmbed();
```

{% endtab %}

{% tab title="React Components" %}
For React apps, conditionally render the embed based on token presence:

```jsx
import { useEffect, useState } from "react";
import { GitBookProvider, GitBookFrame } from "@gitbook/embed/react";

function App() {
  const [token, setToken] = useState(null);

  useEffect(() => {
    // Check for token in cookies
    const getCookie = (name) => {
      const value = `; ${document.cookie}`;
      const parts = value.split(`; ${name}=`);
      if (parts.length === 2) return parts.pop().split(";").shift();
    };

    const visitorToken = getCookie("gitbook-visitor-token");
    setToken(visitorToken);
  }, []);

  if (!token) {
    return (
      <div>
        <p>Please sign in to access help.</p>
        <a href="https://docs.example.com">Sign in</a>
      </div>
    );
  }

  return (
    <GitBookProvider siteURL="https://docs.example.com">
      <YourAppContent />
      <GitBookFrame visitor={{ token: token }} />
    </GitBookProvider>
  );
}
```

{% endtab %}
{% endtabs %}

## Common pitfalls

* **Loading the embed before sign-in** – Always check for the token before loading the script or components, or pass the token directly when initializing.
* **Token not persisting across domains** – Cookies don't persist across different domains due to browser security policies. Your app and docs must be on the same domain or subdomain, or pass the token directly.
* **Token expired** – Tokens can expire. If the embed returns authentication errors, prompt users to sign in again.
* **Using wrong cookie name** – The token is stored as `gitbook-visitor-token`, not `gitbook-token` or other variations.
* **Not passing token to init/getFrameURL** – When using the cookie-based approach, make sure to pass the token to `GitBook('init', ..., { visitor: { token } })` or `getFrameURL({ visitor: { token } })`.

## Debugging

To verify the token is present, open your browser console and run:

```javascript
document.cookie.split(";").find((c) => c.includes("gitbook-visitor-token"));
```

If this returns `undefined`, the user hasn't signed in to your docs yet.

## Next steps

* [Customizing the Embed](/docs/docs-site/embedding/configuration/customizing-docs-embed) – Add welcome messages and actions
* [Creating custom tools](/docs/docs-site/embedding/configuration/creating-custom-tools) – Integrate with your product APIs
* [Docs Embed documentation](/docs/docs-site/embedding) – Complete embedding guide


# Configuration


# Customizing the Embed

Customize the experience when embedding Docs Embed into your product or app by setting welcome messages, actions, and more

After [adding Docs Embed to your website or app](/docs/docs-site/embedding/implementation), you can further customize the experience by adding actionable buttons to the sidebar, suggestions to nudge your users with contextual questions, tabs, and more.

### Customizing the button ([standalone](/docs/docs-site/embedding/implementation/script) only)

When using the [standalone script tag implementation](/docs/docs-site/embedding/implementation/script), you can customize the label and icon of the button that launches the embed widget.

{% hint style="info" %}
This button customization option is only available when using the [standalone script tag implementation](/docs/docs-site/embedding/implementation/script). For [React](/docs/docs-site/embedding/implementation/react) or [Node.js/NPM package](/docs/docs-site/embedding/implementation/nodejs) implementations, you'll need to create your own button to launch the embed.
{% endhint %}

```javascript
window.GitBook("configure", {
  button: {
    label: "Ask",
    icon: "assistant", // 'assistant' | 'sparkle' | 'help' | 'book'
  },
});
```

**Available icon options:**

* `assistant` - <i class="fa-gitbook-assistant">:gitbook-assistant:</i> Assistant icon (default)
* `sparkle` - <i class="fa-sparkle">:sparkle:</i> Sparkle icon
* `help` - <i class="fa-circle-question">:circle-question:</i> Help/question icon
* `book` - <i class="fa-book-open">:book-open:</i> Book icon

### Setting the color scheme

By default, the embed follows the iframe's CSS `color-scheme`. This lets it match your app theme or the browser preference automatically.

If you want to force a mode, pass `colorScheme` when you initialize the embed, build the frame URL, or render the React component. This is not part of `configure`.

{% tabs %}
{% tab title="Standalone script" %}

```javascript
window.GitBook(
  "init",
  { siteURL: "https://docs.company.com" },
  { colorScheme: "dark" }
);
```

{% endtab %}

{% tab title="Node.js/NPM" %}

```javascript
const iframeURL = gitbook.getFrameURL({
  colorScheme: "dark",
});
```

{% endtab %}

{% tab title="React" %}

```jsx
<GitBookFrame colorScheme="dark" />
```

{% endtab %}
{% endtabs %}

### Adding actions

Adding actions to the embed allows you to give users extra actions in the UI. Each action consists of a label, icon (from [Font Awesome](https://fontawesome.com/search?ip=brands%2Cclassic%2Cduotone)), and an `onClick` action that runs when the user clicks the action. Any actions you add will appear in the sidebar alongside tabs. Actions can control the Docs Embed itself or execute any code you'd like.

```javascript
window.GitBook("configure", {
  actions: [
    {
      label: "Contact Support",
      icon: "circle-question",
      onClick: () => {
        window.open("https://support.example.com", "_blank");
      },
    },
    {
      label: "Documentation",
      icon: "book",
      onClick: () => {
        window.open("https://docs.example.com", "_blank");
      },
    },
  ],
});
```

### Adding suggestions

You can add suggestions to the Assistant tab, which will show up as clickable prompts for your users to use when the Assistant loads.

```javascript
window.GitBook("configure", {
  suggestions: [
    "Help me get started with my new account",
    "How do I reset my password?",
    "What are your pricing plans?",
  ],
});
```

### Adding a greeting

Customize the welcome message displayed in the Assistant tab:

```javascript
window.GitBook("configure", {
  greeting: {
    title: "Welcome!",
    subtitle: "How can I help you today?",
  },
});
```

### Overriding the assistant name

Use `assistantName` to override the assistant name shown in the UI.

The value can contain up to 32 characters.

```javascript
window.GitBook("configure", {
  assistantName: "Support Copilot",
});
```

### Showing a close button

Use `closeButton` to display a close button inside the Assistant.

```javascript
window.GitBook("configure", {
  closeButton: true,
});
```

### Showing or hiding the trademark

Use `trademark` to show or hide the GitBook trademark in the embed UI — including the Docs Embed footer and Assistant branding.

```javascript
window.GitBook("configure", {
  trademark: false,
});
```

### Configuring tabs

Override which tabs are displayed. All tabs are enabled by default provided your site supports them. For example, if your site does not have the Assistant enabled, it will not be shown. If you set `tabs`, the embed shows only the tabs you list.

```javascript
window.GitBook("configure", {
  tabs: ["assistant", "search", "docs"], // Show all tabs
  // tabs: ["search", "docs"], // Show search and docs only
  // tabs: ['docs'], // Show only docs tab
});
```


# Connect to custom tools

Connect GitBook Assistant to any tool you can call from your app — especially support workflows

Custom tools let the GitBook Assistant inside the [Docs Embed](/docs/docs-site/embedding) run real actions.

You can connect it to *any* tool your app can access. That includes your backend APIs, third-party SDKs, and internal systems.

If your app can call it, the Assistant can call it.

Common examples:

* Create or update support tickets on behalf of the user
* Hand off to support by opening a support chat with a prefilled message

  <div data-gb-custom-block data-tag="hint" data-style="success" class="hint hint-success"><p><strong>Support handoff</strong> is a great way to get started with custom tools. It’s the fastest way to unblock users.</p></div>
* Trigger product actions (reset MFA, resend an invite, enable a feature flag)
* Look up account status in your backend
* Kick off workflows in tools like Jira, Linear, Slack, or Zendesk

{% hint style="info" %}
In addition to tools you define in the Embed config, the Assistant can also use any [MCP servers you set up](/docs/ai-and-search/mcp-servers-for-published-docs) in **Settings → AI & MCP**.
{% endhint %}

### Where tools run

The tool’s `execute` function runs in the same environment as your embed integration.

That usually means it runs in the user’s browser, inside your app.

So you can:

* Call your own backend endpoints
* Call any third-party SDK already loaded in your app (for example, Intercom)
* Open modals, deep links, or in-product UI

{% hint style="warning" %}
Avoid putting secrets in client-side code — call your backend instead.
{% endhint %}

### Add a tool

Define tools:

* Via `window.GitBook("configure", …)` for the [script tag](/docs/docs-site/embedding/implementation/script) implementation
* Via the `tools` prop for the [Node.js/NPM](/docs/docs-site/embedding/implementation/nodejs) package and [React](/docs/docs-site/embedding/implementation/react) components

{% hint style="info" %}
Tools aren’t the same as embed **actions**.

* Use **actions** for buttons the user clicks.
* Use tools when you want the Assistant to choose and run code.
  {% endhint %}

#### Tool template (resend an invite email)

Let’s look at an example:

```javascript
window.GitBook("configure", {
  tools: [
    {
      // Register the tool with a name and description.
      name: "resend_invite",
      description:
        "Resend an invite email when the user can’t find it or says it expired.",

      // The input schema is data that can be accessed in the execute function.
      inputSchema: {
        type: "object",
        properties: {
          email: {
            type: "string",
            description:
              "The email address to resend the invite to. If unknown, ask the user first.",
          },
        },
        required: ["email"],
      },

      // An optional confirmation button that shows before the execute function is run.
      confirmation: { icon: "paper-plane", label: "Resend invite?" },

      // The execute function is the function that will be called when the tool is used.
      execute: async (input) => {
        const { email } = input;

        const result = await fetch("/api/invites/resend", {
          method: "POST",
          headers: { "Content-Type": "application/json" },
          body: JSON.stringify({ email }),
        }).then((r) => r.json());

        return {
          // The output is passed back to the AI.
          output: {
            recipient: email,
            status: result.status ?? "success",
          },
          // The summary is shown to the user.
          summary: {
            icon: "check",
            text: "Resent the invite email.",
          },
        };
      },
    },
  ],
});
```

### How tools get used

Once you register tools, the Assistant can choose them automatically — based on the user’s question and your tool `description`.

If required fields are missing, the Assistant should ask follow-up questions.

If you add `confirmation`, the user must approve before the tool runs.

### Tool fields

* `name`: Unique identifier.
* `description`: The “when to use this” hint for the Assistant.
* `inputSchema`: JSON Schema for tool inputs.
* `confirmation` (optional): A confirmation button shown before the tool runs.
* `execute(input)`: Async function that runs the action.
  * Return `{ output, summary }`.
  * `output` goes back to the Assistant.
  * `summary` shows to the user.

#### Confirmation

Use `confirmation` when you want the user to approve an action. It helps prevent surprise side effects.

`confirmation` accepts:

* `label` (required): Button text.
* `icon` (optional): A [Font Awesome](https://fontawesome.com/search) icon name.

### Support workflow

Support is the highest-leverage use case for tools.

You can let the Assistant:

* Collect missing details
* Create a ticket in your system
* Open a human support channel with context prefilled

#### Template: open support chat with a prefilled message

Use this when you want a clean handoff to a human.

```javascript
window.GitBook("configure", {
  tools: [
    {
      name: "open_support_chat",
      description:
        "Open the support chat with a prefilled message so the user can contact support fast.",
      inputSchema: {
        type: "object",
        properties: {
          message: {
            type: "string",
            description:
              "The message to send to support. If missing, ask the user first.",
          },
        },
      },
      confirmation: { icon: "circle-question", label: "Open Support Chat" },
      execute: (input) => {
        // Close GitBook Assistant
        window.GitBook('close');
     
        // Examples:
        // - Intercom: Intercom('showNewMessage', input.message);
        // - Zendesk: zE('messenger', 'open');
        
        return {
          output: {
            status: "success",
          },
          summary: { icon: 'check', text: "Forwarded to support." },
        };
      },
    },
  ],
});
```

{% hint style="info" %}
Pair this with an always-visible **Contact Support** action in the embed sidebar. You can configure actions by following [Customizing the Embed](/docs/docs-site/embedding/configuration/customizing-docs-embed).
{% endhint %}

### Next steps

* Need the full embed API surface? See [API Reference](/docs/docs-site/embedding/configuration/reference).
* Want more UI controls (greeting, suggestions, actions)? See [Customizing the Embed](/docs/docs-site/embedding/configuration/customizing-docs-embed).


# API Reference

Learn more about the methods available to use when working with Docs Embed programmatically

Docs Embed provides different APIs depending on how you integrate it. This reference covers all available methods across integration methods.

## Method Comparison

| Method                    | Standalone Script                                            | NPM Package                           | React Components                     |
| ------------------------- | ------------------------------------------------------------ | ------------------------------------- | ------------------------------------ |
| **Initialize**            | `GitBook('init', options, frameOptions)`                     | `createGitBook(options)`              | `<GitBookProvider siteURL="...">`    |
| **Color scheme override** | `GitBook('init', options, { colorScheme })`                  | `client.getFrameURL({ colorScheme })` | `<GitBookFrame colorScheme="..." />` |
| **Get frame URL**         | ❌ (handled internally)                                       | `client.getFrameURL(options)`         | `useGitBook().getFrameURL(options)`  |
| **Create frame client**   | ❌ (handled internally)                                       | `client.createFrame(iframe)`          | `useGitBook().createFrame(iframe)`   |
| **Show/Hide widget**      | `GitBook('show')` / `GitBook('hide')`                        | ❌                                     | ❌                                    |
| **Open/Close window**     | `GitBook('open')` / `GitBook('close')` / `GitBook('toggle')` | ❌                                     | ❌                                    |
| **Navigate to page**      | `GitBook('navigateToPage', path)`                            | `frame.navigateToPage(path)`          | Via frame client                     |
| **Navigate to assistant** | `GitBook('navigateToAssistant')`                             | `frame.navigateToAssistant()`         | Via frame client                     |
| **Post message**          | `GitBook('postUserMessage', message)`                        | `frame.postUserMessage(message)`      | Via frame client                     |
| **Clear chat**            | `GitBook('clearChat')`                                       | `frame.clearChat()`                   | Via frame client                     |
| **Configure**             | `GitBook('configure', settings)`                             | `frame.configure(settings)`           | Props on `<GitBookFrame>`            |
| **Event listeners**       | ❌                                                            | `frame.on(event, listener)`           | Via frame client                     |
| **Unload**                | `GitBook('unload')`                                          | ❌                                     | ❌                                    |

## Standalone Script API

### Initialization

#### `GitBook('init', options, frameOptions)`

Initialize the widget with site URL and optional authenticated access.

**Parameters:**

* `options`: `{ siteURL: string }` - Your GitBook docs site URL
* `frameOptions`: `{ visitor?: { token?: string, unsignedClaims?: Record<string, unknown> }, colorScheme?: 'light' | 'dark' }` (optional) - Frame options

**Example:**

```javascript
window.GitBook('init', 
  { siteURL: 'https://docs.company.com' },
  { visitor: { token: 'your-jwt-token' }, colorScheme: 'dark' }
);
```

When omitted, `colorScheme` follows the iframe's CSS `color-scheme`.

### Widget Control

#### Show the widget

Display the GitBook widget if it has been hidden.

**Example:**

```js
window.GitBook("show");
```

#### Hide the widget

Hide the GitBook widget without unloading it.

**Example:**

```js
window.GitBook("hide");
```

#### Open the window

Open the Docs Embed window.

**Example:**

```js
window.GitBook("open");
```

#### Close the window

Close the Docs Embed window.

**Example:**

```js
window.GitBook("close");
```

#### Toggle the window

Toggle the Docs Embed window open or closed.

**Example:**

```js
window.GitBook("toggle");
```

#### Unload the widget

Completely remove the GitBook widget from your site.

**Example:**

```js
window.GitBook("unload");
```

### Navigation

#### `GitBook('navigateToPage', path)`

Navigate to a specific page within your GitBook docs by its path.

**Parameters:**

* `path` (string): The path to the page you want to navigate to

**Example:**

```javascript
// Navigate to the getting started guide
window.GitBook("navigateToPage", "/getting-started");

// Navigate to a specific API documentation page
window.GitBook("navigateToPage", "/api/authentication");

// Navigate to FAQ section
window.GitBook("navigateToPage", "/faq/billing");
```

#### `GitBook('navigateToAssistant')`

Navigate directly to the Assistant tab.

**Example:**

```javascript
// Switch to the assistant tab
window.GitBook("navigateToAssistant");

// You might use this in response to a button click
document.getElementById("help-button").addEventListener("click", () => {
  window.GitBook("navigateToAssistant");
});
```

### Chat

#### `GitBook('postUserMessage', message)`

Post a message to the chat as if the user typed it.

**Parameters:**

* `message` (string): The message to post to the chat

**Example:**

```javascript
// Send a predefined message
window.GitBook("postUserMessage", "How do I reset my password?");

// Send a message based on user action
function askAboutBilling() {
  window.GitBook("postUserMessage", "I have questions about my billing");
}

// Send a message with context
const userPlan = "premium";
window.GitBook(
  "postUserMessage",
  `I'm on the ${userPlan} plan and need help with advanced features`
);
```

#### `GitBook('clearChat')`

Clear all messages from the current chat session.

**Example:**

```javascript
// Clear the chat
window.GitBook("clearChat");

// Clear chat and start fresh conversation
function startNewConversation() {
  window.GitBook("clearChat");
  window.GitBook("postUserMessage", "Hello, I need help with a new issue");
}

// Clear chat when switching contexts
document.getElementById("new-topic").addEventListener("click", () => {
  window.GitBook("clearChat");
  window.GitBook("navigateToAssistant");
});
```

### Configuration

#### `GitBook('configure', settings)`

Configure the embed with customization options. See the [Configuration section](/docs/docs-site/embedding/implementation/script#configuration-options) for available options.

**Example:**

```javascript
window.GitBook('configure', {
  trademark: false,
  tabs: ['assistant', 'search', 'docs'],
  actions: [
    {
      icon: 'circle-question',
      label: 'Contact Support',
      onClick: () => window.open('https://support.example.com', '_blank')
    }
  ],
  greeting: { title: 'Welcome!', subtitle: 'How can I help?' },
  assistantName: 'Support Copilot',
  closeButton: true,
  suggestions: ['What is GitBook?', 'How do I get started?']
});
```

## NPM Package API

### Client Factory

#### `createGitBook(options)`

Create a GitBook client instance.

**Parameters:**

* `options`: `{ siteURL: string }` - Your GitBook docs site URL

**Returns:** `GitBookClient`

**Example:**

```javascript
import { createGitBook } from '@gitbook/embed';

const gitbook = createGitBook({
  siteURL: 'https://docs.company.com'
});
```

#### `client.getFrameURL(options)`

Get the iframe URL with optional authenticated access.

**Parameters:**

* `options`: `{ visitor?: { token?: string, unsignedClaims?: Record<string, unknown> }, colorScheme?: 'light' | 'dark' }` (optional)

**Returns:** `string`

**Example:**

```javascript
const iframeURL = gitbook.getFrameURL({
  colorScheme: 'dark',
  visitor: {
    token: 'your-jwt-token',
    unsignedClaims: { userId: '123', plan: 'premium' }
  }
});
```

#### `client.createFrame(iframe)`

Create a frame client to communicate with the iframe.

**Parameters:**

* `iframe`: `HTMLIFrameElement` - The iframe element

**Returns:** `GitBookFrameClient`

**Example:**

```javascript
const iframe = document.createElement('iframe');
iframe.src = gitbook.getFrameURL();
const frame = gitbook.createFrame(iframe);
```

### Frame Client Methods

#### `frame.navigateToPage(path)`

Navigate to a specific page in the docs tab.

**Parameters:**

* `path`: `string` - The path to the page

#### `frame.navigateToAssistant()`

Switch to the assistant tab.

#### `frame.postUserMessage(message)`

Post a message to the chat.

**Parameters:**

* `message`: `string` - The message to post

#### `frame.clearChat()`

Clear chat history.

#### `frame.configure(settings)`

Configure the embed. See the [Configuration section](/docs/docs-site/embedding/implementation/nodejs#configuration-options) for available options.

#### `frame.on(event, listener)`

Register an event listener.

**Parameters:**

* `event`: `string` - The event name
* `listener`: `Function` - The callback function

**Returns:** `() => void` - Unsubscribe function

**Example:**

```javascript
const unsubscribe = frame.on('close', () => {
  console.log('Frame closed');
});

// Later, unsubscribe
unsubscribe();
```

## React Components API

See the [React integration guide](/docs/docs-site/embedding/implementation/react) for component props and the `useGitBook` hook API.

`GitBookFrame` supports `assistantName`, `closeButton`, `colorScheme="light" | "dark"`, and the `visitor` prop for authenticated access.

`useGitBook().getFrameURL()` accepts the same `colorScheme` parameter as the NPM package.


# AI insights

See what your users are actually asking GitBook Assistant — and identify knowledge gaps where your docs fall short

{% hint style="info" %}
This feature is available on the [Ultimate site plan](https://www.gitbook.com/pricing).
{% endhint %}

AI insights shows what your visitors are asking and how effectively [GitBook Assistant](/docs/ai-and-search/gitbook-ai-assistant) responds using your content.

To open AI insights, click on **Insights** from your site’s overview.

#### AI insights dashboard

The AI insights dashboard gives you a snapshot of your site through four key metrics:

* **Savings:** Estimated effort saved through questions answered by GitBook Assistant
* **Questions:** The unique questions asked by visitors
* **Answered:** The percentage of questions successfully addressed
* **Topics:** Your content insights sorted by shared themes

Click any topic to open the topic detail view.

<figure><img src="/files/8A8qEdFDDitHji3CnlTq" alt=""><figcaption><p>AI insights screen.</p></figcaption></figure>

### Topics

The **Topics** view shows how individual topics perform over time and lists the questions related to each one.

<figure><img src="/files/foYkxphjUt7jXYKhOtxv" alt=""><figcaption><p>Topic detail view in AI insights.</p></figcaption></figure>

#### Questions in this topic

GitBook groups questions in a topic by **Type** or **Recency**. Use this to review recurring needs, spot documentation gaps, and understand whether your site is answering questions in that area successfully.

Click any question to open the question detail view.

### Questions

The **Questions** view shows how GitBook Assistant handled an individual visitor question and which content supported the response.

When you click a question, the detail view opens. At the top of the screen, you can review the question itself, how often visitors asked it, its type, and the topics it belongs to.

<figure><img src="/files/LqX0peM8Ic7b5x27P1Fh" alt=""><figcaption><p>Question detail view in AI insights.</p></figcaption></figure>

#### Conversations and answer quality

Below the summary, you can review the conversations tied to the question and see whether GitBook answered it fully, partially, or not at all. The conversation panel also shows the full Assistant exchange, including any follow-up questions and responses.

#### Sources and context

The sources section shows which pages, records, or [connected content](/docs/ai-and-search/connections) GitBook used to answer the question. Use this to verify the AI drew from the right content — and to find places where relevant pages exist but weren't surfaced.

### FAQ

<details>

<summary><strong>How do I use AI insights?</strong></summary>

AI insights gives your team an overview of how visitors interact with your documentation when searching for answers.

Filtering AI insights helps you identify content gaps. You can filter for:

* The questions visitors ask most often
* Questions visitors search for that don't have answers
* Topics your documentation doesn't cover

Addressing these gaps helps visitors find answers more quickly — and understand your product faster.

{% hint style="info" %}
Coming soon: We’re working on features to help your team fix your content gaps automatically, through [GitBook Agent](/docs/gitbook-agent/what-is-gitbook-agent).

See [Agent audit](/docs/gitbook-agent/agent-audit) to learn more.
{% endhint %}

</details>


# Site analytics

View analytics related to your published documentation’s traffic and usage

{% hint style="info" %}
This feature is available on [Premium and Ultimate site plans](https://www.gitbook.com/pricing).
{% endhint %}

Site analytics gives you information on the content you’ve published and how it performs. It’s split into different sections — **Traffic**, **Pages & feedback**, **Agent and LLMs**, **Search**, **Ask AI**, **Links**, **MCP**, and **OpenAPI**.

You can see a top-level overview of your analytics on the **Overview** tab of your site’s dashboard, with a globe that shows views in the last hour by location.

Click **Analytics** in the site header to open site analytics for your site.

{% hint style="info" %}
If you connect **Google Analytics**, your site can show a cookies notice. To remove it, open [**Site settings → Analytics cookie**](/docs/docs-site/site-settings#analytics-cookie) and disable or remove the **Google Analytics** integration.
{% endhint %}

<figure><img src="/files/CBKJfT5v7rLRfphJCilz" alt="A GitBook screenshot showing the site analytics dashboard"><figcaption><p>The site analytics dashboard.</p></figcaption></figure>

### Filters & groups

You can add filters or group your data to view it in specific ways. For example, you could look at search data within a specific site section, or filter your traffic data by country, device, browser and more.

By combining filters and groups, you can drill down in to precise analytics data to track the events that you are important to you.

### View by custom time periods

You can use the time filter <picture><source srcset="/files/5jbxDjfORqRZ8w1Ej45a" media="(prefers-color-scheme: dark)"><img src="/files/3yraFfrUvS7pZNIAUIsj" alt=""></picture> on the right of the **Analytics** screen to change the time period between the last 24 hours, 7 days, 30 days or 3 months.

To view the data over a custom time period, click **Custom range** to choose your custom time period in the calendar.

### Types of data

Site Analytics is split into seven sections, each focused on a specific data type.

#### Traffic

GitBook tracks page views to help you understand the popularity and reach of your content. Each time a user visits a page on your docs site, it is counted as a page view.

Page views are critical for assessing the effectiveness of your content strategy and optimizing your documentation based on user interest. It’s split up between different views and profiles, including countries, languages, browsers, and more.

{% hint style="success" %}
Throughout Site Analytics, you will see Events and Visitor metrics. **Events** indicate the total number of instances for any given category, while **Visitors** indicates the unique users performing the actions.

In the context of page views, Events would be total amount of page views, and Visitors would be the count of distinct users performing a page view.
{% endhint %}

#### Pages & Feedback

Pages & feedback allow you to see a high-level representation of how your users rate your content. You’ll see an overview of all of your site’s sections and variants, and after enabling [page rating](/docs/docs-site/site-settings#page-ratings-pro-and-enterprise-plans) in the **Customize** menu for a site, you can see each page’s average feedback rating.

If you want to use or analyze this data further outside of GitBook, click **Download CSV** to download a `.csv` file to your device.

You can also see a list of comments left from visitors who rate your pages, to get actionable insights on how your docs can be improved.

{% hint style="info" %}
**Why can’t I see any feedback data for my site?**\
We only display data for published sites with page ratings enabled. If your site is not published or does not have page ratings enabled, you won’t see any analytics data.
{% endhint %}

#### Agent & LLMs

Track traffic from LLMs, coding agents, and bots.

This view shows requests to `llms.txt`, `llms-full.txt`, and Markdown pages. You can also review which agents access your content most often.

#### Broken URLs

Broken URLs shows any incoming links from external sources that are resulting in a ‘Page not found’ error. These may be mistyped URLs, outdated links with no redirects, or spam links.

If a broken link points to a topic that exists somewhere else in your documentation, or you simply want to direct the traffic to your primary docs, you can set up [site redirects](/docs/docs-site/site-redirects) to point those visitors in the right direction.

#### Search

You can measure and improve your documentation by checking which keywords are used the most by users searching your documentation. This view allows you to see what keywords are performing the best, and which ones you could improve on.

The information here can be helpful for informing your content architecture, making certain parts of your documentation easier to find without search, or adding additional content to existing pages based on what your visitors are searching for.

#### Ask AI

The [Ask AI](/docs/creating-content/searching-your-content/gitbook-ai) section allows you to see what your users are asking for when using GitBook AI. This insight helps you identify common questions, uncover gaps in your documentation, and improve content to better meet user needs.

You can also see how users are rating the answers that AI gives to their questions. By looking at these queries and their ratings, you can refine your documentation structure, enhance discoverability, and identify areas that would benefit from more documented information.

#### Links

GitBook tracks links to help you understand how users interact with external resources in your documentation. This feature provides insights into external links, their domains, and their placement within your docs, such as in the header, footer, or sidebar. Analyzing link usage can help you optimize navigation, improve content accessibility, and refine your documentation strategy based on user engagement.

#### OpenAPI

The [OpenAPI](/docs/api-references/openapi) analytics view in GitBook provides insights into how users engage with your API documentation.

It tracks interactions such as endpoint views, parameter searches, and request explorations, helping you understand which parts of your API are most accessed and where users may need more clarity. These insights enable you to refine your documentation, improve developer experience, and ensure your API content is effectively meeting user needs.

#### MCP

See how your site content is being accessed through [MCP](/docs/ai-and-search/mcp-servers-for-published-docs) integrations. You can view MCP requests over time and see which bots and agents are accessing your site content.


# PDF export

Export a PDF copy of your GitBook content

### Allow readers to export a PDF version of your published content

{% hint style="info" %}
This feature is available on [Premium and Ultimate site plans](https://www.gitbook.com/pricing).
{% endhint %}

To enable or disable PDF export for visitors to your [published docs site](https://github.com/GitbookIO/public-docs/blob/main/collaboration/broken-reference/README.md), open the docs site’s dashboard, open the **Customization** tab, and navigate to **Configure → Page actions**. From there, you can toggle **Export as PDF** on or off.

This setting determines whether or not **readers of your published content can download it in PDF format**. This feature is only available for **Premium and Ultimate sites**.

### Export your own internal content as PDF

However you decide to configure your published docs sites, all logged-in members of an organization on a Pro or Enterprise can export a page — or an entire space — from your internal knowledge base as a PDF file.

{% hint style="warning" %}
Note that links across spaces are not currently supported when exporting internal content to PDF.
{% endhint %}

#### Export an individual page

1. Open the page you want to export, then open the page’s [Actions menu](/docs/resources/gitbook-ui#the-actions-menu)

   <picture><source srcset="/files/YjlF3Z9KMYv9aQiFzZKD" media="(prefers-color-scheme: dark)"><img src="/files/Zw9q37vPYF03vQIqywTy" alt="The Actions menu icon in GitBook"></picture>

   next to the page title.
2. Select **Export to PDF > Current page**.
3. Wait for the page to load, then click the **Print or save as PDF** button in the upper right to open your browsers Print menu.
4. From here, you can save the page as a PDF or open it in your PDF viewer using the typical process for your browser.

#### Export an entire space

1. Open the[ Actions menu](/docs/creating-content/content-structure)

   <picture><source srcset="/files/YjlF3Z9KMYv9aQiFzZKD" media="(prefers-color-scheme: dark)"><img src="/files/Zw9q37vPYF03vQIqywTy" alt="The Actions menu icon in GitBook"></picture>

   next to the page title and choose **Export as PDF > All pages**. Alternatively, open the space’s **Actions menu**

   <picture><source srcset="/files/HXFvPsjDqbaBEhpH0WKJ" media="(prefers-color-scheme: dark)"><img src="/files/NHMhGPTU1i5O6tIApq9t" alt="The Actions menu icon in GitBook"></picture>

   in the [space header](/docs/resources/gitbook-ui#space-header) and choose **Export as PDF** in the drop-down menu.\
   \
   \&#xNAN;*Note: This action is not available within a change request.*
2. Wait for the page to load, then click the **Print or save as PDF** button in the upper right to open your browsers Print menu.
3. From here, you can save the page as a PDF or open it in your PDF viewer using the typical process for your browser.


# Formatting your content

Format your content in various ways using the context menu or keyboard shortcuts

To format your text, simply select the words you want and choose one of the formats from the context menu — or format your text using a keyboard shortcut or through Markdown syntax.

{% hint style="info" %}
We’ve written these shortcuts using Mac keys. Use **Control** in place of **⌘ (Command)** on Windows or Linux operating systems. Check out our [keyboard shortcuts](/docs/resources/keyboard-shortcuts) section to see all the shortcuts for all operating systems.
{% endhint %}

### Bold

Keyboard shortcut: <kbd>⌘</kbd> + <kbd>B</kbd>

{% tabs %}
{% tab title="Markdown" %}

```markdown
**Bold**
```

{% endtab %}
{% endtabs %}

### Italic

Keyboard shortcut : <kbd>⌘</kbd> + <kbd>I</kbd>

{% tabs %}
{% tab title="Markdown" %}

```markdown
_Italic_
```

{% endtab %}
{% endtabs %}

### Strikethrough

Keyboard shortcut: <kbd>⇧</kbd> + <kbd>⌘</kbd> + <kbd>S</kbd>

{% tabs %}
{% tab title="Markdown" %}

```markdown
~~Strikethrough~~
```

{% endtab %}
{% endtabs %}

### Code

Keyboard shortcut: <kbd>⌘</kbd> + <kbd>E</kbd>

{% tabs %}
{% tab title="Markdown" %}

```markdown
`Code`
```

{% endtab %}
{% endtabs %}

### Link

Keyboard shortcut: <kbd>⌘</kbd> + <kbd>K</kbd>

When you add a link to text on your page, you’ll be prompted to provide the link. You can add any URL, but if you’re linking to another page or section in your space, we recommend [using a relative link](/docs/creating-content/formatting/inline#relative-links).

This is [a link to an external page](https://www.gitbook.com).

This is a [link to another page in this space](/docs/creating-content/blocks).

This is a [link to a section on this page](#code).

This is [a link that starts an email to a specific address](mailto:support@gitbook.com).

### Color and background color

Click the color icon in the context menu, and choose a color for the text or its background.

<mark style="color:orange;">This text is orange.</mark>

<mark style="background-color:orange;">This text background is orange.</mark>


# Inline content

Use the inline palette to add images, links, math & TeX, and more

<figure><img src="/files/tabkiZELLAHIyHmh3cfN" alt="A GitBook screenshot showing inline content options"><figcaption><p>Add inline elements to your content.</p></figcaption></figure>

The inline palette lets you quickly add extra content to your text block without moving your hands away from the keyboard. Simply hit `/` on any text block to open the inline palette. The forward slash will be replaced by the content you choose to insert.

## Annotations

With annotations, you can add extra context to your words without breaking the reader’s train of thought. You can use them to explain the meaning of a word, insert extra information, and more. Readers can hover over the annotated text to show the annotation above the text.

### Create an annotation

To create an annotation, select the text you would like to annotate and click the **Annotate** option in the context menu. Once you’ve written your annotation, click outside of it to continue writing in the text block.

### Markdown representation

You can write content as [Markdown footnotes](https://www.markdownguide.org/extended-syntax/#footnotes) to add them as annotations in GitBook. Footnote indicators should appear immediately after the word you wish to annotate; they should not appear after punctuation marks or other symbols.

```markdown
Here's a simple footnote[^1], and here's a longer one[^bignote].

[^1]: This is the first footnote.

[^bignote]: Here's one with multiple paragraphs and code.

    Indent paragraphs to include them in the footnote.

    `{ my code }`

    Add as many paragraphs as you like.
```

## Images

Inline images will sit alongside your text on the page.

By default, images are set to their original size with a maximum width of 300px. You can change the size by clicking the image to open the formatting palette, then choosing one of the three options:

1. **Inline size:** The image is proportionally sized to the font — great for icons and badges.
2. **Original size:** The image will remain inline at its original size, with a maximum width of 300 pixels.
3. **Convert to block:** This turns an inline image into a [image block](/docs/creating-content/blocks/insert-images), which is as wide as your content.

{% hint style="info" %}
[Image blocks](/docs/creating-content/blocks/insert-images) offer more options, including more sizes and the ability to add a caption — but will not appear inline with your text.
{% endhint %}

### Representation in Markdown

{% code overflow="wrap" %}

```markdown
Here is an inline image: <img src=".gitbook/assets/GitBook - Dark.jpg" alt="Dark version of GitBook logo" data-size="line">
```

{% endcode %}

## Emojis

You can add emojis by hitting `/` to open the inline palette. Alternatively, type `:` and a list of emojis will pop up directly in line — you can start typing the name of an emoji to narrow down the selection.

### Representation in Markdown

{% code overflow="wrap" %}

```markdown
:house:
:car:
:dog:
```

{% endcode %}

## Links

You can insert three different types of links:

* [Relative links](#relative-links)
* [Absolute links](#absolute-links)
* [Email address `mailto` links](#email-address-mailto-links)

### Relative links

Relative links are links created by linking to [pages](/docs/creating-content/content-structure/page) that already exist in your space. The advantage of using relative links is that if the page’s URL, name, or location changes, its reference will be kept up to date — so you’ll end up with fewer broken links.

Here’s how to insert a relative link:

1. Click somewhere in your paragraph where you want to insert the link, or select some text.
2. Hit / to open the inline palette and choose Link, click the **Link** button in the context menu, or hit **⌘ + K**.
3. Start typing the title of the page you want to link to.
4. Select the page from the drop-down search results.
5. Hit `Enter`.

### Absolute links

Absolute links are external links that you can copy and paste into your content. They’re great when you want to link to something outside your documentation.

To insert an absolute link:

1. Click somewhere in your paragraph where you want to insert the link, or select some text.
2. Hit / to open the inline palette and choose Link, click the **Link** button in the context menu, or hit **⌘ + K**.
3. Paste the URL you want to link to.
4. Hit `Enter`.

{% hint style="info" %}
**Why don't external links open in a new tab?**

When you add a link to an external site in your docs, it will open in the same tab.

GitBook follows this [W3C-recommended behavior](https://www.w3.org/TR/WCAG20-TECHS/G200.html) to support [accessibility](https://it.wisc.edu/learn/make-it-accessible/websites-and-web-applications/when-to-open-links-in-a-new-tab/) and ensure a consistent, inclusive experience for your readers.
{% endhint %}

### Email address mailto links

Email address `mailto` links are useful when you want your visitors to click on a link that will open up their default email client and fill in the `To` field with the email address of your link, so they can write an email to send.

Here’s how to insert an email address `mailto` link:

1. Click somewhere in your paragraph where you want to insert the link, or select some text.
2. Hit / to open the inline palette and choose Link, click the **Link** button in the context menu, or hit **⌘ + K**.
3. Paste or type `mailto:something@address.com`, replacing `something@address.com` with the email address you would like to use.
4. Hit `Enter`.

### Representation in Markdown

```markdown
[This is a relative link to another page in this space](../content-structure/page.md)
[This is an absolute link](https://www.gitbook.com/blog)
[This is a link](mailto:support@gitbook.com) to our support email address
```

## Math & TeX

Using this option, you can create an inline math formula in your content, like this: $$f(x) = x \* e^{2 pi i \xi x}$$. We use the [KaTeX](https://katex.org/docs/supported.html) library to render formulas.

{% hint style="info" %}
You can also insert [a block-level math formula](/docs/creating-content/blocks/math-and-tex) by opening the command palette in an empty block and choosing the second Math & TeX option.
{% endhint %}

### Representation in Markdown

```markdown
# Math and TeX block

$$f(x) = x * e^{2 pi i \xi x}$$
```

## Buttons

Buttons are a great way to highlight calls to action or add a search or Ask AI bar to your docs. You can use them to send readers somewhere, or help them find answers.

### Button actions

Buttons can do more than link to a URL. You can also turn a button into a search or ask GitBook Assistant bar — right from the page. These actions work on published pages, too — as you can see from the examples belo

You can configure the following actions:

#### **Add a link button**

Send readers to another page or an external URL:<a href="/pages/m6LOhkgWYpmL4u1LYydz" class="button primary" data-icon="gitbook-assistant">Learn more about Assistant</a>

#### **Add a search bar**

Open search with an optional preset query: <button type="button" class="button primary" data-action="search" data-icon="magnifying-glass">Search...</button>

#### **Add a Ask AI/GitBook Assistant bar**

Open [GitBook Assistant](/docs/ai-and-search/gitbook-ai-assistant) with an optional preset prompt: <button type="button" class="button primary" data-action="ask" data-icon="gitbook-assistant">Ask a question...</button>

#### **Add a disabled button**

Show a button that’s intentionally inactive:<a class="button primary">Inactive button</a>

### Create and configure a button

1. Type `/` and choose **Button**.
2. Click the button to open the **Label** menu.
3. Choose an action, then set the label and style.
4. Optional: add a preset search query or Assistant prompt.

### Styles

Link and inactive buttons have both primary and secondary styles. Here are a couple of examples:

<a href="https://app.gitbook.com/join" class="button primary">Sign up to GitBook</a> <a href="#annotations" class="button secondary">Go to top</a>

### Representation in Markdown

```markdown
<a href="https://app.gitbook.com" class="button primary">GitBook</a>
```

## Icons

Icons allow you to add extra visual indications to your site. You can add them inline to paragraphs, inside a card, or anywhere else you need to add some flair. They will use the visual style defined in your [customization settings](/docs/docs-site/customization/icons-colors-and-themes).

<i class="fa-facebook">:facebook:</i> <i class="fa-github">:github:</i> <i class="fa-x-twitter">:x-twitter:</i> <i class="fa-instagram">:instagram:</i>

Visit [Font Awesome](https://fontawesome.com/) to explore the different icons available.

### Representation in Markdown

```markdown
<i class="fa-github">:github:</i>
```

## Expressions

Expressions allow you to dynamically display content defined in a [variable](/docs/creating-content/variables-and-expressions). Expressions can be inserted from the `/` menu. Once inserted, clicking on the expression will bring up the expression editor, allowing you to reference and [conditionally format](https://developer.mozilla.org/en-US/docs/Web/JavaScript/Reference/Operators/Conditional_operator) your variable.


# Markdown

Write Markdown directly in the editor to easily create content using common syntax

<figure><img src="/files/EUNxpgkEg9iRcbpzhOAh" alt="An image containing the markdown logo"><figcaption><p>Write Markdown in GitBook.</p></figcaption></figure>

GitBook’s editor allows you to create formatted content using Markdown.

Markdown is a popular markup syntax that’s widely known for its simplicity. GitBook supports it as a keyboard-friendly way to write rich and structured text.

{% hint style="info" %}
You can learn more about Markdown itself by visiting [Common Mark](https://commonmark.org/help/).
{% endhint %}

### Text formatting <a href="#text-formatting" id="text-formatting"></a>

GitBook supports all the classic inline Markdown formatting:

| Formatting    | Markdown version  | Result            |
| ------------- | ----------------- | ----------------- |
| Bold          | `**bold**`        | **bold**          |
| Italic        | `_italic_`        | *italic*          |
| Strikethrough | `~strikethrough~` | ~~strikethrough~~ |
| Inline code   | `` `code` ``      | `code`            |

### Line breaks

Press `Enter` to start a new paragraph.

Press `Shift` + `Enter` to insert a soft line break in the same paragraph.

### Pasting Markdown

When pasting Markdown content directly into the editor, it’s important to use the **Paste and Match Style** option (typically <kbd>Shift</kbd> + <kbd>Cmd</kbd> + <kbd>V</kbd> on Mac or <kbd>Shift</kbd> + <kbd>Ctrl</kbd> + <kbd>V</kbd> on Windows).

If you use the standard Paste option for content copied from another editor or from the web, it may be inserted as a code block instead of formatted text.

### Titles

* Heading 1: `# A first-level title`
* Heading 2: `## A second-level title`
* Heading 3: `### A third-level title`

### Code blocks

` ```⏎ ` creates a new code block.

` ```py⏎ ` creates a new code block with Python syntax highlighting.

We use [Prism](https://github.com/PrismJS/prism) for syntax highlighting. Use [Test Drive Prism](https://prismjs.com/test.html#language=markup) to check supported languages.

If GitBook and Prism differ, we might be a version or two behind.

### Lists

GitBook automatically detects and creates ordered and unordered lists as you type.

* Begin a line with `-` or `*` to start an unordered bullet list.
* Begin a line with `1.` to start a numbered list.
* Begin a line with `- [ ]` to start a task list.

When writing lists, hit `Tab` to indent, and `Shift+Tab` to outdent.

### Quotes

Begin a line with `>` to create a block quote. If you select an entire paragraph from start to end, typing `>` will wrap the content in a block quote.

> This is a block quote.

### Dividers

Type `---` then hit `Enter` to create a divider on your page.

***

This is an example of a divider.


# Content structure

Create pages, spaces and collections

The structure of your content in GitBook is organized through pages, spaces and collections. Pages live inside of spaces, and collections are groups of spaces.

<table data-view="cards"><thead><tr><th></th><th></th><th data-hidden data-type="image">Cover image (dark)</th><th data-hidden data-card-target data-type="content-ref"></th><th data-hidden data-card-cover data-type="image">Cover image</th><th data-hidden data-card-cover-dark data-type="image">Cover image (dark)</th></tr></thead><tbody><tr><td><strong>Spaces</strong></td><td>Create a space to organize your documentation in one place.</td><td><a href="/files/YaGmUbXRgaRXXSDCxCOW">/files/YaGmUbXRgaRXXSDCxCOW</a></td><td><a href="/pages/moDj3PEk7p2zQgeFnQeb">/pages/moDj3PEk7p2zQgeFnQeb</a></td><td><a href="/files/8H91vCxYt417FwCXU47O">/files/8H91vCxYt417FwCXU47O</a></td><td><a href="/files/RT2KZj58Pwl5LQCVOPsY">/files/RT2KZj58Pwl5LQCVOPsY</a></td></tr><tr><td><strong>Pages</strong></td><td>Create pages to split up and edit the content in your documentation.</td><td><a href="/files/8YSQLnUUVs9loZUMYowy">/files/8YSQLnUUVs9loZUMYowy</a></td><td><a href="/pages/rQjvGxGcUeJWEOCurV8r">/pages/rQjvGxGcUeJWEOCurV8r</a></td><td><a href="/files/GZvdqpNfPrKZbQo8LIs6">/files/GZvdqpNfPrKZbQo8LIs6</a></td><td><a href="/files/WI0Nn32gFMXXWZWC6K5F">/files/WI0Nn32gFMXXWZWC6K5F</a></td></tr><tr><td><strong>Collections</strong></td><td>Create collections to group spaces together.</td><td><a href="/files/cNLtXHiB8iSgh246ZhSR">/files/cNLtXHiB8iSgh246ZhSR</a></td><td><a href="/pages/e9ggdMSZiVMkRxIMXuwb">/pages/e9ggdMSZiVMkRxIMXuwb</a></td><td><a href="/files/AOaOSF0tWX9LnAXvRmmm">/files/AOaOSF0tWX9LnAXvRmmm</a></td><td><a href="/files/JQsGLet62uI6oeAYtJe5">/files/JQsGLet62uI6oeAYtJe5</a></td></tr></tbody></table>


# Spaces

Organize the content you create and publish into spaces

A space is a project that lets you work on a collection of related pages. They allow you to write content, organize pages, add integrations and more.

<figure><img src="/files/NNOaQRDLubwclo6uuRHC" alt="A GitBook screenshot showing the spaces sidebar"><figcaption></figcaption></figure>

### Create a space

Click the **+** button next to the **Spaces** header in the sidebar and choose **New space** to create a new space. You can also create a new space inside a [collection](/docs/creating-content/content-structure/collection).

You can edit a space’s name by hovering over the name in the [space header](/docs/resources/gitbook-ui#space-header).

### Duplicate a space

To duplicate a space, open that space's **Action menu** <picture><source srcset="/files/YjlF3Z9KMYv9aQiFzZKD" media="(prefers-color-scheme: dark)"><img src="/files/Zw9q37vPYF03vQIqywTy" alt="The Actions menu icon in GitBook"></picture> in the sidebar and select **Duplicate**.

Duplicating a space will create a copy of the source space, in the same location (organization, collection, sub-collection, etc.).

{% hint style="warning" %}
Duplicating a space copies the content in the source space. It doesn't copy revisions or version history.
{% endhint %}

### Move a space

You can move a space by opening the space’s **Action menu** <picture><source srcset="/files/YjlF3Z9KMYv9aQiFzZKD" media="(prefers-color-scheme: dark)"><img src="/files/Zw9q37vPYF03vQIqywTy" alt="The Actions menu icon in GitBook"></picture> in the sidebar, selecting **Move space to…** and choosing a destination. Alternatively, you can drag and drop spaces in the sidebar to move or reorder them.\
\
You can move spaces between collections within the same organization, as long as you have an [admin role](/docs/collaboration/member-management/roles).

### Delete a space

You can delete a space by opening the space’s **Action menu** <picture><source srcset="/files/YjlF3Z9KMYv9aQiFzZKD" media="(prefers-color-scheme: dark)"><img src="/files/Zw9q37vPYF03vQIqywTy" alt="The Actions menu icon in GitBook"></picture> in the sidebar and selecting **Delete**.

{% hint style="warning" %}
**Deleted spaces can be restored from the Trash for up to 7 days**. After this, they will be permanently deleted.
{% endhint %}


# Pages

Add pages, page groups or external links — and learn about the options you have on each page

A page is the place where you can add, edit and embed content. Pages always live inside a [space](/docs/creating-content/content-structure/space), allowing you to group related content and create different sections for the topics or areas you’re covering.

When publishing your documentation, each space will be its own [docs site](/docs/docs-site/publish-a-docs-site) or [site section](/docs/docs-site/site-structure/site-sections), and the pages inside the space will all appear on that site.

### Table of contents

You can create as many pages as you need in a space. They’re all visible on the left sidebar of your screen in your space’s [table of contents](/docs/resources/gitbook-ui#table-of-contents). The table of content will appear in the same place when you publish your space, unless [you choose to hide it](#page-options).

{% hint style="info" %}

#### Docs site landing page

The first page in your table of contents is always your space's landing page, even if it's hidden from the table of contents.
{% endhint %}

### Create a new page

When in [live edit](/docs/collaboration/live-edits) mode or in a [change request](/docs/collaboration/change-requests), you can create a new page by clicking **Add new\...** > **Page** at the bottom of your table of contents. Alternatively, you can hover between pages in the table of contents and click the **+** icon that appears.

<figure><img src="/files/Sb2oXGodW3kfze2HqOyR" alt="A GitBook screenshot showing an empty page listed in the table of contents"><figcaption><p>An empty page in GitBook. You can see it listed in the table of contents on the left-hand side.</p></figcaption></figure>

### Can’t see the option to create a new page?

{% hint style="warning" %}
If [live edits](/docs/collaboration/live-edits) are disabled for your space, you’ll need to create or edit a [change request](/docs/collaboration/change-requests). Once you’re in a change request, the **New page** button (which allows you to create pages, page groups and links) will be available in the table of contents.

Alternatively, you may not have the correct [permissions](/docs/collaboration/member-management/permissions-and-inheritance) to edit a page.
{% endhint %}

### Organizing your content

There are three ways to organize your content in the table of contents:

#### Pages

A page has a title, and optional description, and an area where you can write and add any kind of content.‌

You can nest pages by dragging and dropping a page below an other in the table of contents. Doing this creates a **subpage**.

If you add subpages to an empty parent page, GitBook will automatically generate a ‘contents’ page with links to all the subpages in the published version of your docs.

{% hint style="info" %}
**Tip:** There’s no limit to page nesting, but we’d recommend you avoid more than three levels of nesting to avoid an overly-complex navigation.
{% endhint %}

When you change the title of a page, the page’s slug (the part at the very end of the URL, e.g. `/hello-world`) will also change — unless you’ve manually set the page’s slug previously.

You can change the title, link title and the slug of a page at any time by clicking opening the page’s **Action menu** <picture><source srcset="/files/YjlF3Z9KMYv9aQiFzZKD" media="(prefers-color-scheme: dark)"><img src="/files/Zw9q37vPYF03vQIqywTy" alt="The Actions menu icon in GitBook"></picture> and choosing **Edit title & slug**.

#### **Page link title**

If you want your page to have a longer SEO-friendly title while keeping a shorter title for your navigation entry and links, you can optionally define a link title.

Open the page’s **Action menu** <picture><source srcset="/files/YjlF3Z9KMYv9aQiFzZKD" media="(prefers-color-scheme: dark)"><img src="/files/Zw9q37vPYF03vQIqywTy" alt="The Actions menu icon in GitBook"></picture> and choose **Edit title & slug**. In the **Edit page** dialog, you'll find the option to enable and define a link title for that page.

If you're using Git Sync, the page link title is set in the `SUMMARY.md` file on the page link:

```markdown
# Table of contents

* [Page main title](page.md "Page link title")
```

{% hint style="info" %}
**Note:** Page link titles are used in the table of contents, the pagination buttons at the bottom of each page, and in any relative links you add to that page.
{% endhint %}

Page link titles are optional — if you don’t manually add one, your page will use the page’s standard title by default.

#### Page groups

With page groups, you can bring pages together into sections that cover related content.

You can create a new page group by clicking **Add new\...** > **Group** at the bottom of your table of contents.

Page groups can only live at the **top level** of the table of contents. You cannot nest page groups inside page groups.

To change the title and slug of a page group, click the **Action menu** icon <picture><source srcset="/files/YjlF3Z9KMYv9aQiFzZKD" media="(prefers-color-scheme: dark)"><img src="/files/Zw9q37vPYF03vQIqywTy" alt="The Actions menu icon in GitBook"></picture> next to the group title in the table of contents and choose **Rename**.

#### External links <a href="#external-links" id="external-links"></a>

You can also add links to your table of contents. Clicking them will take people directly to the linked content.

Create new external link by clicking **Add new\...** > **External link** at the bottom of your table of contents.

### Page icons and emojis

To improve visibility for readers when skimming your table of contents, you can add an optional icon or emoji to individual pages. The icon or emoji will appear in the table of contents, and next to the title at the top of the page.

To add an icon or emoji, click the **Add icon** button when hovering the page title, or the emoji button to the left of the title.

### Page options

In the **Page options** menu you can customize the look and feel of a selected page within a space, and control its visibility.

#### **Layout**

You can open the **Page options** <picture><source srcset="/files/tb21SaZbz1g0fv6lzP83" media="(prefers-color-scheme: dark)"><img src="/files/lp0LvnOwrkQTJcNAhoct" alt="The Page options menu icon in GitBook"></picture> menu or change a page’s cover by hovering over the page title. You’ll see the buttons appear just above the page title.

In the **Page options** side panel, you can select how each page is displayed to those who visit your **published** content. There are three layout presets to choose from, or you can create a custom layout.

Each layout preset will toggle on or off each of the following parts of the page:

* Page title
* Page description
* Table of contents
* Page outline
* Next/previous links
* Page metadata
* Tags

You can tag a page with one or more tags from **Library** → **Tags**. Turn on **Show tags on page** to display them in the page header. You can also pick one tag as the page’s primary tag. GitBook can show it next to the page in the table of contents. Learn more in [Tags](/docs/creating-content/content-structure/page/tags).

You can also set your page’s global width from this menu. Choosing **Wide** gives blocks such as tables, cards, and code blocks more space when the page is published. This is ideal for creating eye-catching landing pages.

#### Visibility

You can decide which pages you would like to show/hide in your published documentation, while also deciding if you would like the page to be indexed in your published doc’s search, and/or indexed by search engines.

You can hide a page or group of pages from your site's table of contents by opening the page’s **Actions menu** <picture><source srcset="/files/YjlF3Z9KMYv9aQiFzZKD" media="(prefers-color-scheme: dark)"><img src="/files/Zw9q37vPYF03vQIqywTy" alt="The Actions menu icon in GitBook"></picture> and toggling **Hide page**.

Hidden pages are only hidden from the published table of contents.

They remain available through the site’s MCP server and in `llms-full.txt`.

If hidden the following will appear in the front matter of the markdown file when using Git Sync:

<pre class="language-markdown" data-title="page.md"><code class="lang-markdown">---
hidden: true
<strong>---
</strong></code></pre>

{% hint style="warning" %}
Hiding **Page title** or **Page description** only hides the page header in published content. It doesn’t remove headings inside the page body. Learn more about heading levels in [Headings](/docs/creating-content/blocks/heading).
{% endhint %}

#### Metadata (SEO)

Use **Page options → Metadata** to control how search engines understand relationships between similar pages (for example: documentation versions or [content variants](/docs/docs-site/site-structure/variants)).

* **Canonical URL**: the preferred (authoritative) URL for this page. Search engines treat it as the ‘source of truth’. Use it when multiple URLs show the same content.
* **Alternate URLs**: other URLs for the same content in another variant. For example, another version or language. They help search engines group variants instead of treating them as duplicates.

Both fields support selecting another GitBook page (recommended) or entering an external URL.

{% hint style="info" %}
A common pattern for versioned docs is to set older pages to be canonical to the latest equivalent page (for example, `1.0` → `2.0`), and then list older versions as alternates on the latest page.
{% endhint %}

### Page covers

You can also set a page cover for each page of your documentation. When you click the **Page cover** <picture><source srcset="/files/m3pW0fk37zO88JKWr4U5" media="(prefers-color-scheme: dark)"><img src="/files/ubqew7sOx05nH5uA3JfX" alt="The Page cover icon in GitBook"></picture> option, a default cover will be added immediately. From here, you can:

* **Change the cover image**

  Hover over the page cover and click **Change cover**, then select or upload an image. Based on how we currently display page covers, 1990x480 pixels is the ideal size.
* **Reposition the cover image**

  Hover over the page cover and open the **Actions menu** <picture><source srcset="/files/YjlF3Z9KMYv9aQiFzZKD" media="(prefers-color-scheme: dark)"><img src="/files/Zw9q37vPYF03vQIqywTy" alt="The Actions menu icon in GitBook"></picture>. Click **Reposition**, then drag the image as you wish and click **Save**.
* **Remove the cover image**\
  Hover over the page cover and open the **Actions menu** <picture><source srcset="/files/YjlF3Z9KMYv9aQiFzZKD" media="(prefers-color-scheme: dark)"><img src="/files/Zw9q37vPYF03vQIqywTy" alt="The Actions menu icon in GitBook"></picture>, then click **Remove**.
* **Full width and hero width**\
  You can change the style of your page cover to span the full width of your screen or just the width of your content. Hover over the page cover and open the **Actions menu** <picture><source srcset="/files/YjlF3Z9KMYv9aQiFzZKD" media="(prefers-color-scheme: dark)"><img src="/files/Zw9q37vPYF03vQIqywTy" alt="The Actions menu icon in GitBook"></picture>, then choose your preferred option from the menu.


# Tags

Tags are reusable labels you can add to pages and update blocks — this page tells you how to create, add and manage tags

You can use tags to group related content, convey release states, mark outdated content, or in any other way that helps your readers scan your documentation.

{% hint style="info" %}
**Note:** Tags are currently in beta as we consider adding more features — including search functionality and color support. If there are specific features you want to see for tags, please [let us know in our GitHub community](https://github.com/GitbookIO/community)!
{% endhint %}

## Tag a page

Open the page, then open **Page options** — accessible by hovering over the page title — and add one or more tags. You can drag tags around to change the order in which they appear on the page.

### Show or hide tags on a page

By default, tags will be displayed at the top of the page. To hide a page’s tags while keeping the associated metadata:

* Open **Page options**
* Turn off **Show tags on page** to keep tags as metadata only

### Display a tag in the table of contents

For each page, you can pick one tag to display in the [table of contents](https://gitbook.com/docs/creating-content/content-structure/page#table-of-contents) — as you can see with this page. To choose which tag displays:

* Open **Page options**
* Under **Tags**, use the **Display in table of contents** dropdown to choose your tag.

## Tag an update block

Each individual [update block](/docs/creating-content/blocks/updates) can also have its own tags.

To add a tag to an update block, navigate to the update and click **Add tag** below the date. You can then use the tag picker to add, remove, or reorder tags.

## Manage tags in the Library

To view, create and manage tags for your space, open the **Library** from the [table of contents](/docs/creating-content/content-structure/page#table-of-contents) and choose **Tags**.

Each tag has:

* A **label** — what readers see
* A **slug** — a stable identifier
* An optional **icon** or **emoji**

## Tags in Markdown

If you use Git Sync, tags appear in the page frontmatter.

```yaml
---
description: "Tags are reusable labels you can add to pages and update blocks — this page tells you how to create, add and manage tags"
tags:
  - news
  - experiment
  - tag: beta
    primary: true
  - pro
---
```

Use a string for a standard tag.

Use `primary: true` on one tag to make it the page’s primary tag. GitBook can show that tag in the table of contents.

GitBook keeps the tag order from the list.


# Collections

Organize your spaces into folders

Collections are a way to group spaces together to make it easier for you to organize your content. With collections, you can:

* organize your content by similar topics or ideas
* manage space [permissions](/docs/collaboration/member-management/permissions-and-inheritance) at scale by allowing you to override the organization-level defaults.

### Create a collection

Click the **+** button next to the **Spaces** header in the sidebar to create a new collection. You can also create a collection or space within another collection from the collection’s main page.

### Move a collection

You can move a collection by opening the **Actions menu** <picture><source srcset="/files/YjlF3Z9KMYv9aQiFzZKD" media="(prefers-color-scheme: dark)"><img src="/files/Zw9q37vPYF03vQIqywTy" alt="The Actions menu icon in GitBook"></picture>, selecting **Move collection to…** and choosing a destination. Alternatively, you can drag and drop collections in the sidebar to move or reorder them.\
\
You can move collections into other collections — or even to other organizations, if you have an [admin role](/docs/collaboration/member-management/roles) in both.

### Nested collections

You can nest collections inside each other, creating a collection -> sub-collection -> space hierarchy.

Open a collection and you can click **New collection** from the collection’s main page to create a sub-collection.

To move one collection into another, click **Move collection to…** from the collection’s **Action menu** <picture><source srcset="/files/YjlF3Z9KMYv9aQiFzZKD" media="(prefers-color-scheme: dark)"><img src="/files/Zw9q37vPYF03vQIqywTy" alt="The Actions menu icon in GitBook"></picture> and then choose its new location. Alternatively, you can drag and drop the collection to its new location.

### How to delete a collection

You can delete a collection by opening its **Actions menu** <picture><source srcset="/files/YjlF3Z9KMYv9aQiFzZKD" media="(prefers-color-scheme: dark)"><img src="/files/Zw9q37vPYF03vQIqywTy" alt="The Actions menu icon in GitBook"></picture> and selecting **Delete**.

{% hint style="danger" %}
**Deleting a collection is final**, but spaces inside a deleted collection will move to the **Trash** and can be restored up to seven days after deletion. You can access the Trash from the bottom of the sidebar.
{% endhint %}


# Blocks

Add and edit blocks within your content

GitBook is a block-based editor, meaning you can add different kinds of blocks to your content — from standard text and images to interactive blocks. Your pages can include any combination of blocks you want, and there’s no limit to the number of blocks you can have on a page.

<figure><img src="/files/MNWX7498k8mPYo6bgjPF" alt="A GitBook screenshot showing the available content blocks"><figcaption><p>GitBook's built in content blocks.</p></figcaption></figure>

### Inserting a new content block

You can insert a new content block below an existing block using your mouse:

1. Hover over the block above the place you need the new content block.
2. Click on the `+` icon that appears on the left to open the insert palette.
3. Select the block you want from the drop-down menu to insert it.

Alternatively, on a new line, you can press `/` to launch the insert palette, which lists all the available blocks. You can scroll through the list to find the one you want, or use your keyboard to search for the block you want, navigate up and down the list, and insert it with `Enter`.

### Exiting a block

Some content blocks capture the editing cursor to allow you to add content in the context of that block. For example, when you’re writing in [a hint block](/docs/creating-content/blocks/hint), hitting `Enter` will add a new line within the hint block, rather than a new paragraph below.

When you are done, you can continue adding new content to the page either by inserting a new block using the `+` button to the left of your content, or by hitting **⌘ + Enter** on a Mac or **Ctrl + Enter** on a PC.

### Selecting blocks and interacting with selected blocks

You can select a single block by pressing the `Esc` key with the cursor in the block. You can also select multiple blocks by highlighting content within them and hitting `Esc`.

Once selected, you can:

* Select more blocks by clicking on them while keeping the **Shift ⇧** key pressed.
* Moving up and down to select the block above or below, using the **↑** and **↓** keys
* Copy the entire block using **⌘ + C** (Mac) or **Ctrl + C** (Windows)
* Cut the entire block using **⌘ + X** (Mac) or **Ctrl + X** (Windows)
* Delete the selected block or blocks using **⌫** or **Del**.


# Paragraphs

Add a paragraph block to insert formatted text, inline images and more

A paragraph is the most basic content block you can use on GitBook.

{% hint style="info" %}
You can [add other inline content](/docs/creating-content/formatting/inline) to your paragraph, such as emojis, images and Math & TeX.

You can also [format your text](/docs/creating-content/formatting) using the context menu or keyboard shortcuts, or using [Markdown](/docs/creating-content/formatting/markdown).
{% endhint %}

### Example of a paragraph

Professionally printed material in English typically does not indent the first paragraph, but indents those that follow. For example, Robert Bringhurst states that we should “set opening paragraphs flush left.”

### Representation in Markdown

Because a paragraph block is just text, that’s how it’s represented in Markdown.

{% code overflow="wrap" %}

```markdown
Professionally printed material in English typically does not indent the first paragraph, but indents those that follow. For example, Robert Bringhurst states that we should “set opening paragraphs flush left.”
```

{% endcode %}


# Headings

Add heading blocks to a page to organize your content and improve SEO

Headings help give your documents structure — and using keywords in headings will also help search engines understand that structure, which can help your page rank higher in search results.

GitBook offers three levels of headings. Heading levels 1 (H1) and 2 (H2) will appear in the [page outline](/docs/resources/gitbook-ui#page-outline).

### Anchor links

When you add a heading to a page, it creates an anchor link. You can then link directly to these specific sections, to point people to relevant information.

#### Link to an anchor

You can see anchor links in public content, or private content in read-only mode, by hovering over the title and clicking the `#` that appears next to it. This will update the URL in your browser’s top bar, so you can copy it to use elsewhere.

If you want to link to a particular anchor from a page within your GitBook space, you can use a [relative link](/docs/creating-content/formatting/inline#relative-links), which will update if you change the heading to prevent the link from breaking.

#### Edit an anchor

By default, the anchor link will be identical to the text in your header. If you plan to link to that URL outside of GitBook, changing the header in future will break the anchor link. The link will then take visitors to the top of the page, rather than the anchor location.

To avoid this, you can manually set the anchor link by opening the **Options menu** <picture><source srcset="/files/QLUQj6waZRiK6FpSqrt6" media="(prefers-color-scheme: dark)"><img src="/files/mmXesAh49D5J1O4wUAyK" alt="The Options menu icon in GitBook"></picture> for the header, then choosing **Edit anchor**. You can then enter the anchor link you wish to use — this will remain the anchor even if you change the header itself.

### Representation in Markdown

GitBook generates SEO optimized pages, meaning page titles in GitBook are automatically represented in markdown as a first level heading:

```markdown
# I'm a page title
```

This means that if you [sync your content with Git](/docs/getting-started/git-sync), page headers added through the editor will be represented as one level lower:

{% code overflow="wrap" %}

```markdown
## My heading 1
### My heading 2
#### My heading 3
```

{% endcode %}

### Heading examples <a href="#example-of-a-heading" id="example-of-a-heading"></a>

## My heading 1

### My heading 2

#### My heading 3

{% hint style="info" %}
Page titles are separate from heading blocks in the page body. If you hide the page title in **Page options**, your H1, H2, and H3 headings still appear.
{% endhint %}


# Unordered lists

Add an unordered list block to create bullet point lists

Unordered lists are great for making a series of points that do not necessarily need to be made in a particular order. They are effectively bullet point lists, with support for nesting as needed.

When typing a list in GitBook, you can exit the list and start a new empty block below by hitting `Enter` twice.

### Example of unordered list

* Item
  * Nested item
    * Another nested item
  * Yet another nested item
* Another item
* Yet another item

{% hint style="info" %}
To create nested items, you can use **Tab** to indent and **⇧ + Tab** to outdent.
{% endhint %}

### Representation in Markdown

```markdown
- Item
   - Nested item
      - Another nested item
   - Yet another nested item
- Another item
- Yet another item
```


# Ordered lists

Add an ordered or numbered list to a page

Ordered lists, also called numbered lists, help you prioritize items or create a list of steps.

### Example of ordered list

1. Item 1
   1. Nested item 1.1
      1. Nested item 1.1.1
   2. Nested item 1.2
2. Item 2
3. Item 3

{% hint style="info" %}
To create nested items, you can use **Tab** to indent and **⇧ + Tab** to outdent.
{% endhint %}

### Representation in Markdown

```markdown
1. Item 1
   1. Nested item 1.1
      1. Nested item 1.1.1
   2. Nested item 1.2
2. Item 2
3. Item 3
```

### Adding an inline image to an ordered list

Adding images inside of ordered lists is possible in GitBook

If you want to add an image within an ordered list, add it using the insert menu, then on the row below the image type `3.` then hit `Space`, and the ordered list will continue.

1. Item 1
2. Item 2

<div align="left"><figure><img src="/files/TYWs6dVTtlupxjjGCrx4" alt="" width="375"><figcaption></figcaption></figure></div>

3. Item 3
4. Item 4


# Task lists

Add a task list to display tasks that can be completed

Task lists allow you to create a list of items with checkboxes that you can check or uncheck.

{% hint style="info" %}
**Note:** Readers of your published space will not be able to check or uncheck these boxes. You can decide which boxes are checked and unchecked when you create the content.
{% endhint %}

### Example of a task list

* [ ] Here’s a task that hasn’t been done
  * [x] Here’s a subtask that has been done, indented using `Tab`.
  * [ ] Here’s a subtask that hasn’t been done.
* [ ] Finally, an item, unindented using `shift` + `tab`.

### Representation in markdown

```markdown
- [ ] Here’s a task that hasn’t been done
  - [x] Here’s a subtask that has been done, indented using `tab`
  - [ ] Here’s a subtask that hasn’t been done.
- [ ] Finally, an item, unidented using `shift` + `tab`.
```


# Hints

Add a hint to a page to draw your reader’s attention to specific pieces of important information.

Hints, or callouts, are a great way to bring the reader’s attention to specific elements in your documentation, such as tips, warnings, and other important information.

There are four different hint styles — you can change the style by opening the block’s **Options menu** <picture><source srcset="/files/QLUQj6waZRiK6FpSqrt6" media="(prefers-color-scheme: dark)"><img src="/files/mmXesAh49D5J1O4wUAyK" alt="The Options menu icon in GitBook"></picture> and selecting the style you want. Each style uses a default icon, but you can customize the icon by clicking on it and choosing another one from [our icons set](/docs/creating-content/formatting/inline#icons).

Hint blocks support [inline content](/docs/creating-content/formatting/inline) and [formatting](/docs/creating-content/formatting), as well some specific block types. To see which block types you can use in a hint, hit `/` on an empty line and check the [insert palette](/docs/creating-content/blocks#inserting-a-new-content-block).

### Examples of hint blocks <a href="#example-of-a-hint" id="example-of-a-hint"></a>

{% hint style="info" %}
**Info hints** are great for showing general information, or providing tips and tricks.
{% endhint %}

{% hint style="success" %}
**Success hints** are good for showing positive actions or achievements.
{% endhint %}

{% hint style="warning" %}
**Warning hints** are good for showing important information or non-critical warnings.
{% endhint %}

{% hint style="danger" %}
**Danger hints** are good for highlighting destructive actions or raising attention to critical information.
{% endhint %}

{% hint style="info" icon="books" %}
This hint block has a custom icon.
{% endhint %}

{% hint style="info" %}

#### **This is a H2 heading**

This is a line

This is an inline <img src="/files/0b2C15Pewvq41XtJOPWG" alt="The Apple computer command icon" data-size="line"> image

* This is a second <mark style="color:orange;background-color:purple;">line using an unordered list and color</mark>
  {% endhint %}

To add a heading to your hint, you need to create a heading block as the the first block in the hint.

### Representation in Markdown

```markdown
{% hint style="info" %}
**Info hints** are great for showing general information, or providing tips and tricks.
{% endhint %}

{% hint style="success" %}
**Success hints** are good for showing positive actions or achievements.
{% endhint %}

{% hint style="warning" %}
**Warning hints** are good for showing important information or non-critical warnings.
{% endhint %}

{% hint style="danger" %}
**Danger hints** are good for highlighting destructive actions or raising attention to critical information.
{% endhint %}

{% hint style="info" icon="books" %}
This hint block has a custom icon.
{% endhint %}

{% hint style="info" %}
## This is a H2 heading

This is a line

This is an inline <img src="../../.gitbook/assets/25_01_10_command_icon_light.svg" alt="The Apple computer command icon" data-size="line"> image

- This is a second <mark style="color:orange;background-color:purple;">line using an unordered list and color</mark>
{% endhint %}
```


# Quotes

Add a quote block to a page to highlight copy you’re adding from elsewhere, or to draw attention to a specific part of your text

Quotes are useful when you want to include something from another source.

Start a quote by typing `>` followed by pressing `Space` in an empty paragraph, or use the[ insert palette](/docs/creating-content/blocks#inserting-a-new-content-block). You can also convert a paragraph block to a quote by highlighting the entire paragraph and hitting `>`.

### Example of a quote

> "No human ever steps in the same river twice, for it’s not the same river and they are not the same human." — *Heraclitus*

### Representation in Markdown

{% code overflow="wrap" %}

```markdown
> "No human ever steps in the same river twice, for it’s not the same river and they are not the same human." — _Heraclitus_
```

{% endcode %}


# Code blocks

Add a code block to a page to include sample code, configurations, code snippets and more

You can add code to your GitBook pages using code blocks.

When you add a code block, you can choose to [set the syntax](#set-syntax...), [show line numbers](#with-line-numbers), [show a caption](#with-caption), and [wrap the lines](#wrap-code). It’s also easy to [copy the contents of a code block to the clipboard](#copying-the-code), so you can use it elsewhere

A code block may be useful for:

* Sharing configurations
* Adding code snippets
* Sharing code files
* Showing usage examples of command line utilities
* Showing how to call API endpoints
* And much more!

### Add a code block

1. To add a code block, place your cursor on an empty line and type `/`.
2. In the quick insert menu, select **Code block**.
3. GitBook inserts the block and places your cursor inside it, ready for you to paste or type code.

### Example of a code block

{% code title="index.js" overflow="wrap" lineNumbers="true" %}

```javascript
‌import * as React from 'react';
import ReactDOM from 'react-dom';
import App from './App';

ReactDOM.render(<App />, window.document.getElementById('root'));
```

{% endcode %}

You can also combine code blocks with a [tabs block](/docs/creating-content/blocks/tabs) to offer the same code example in multiple different languages:

{% tabs %}
{% tab title="JavaScript" %}

```javascript
let greeting = function (name) {
  console.log(`Hello, ${name}!`);
};
greeting("Anna");
```

{% endtab %}

{% tab title="Ruby" %}

```ruby
greeting = lambda {|name| puts "Hello, #{name}!"}
greeting.("Anna")
```

{% endtab %}

{% tab title="Elixir" %}

```elixir
greeting = fn name -> IO.puts("Hello, #{name}!") end
greeting.("Anna")
```

{% endtab %}
{% endtabs %}

### Code block options <a href="#options" id="options"></a>

When you click on the **Options menu** <picture><source srcset="/files/QLUQj6waZRiK6FpSqrt6" media="(prefers-color-scheme: dark)"><img src="/files/mmXesAh49D5J1O4wUAyK" alt="The Options menu icon in GitBook"></picture> next to the code block, or the **Actions menu** <picture><source srcset="/files/YjlF3Z9KMYv9aQiFzZKD" media="(prefers-color-scheme: dark)"><img src="/files/Zw9q37vPYF03vQIqywTy" alt="The Actions menu icon in GitBook"></picture> in the block itself, you’ll see a number of options you can set.

#### Set syntax… <a href="#set-syntax" id="set-syntax"></a>

You can set the syntax in your code block to any of the supported languages. This will enable syntax highlighting in that language, too.

{% hint style="info" %}
We use [Prism](https://github.com/PrismJS/prism) for syntax highlighting. You can use [Test Drive Prism](https://prismjs.com/test.html#language=markup) to check which languages Prism supports. If you notice a mismatch between GitBook and Prism, there’s a chance we’re a version or two behind. We’ll catch up soon!
{% endhint %}

{% code title="filename.txt" %}

```
// Some code
```

{% endcode %}

#### With line numbers <a href="#with-line-numbers" id="with-line-numbers"></a>

This will toggle line numbers for your code on and off.

Showing line numbers is useful when the code represents the contents of a file as a whole, or when you have long code blocks with lots of lines. Hiding line numbers is useful for snippets, usage instructions for command line or terminal expressions and similar scenarios.

#### With caption

This will toggle a caption that sits at the top of the block, above your lines of code.

The caption is often the name of a file as shown in [our example above](#example-of-a-code-block), but you can also use it as a title, description, or anything else you’d like.

#### Wrap code

This will toggle code wrapping on and off, so long lines of code will wrap to all be visible on the page at once.

Wrapping lines is useful when your code is long and you want to avoid having the viewer scroll back and forth to read it. If you toggle **Wrap code** on, you may also want to show line numbers — this will make it easier to read the code and understand where new lines start.

#### Expandable

This will toggle showing the code in full (when the toggle is off) or a collapsed window of the code which the user can expand (when the toggle is on).

The collapsed view defaults to showing 10 lines of code with an button to expand to show the full code block. If there are less than 10 lines of code, all the content will be shown.

### Code block actions

As well as the options above, you can also change the language the code block displays, and copy your code instantly.

#### Copy the code <a href="#copying-the-code" id="copying-the-code"></a>

Hover over a code block and a number of icons will appear. Click the middle icon to copy the contents of the code block to your clipboard.

### Representation in Markdown

````markdown
{% code title="index.js" overflow="wrap" lineNumbers="true" %}

```javascript
‌import * as React from 'react';
import ReactDOM from 'react-dom';
import App from './App';

ReactDOM.render(<App />, window.document.getElementById('root'));
```

{% endcode %}
````


# Files

Manage and add files to your space such as PDFs, videos, documents and more

You can upload files to your GitBook space and add them to your page for people to view or download.

You can show some files, such as images and OpenAPI files, on the page itself for people to see without clicking anything. For others, such as PDFs, users will have to click to view or download it.

You can also optionally add a caption below any file you insert into your page to add more information if needed.

### Example of a file <a href="#example-of-a-file" id="example-of-a-file"></a>

{% file src="/files/JjxP2nmSa01O6lINhHqi" %}
This is a caption on a file.
{% endfile %}

### Uploading a file

You can manage uploaded files in the Files side panel of your space. You can find the Files panel at the top of your space’s table of contents.

To upload a file, drag and drop it into the **Drop your file or browse** section, or select it and use your system file dialog to select the file you want to upload.

{% hint style="warning" %}
GitBook allows you to upload files up to 100MB per file.
{% endhint %}

You can also add files to your space when you add an [image block](/docs/creating-content/blocks/insert-images) or an [OpenAPI block](/docs/api-references/openapi). When you create one of these blocks, the Files panel will open, so you can either select a file, or upload a new file.

{% hint style="info" %}
**Tip:** You can also drag and drop images from your file system directly into the editor — or paste a copied image into your content. GitBook will automatically add them to the Files side panel for the respective space, so you can view and manage them later.
{% endhint %}

### Renaming a file

To rename a file, open the **Actions menu** <picture><source srcset="/files/YjlF3Z9KMYv9aQiFzZKD" media="(prefers-color-scheme: dark)"><img src="/files/Zw9q37vPYF03vQIqywTy" alt="The Actions menu icon in GitBook"></picture> for the file, and click **Edit**. In the dialog prompt, enter the new name of your file.

### Deleting a file

To delete a file, open the **Actions menu** <picture><source srcset="/files/YjlF3Z9KMYv9aQiFzZKD" media="(prefers-color-scheme: dark)"><img src="/files/Zw9q37vPYF03vQIqywTy" alt="The Actions menu icon in GitBook"></picture> for the file and click **Delete**. After confirming in the dialog that you’re sure you want to delete the file, your file will be deleted.

{% hint style="warning" %}
**Note:** Make sure you update any pages that included your deleted file! File blocks that reference a deleted file will show an empty block, or *Could not load image* error.
{% endhint %}

### Replacing a file

If you have a file that simply needs updating to a new version, you can replace it. This will swap out the old file and put the new file in its place. Any blocks that previously referred to the old file will then refer to the new file.

To replace a file, open the **Actions menu** <picture><source srcset="/files/YjlF3Z9KMYv9aQiFzZKD" media="(prefers-color-scheme: dark)"><img src="/files/Zw9q37vPYF03vQIqywTy" alt="The Actions menu icon in GitBook"></picture> for the file and click **Replace**. In the file replacement dialog that appears, select the new file and wait for the upload indicator to complete. Your file will automatically update everywhere it appeared in your space.

This can be helpful if, for example, you’ve had a major product redesign and need to update outdated UI screenshots that appear on multiple pages. Replacing the original file would update the screenshot everywhere in your space, saving you time and effort.

{% hint style="info" %}
**Tip:** Once you’ve uploaded an image or a file, you can reference it anywhere in your space by creating an image or a file block and selecting it from the **Files** side panel.

We recommend you do this rather than uploading the image again every time you want to include it, to make it easier to replace images later and to avoid having multiple files with the same name.
{% endhint %}

### Representation in Markdown

```markdown
{% file src="https://example.com/example.pdf" %}
    This is a caption for the example file.
{% endfile %}
```


# Images

Add an image or a gallery of images to a page, add image variants for dark mode, and resize and align images to your needs

You can insert images into your page, then choose their size and whether to align them to the left, center, or right. You can also optionally include alt text and/or a caption on your image block.

{% hint style="info" %}
**Tip:** For accessibility purposes, we recommend setting alt text for your images.
{% endhint %}

### Example of an image block <a href="#example-of-an-image-block" id="example-of-an-image-block"></a>

<div align="center"><figure><img src="https://images.unsplash.com/photo-1446776709462-d6b525c57bd3?crop=entropy&#x26;cs=srgb&#x26;fm=jpg&#x26;ixid=M3wxOTcwMjR8MHwxfHNlYXJjaHwyfHxzcGFjZXxlbnwwfHx8fDE3MzMxOTY5NTR8MA&#x26;ixlib=rb-4.0.3&#x26;q=85" alt="A photograph taken from space looking back towards Earth. A satellite is in the foreground, and in the background is an ocean-covered part of our planet with patchy clouds."><figcaption><p>Example of an image block with a caption</p></figcaption></figure></div>

### Uploading an image

There are two ways to add images to your content:

1. Drag and drop the image from your file management system directly into an empty block on your page.
2. [Add an image block](/docs/creating-content/blocks#inserting-a-new-content-block) to your page and use the **Select images** side panel that appears on the right of the window.

If you follow the second process, you can choose to upload a file, select a previously-uploaded file, paste an image URL or add an image from [Unsplash](https://unsplash.com/) using the built-in search.

{% hint style="warning" %}
GitBook allows you to upload images up to 100MB per file.
{% endhint %}

#### Create an image gallery

Adding more than one image to an image block will create a gallery. To do this, open the block’s **Options menu** <picture><source srcset="/files/QLUQj6waZRiK6FpSqrt6" media="(prefers-color-scheme: dark)"><img src="/files/mmXesAh49D5J1O4wUAyK" alt="The Options menu icon in GitBook"></picture> and choose **Add images…** to open the **Select images** side panel again.

To delete an image from a gallery, open the **Edit menu** <picture><source srcset="/files/kN09oTFtAuyaxNIwWuCt" media="(prefers-color-scheme: dark)"><img src="/files/WNXq6RcD2e4WTRcZEz4f" alt=""></picture> on the image you want to delete and press the **Delete ⌫** key.

### Adding images for light & dark mode <a href="#light-and-dark-mode" id="light-and-dark-mode"></a>

You can set different images for the light and dark mode versions of your published site. GitBook will automatically display the correct image depending on the mode your visitor is in.

To add an image for dark mode, hover over your image, open the **Edit menu** <picture><source srcset="/files/kN09oTFtAuyaxNIwWuCt" media="(prefers-color-scheme: dark)"><img src="/files/WNXq6RcD2e4WTRcZEz4f" alt=""></picture> and click **Replace image** <picture><source srcset="/files/B8EhRVkFXw7nB8Q01UEZ" media="(prefers-color-scheme: dark)"><img src="/files/ahBs1tNYWMRjLRAFt57P" alt="The Replace image icon in GitBook"></picture>.

In the drop-down menu, choose **Add image for Dark mode**. Once you’ve set this, you can replace either image from this same menu.

{% hint style="warning" %}
**Note:** GitBook doesn’t currently support light and dark mode images for certain cases, including page covers or image covers on [cards](/docs/creating-content/blocks/cards).
{% endhint %}

### Light and dark mode images through GitHub/GitLab Sync <a href="#light-and-dark-mode-through-github-gitlab-sync" id="light-and-dark-mode-through-github-gitlab-sync"></a>

You can also add light and dark mode images in Markdown through HTML syntax (`<picture>` and `<source>`).

For block images, use the `<figure>` HTML element with a `<picture>` and `<source>` in it:

```html
Text before

<figure>
  <picture>
    <source
      srcset="
        https://user-images.githubusercontent.com/3369400/139447912-e0f43f33-6d9f-45f8-be46-2df5bbc91289.png
      "
      media="(prefers-color-scheme: dark)"
    />
    <img
      src="https://user-images.githubusercontent.com/3369400/139448065-39a229ba-4b06-434b-bc67-616e2ed80c8f.png"
      alt="GitHub logo"
    />
  </picture>
  <figcaption>Caption text</figcaption>
</figure>

Text after
```

For inline images (images that sit inline with text), use the `<picture>` HTML element with a `<source>` in it:

```html
Text before the image
<picture
  ><source
    srcset="
      https://user-images.githubusercontent.com/3369400/139447912-e0f43f33-6d9f-45f8-be46-2df5bbc91289.png
    "
    media="(prefers-color-scheme: dark)" />
  <img
    src="https://user-images.githubusercontent.com/3369400/139448065-39a229ba-4b06-434b-bc67-616e2ed80c8f.png"
    alt="The GitHub Logo"
/></picture>
and text after the image
```

{% hint style="warning" %}
**Note:** We don’t yet support [GitHub-only syntax](https://github.blog/changelog/2021-11-24-specify-theme-context-for-images-in-markdown/) through `#gh-dark-mode-only` or `#gh-light-mode-only`.
{% endhint %}

### Resizing

To resize your image, hover over it and open the **Edit menu** <picture><source srcset="/files/kN09oTFtAuyaxNIwWuCt" media="(prefers-color-scheme: dark)"><img src="/files/WNXq6RcD2e4WTRcZEz4f" alt=""></picture>. Click the **Size** button to change the size of your image from the available options.

<figure><img src="/files/4DSsoS8K3yYhJfjgIgdR" alt="A GitBook screenshot showing how to resize an image"><figcaption><p>Resize an image</p></figcaption></figure>

* **Small** – 25% of the image size
* **Medium** – 50% of the image size
* **Large** – 75% of the image size
* **Fit** – Removes all size specifications and displays either at full size or capped at a maximum width of **735** **pixels** for larger images.

If your image is wider than the editor, GitBook will limit the image’s width to the editor’s width instead, and resizing will be based on this limit.

{% hint style="info" %}
**Note:** When resizing images in an image gallery, the results can differ from resizing an individual image.
{% endhint %}

### Resizing images through Git Sync

If you want more control over the sizing of your image, you can specify the exact size using Markdown in GitHub or GitLab.

When we export an image, we use the HTML tag `<img/>`. As per the specifications, we can specify the dimensions of the image using the `width` and `height` attributes, which only accept values in pixels or a combination of a number and a `%` sign.\
\
Valid variants for specifying the image dimensions are:\
\
`<img width="100" />` Sets the image to 100 pixels wide\
`<img width="100%" />` Sets the image to full size (although this will be limited by the editor)

### Aligning images

By default, image blocks will show your image at its full size, aligned centrally.

To change the alignment of an image, open the block’s **Options menu** <picture><source srcset="/files/QLUQj6waZRiK6FpSqrt6" media="(prefers-color-scheme: dark)"><img src="/files/mmXesAh49D5J1O4wUAyK" alt="The Options menu icon in GitBook"></picture> and choose the alignment you want. This will only affect images that are narrower than the editor, or images you’ve [resized](#resizing).

### Framing images

You can add a frame to image blocks to give your images a consistent look and visually separate them from their surrounding content.

<div data-with-frame="true"><figure><img src="/files/Vww5NpUJ3V06GkWR37FP" alt="A black and white photograph of a lone figure walking across a stark white landscape"><figcaption><p>Framed images can have captions, and show a subtle grid behind the caption.</p></figcaption></figure></div>

To add a frame to an image, hover over it, open the block’s **Options menu** <picture><source srcset="/files/QLUQj6waZRiK6FpSqrt6" media="(prefers-color-scheme: dark)"><img src="/files/mmXesAh49D5J1O4wUAyK" alt=""></picture> and enable the **With frame** toggle.

{% hint style="info" %}
**Good to know:** You can only frame single images in a block. Image blocks that contain multiple images and inline images cannot have frames.
{% endhint %}

### Representation in Markdown

```markdown
//Simple Block
![](https://gitbook.com/images/gitbook.png)

//Block with Caption
![The GitBook Logo](https://gitbook.com/images/gitbook.png)

//Block with Alt text

<figure><img src="https://gitbook.com/images/gitbook.png" alt="The GitBook Logo"></figure>

//Block with Caption and Alt text

<figure><img src="https://gitbook.com/images/gitbook.png" alt="The GitBook Logo"><figcaption><p>GitBook Logo</p></figcaption></figure>

// Block with framed image

<div data-with-frame="true"><img src="https://gitbook.com/images/gitbook.png" alt="The GitBook Logo"></div>

//Block with different image for dark and light mode, with caption

<figure>
  <picture>
    <source srcset="https://user-images.githubusercontent.com/3369400/139447912-e0f43f33-6d9f-45f8-be46-2df5bbc91289.png" media="(prefers-color-scheme: dark)">
    <img src="https://user-images.githubusercontent.com/3369400/139448065-39a229ba-4b06-434b-bc67-616e2ed80c8f.png" alt="GitHub logo">
  </picture>
  <figcaption>Caption text</figcaption>
</figure>
```


# Embedded URLs

Embed videos, music and more directly into your page with a URL

To add an embedbed URL, simply paste the link of the content you want to embed and hit `Enter`.

{% hint style="info" %}
**Note:** The content you want to embed must be publicly available in order for GitBook to access the file. For example, when embedding a Google doc the share settings must be set to *Anyone with the link*.
{% endhint %}

### Videos

{% embed url="<https://www.youtube.com/watch?v=D_uLM5i0Z4c>" %}

{% hint style="info" %}
**Note:** You can choose to auto-play and loop YouTube and Vimeo embeds by adding `?autoplay=1&loop=1` to the end of your video’s URL.
{% endhint %}

### Codepen

{% embed url="<https://codepen.io/davidkpiano/pen/wMqXea>" %}

### Spotify

{% embed url="<https://open.spotify.com/track/4FmiciU3ZmfgABlbCSXcWw?si=65zMAhStT2ivTit-kZISWg>" %}

### Representation in Markdown

```markdown
{% embed url="URL_HERE" %}
```


# Tables

Keep information organized and make documenting data easier with tables

You can add tables to better organize your information in a GitBook page. You can see a sample of what is possible in the example table below:

<table data-full-width="false"><thead><tr><th>Company</th><th>Status<select><option value="36bef47f343d4588bc43db3e5c701796" label="In progress" color="blue"></option></select></th><th>Contact</th><th>MRR</th><th data-hidden>Contact</th><th data-hidden>MRR</th><th data-hidden>Status<select><option value="3e7a52c673ec4a01992566d18271f7a5" label="In progress" color="blue"></option><option value="2362fd3eafc7476fb8646ac754f34b72" label="Done" color="blue"></option></select></th></tr></thead><tbody><tr><td><strong>Ace AI</strong> – Design</td><td><span data-option="36bef47f343d4588bc43db3e5c701796">In progress</span></td><td><a href="mailto:noreply@gitbook.com">rena@ace.ai</a></td><td>$450</td><td><a href="mailto:noreply@gitbook.com">rena@ace.ai</a></td><td>$420</td><td><span data-option="3e7a52c673ec4a01992566d18271f7a5">In progress</span></td></tr><tr><td><strong>Discrete Data</strong> – API</td><td><span data-option="36bef47f343d4588bc43db3e5c701796">In progress</span></td><td><a href="mailto:noreply@gitbook.com">dave@dd.inc</a></td><td>$100</td><td><a href="mailto:noreply@gitbook.com">dave@dd.inc</a></td><td>$69</td><td></td></tr><tr><td><strong>Example Co</strong></td><td></td><td><a href="mailto:pete@example.com">pete@example.com</a></td><td>$50</td><td></td><td></td><td></td></tr></tbody></table>

### Table block options

When you open the Options menu to the left of a table block, you’ll have a number of options to change the appearance and manage the data inside the table:

* **Table/Cards:** Choose to display your data as either a table block or [a cards block](/docs/creating-content/blocks/cards). GitBook populates both these blocks using the same data, so you can switch between them depending on the look and design you want.
* **Add column:** Add a new column to the right of your table. You can choose column type using the menu, or just click **Add column** to add a text column.
* **Insert row:** Add a new row to the bottom of your table.
* **Show header:** Hide or show the top title row of your table.
* **Freeze header:** Keep the top row of your table visible on the page while you scroll through the rows below. This is useful for larger tables where you want the column titles to stay in view.
* **Freeze first column:** Keep the leftmost column of your table visible while horizontally scrolling through the columns to the right. This is useful for wider tables that overflow the page width, where you want the row labels or identifiers to stay in view.
* **Reset column sizing:** If you’ve changed the column widths, this will reset them all to be equal again.
* **Visible columns:** Choose which columns are visible and which are hidden. If you have hidden columns in your table, this menu is where you can make them visible again.
* **Delete:** Deletes the table block and all of it’s content.

### Changing a column type

Depending on the data you want to display, you can set table columns can have different data types. These add formatting, embellishments or restrictions to every cell in the column:

* **Text:** A standard text column, with standard formatting support.
* **Number:** A number column, with or without floating digits.
* **Checkbox:** A checkbox on each line that can be checked or unchecked.
* **Select:** You can select data from a list of options that you can define by opening the **Columns options** menu and choosing **Manage options**. This can be single-choice or multiple-choice.
* **Users:** You can add the name and avatar of a member of your organization. This can be single-choice or multiple-choice.
* **Files:** You can reference a file in the space. You can upload new files when populating cells in the column.
* **Rating:** A star rating. You can configure the maximum rating by opening the **Column options** menu and choosing **Max**.

Use the **Column options** menu to change a column’s type. When you change a column type, you’ll see a prompt asking you to confirm the change, as column data could be deleted or broken by this action.

### Resizing columns

Hover over a column’s edge and drag to resize it. A pixel count appears above the cursor to help you set consistent column sizes.

GitBook stores column sizes as a percentage of the overall width, which allows for relative sizing based on the overall width of the table.

### Scrolling tables

Tables that are wider than the editor container will be horizontally scrollable.

### Column options

To reorder columns, click and drag on the drag handle <picture><source srcset="/files/HXFvPsjDqbaBEhpH0WKJ" media="(prefers-color-scheme: dark)"><img src="/files/NHMhGPTU1i5O6tIApq9t" alt="The table drag handle icon in GitBook"></picture> at the top of the column you want to move.

You can add new columns by clicking the **Add column** button that appears when you hover over the right edge of the table.

Inside the **Column options** menu you can also switch automatic sizing on and off, add a new column to the right, hide the column, or delete the column.

### Row options

Hover over the row and click the **Row options** <picture><source srcset="/files/YjlF3Z9KMYv9aQiFzZKD" media="(prefers-color-scheme: dark)"><img src="/files/Zw9q37vPYF03vQIqywTy" alt="The Row options menu icon in GitBook"></picture> button that appears on the left of it to open the **Row options** menu. You’ll see a number of options:

* **Open row:** Open the row in a modal that shows all of its data. Here you can quickly change row types, edit data, and see data in hidden columns.
* **Insert above/below:** Add a new row above or below the currently-selected row.
* **Add column:** Add a new column on the right of the table.
* **Delete row:** Permanently remove all the data in the row from your table.

### Images in tables

When you click into a table cell, you can hit the / key to insert images. Images cannot be added to the header row of a table.

### Representation in Markdown

```markdown
# Table

|   |   |   |
| - | - | - |
|   |   |   |
|   |   |   |
|   |   |   |
```

<details>

<summary>Can I create nested tables in GitBook?</summary>

It's not possible to nest tables in GitBook. To ensure documents remain easy to write, reliable to render, and accessible for all users, GitBook keeps tables flat.

Once a table sits inside another table cell, it becomes difficult to edit, resize, navigate, or maintain consistent formatting across devices.

Nested tables also introduce significant complexity in the underlying document structure, often breaking clean semantics and leading to unpredictability in features such as Git Sync.

</details>


# Cards

Display information more dynamically with a set of cards — with or without images

You can use cards to create a visually pleasing page layout, combining text and images in a grid. They’re ideal for building landing pages or displaying any other content in a non-linear way.

You can adjust [switch between medium or large cards](#card-size) and link them to the relevant resources.

### Example of a card

<table data-view="cards"><thead><tr><th></th><th></th><th data-hidden data-card-target data-type="content-ref"></th><th data-hidden data-card-cover data-type="image">Cover image</th><th data-hidden data-type="image">Cover image (dark)</th><th data-hidden data-type="image">Cover image (dark)</th><th data-hidden data-card-cover-dark data-type="image">Cover image (dark)</th></tr></thead><tbody><tr><td><strong>GitBook homepage</strong></td><td>Visit our website and find out more about GitBook.</td><td><a href="https://www.gitbook.com/">https://www.gitbook.com/</a></td><td><a href="/files/QYueHfSoCIBfVtVewHzc">/files/QYueHfSoCIBfVtVewHzc</a></td><td><a href="/files/KnkfYgkg09HoBEsTSvno">/files/KnkfYgkg09HoBEsTSvno</a></td><td></td><td><a href="/files/KnkfYgkg09HoBEsTSvno">/files/KnkfYgkg09HoBEsTSvno</a></td></tr><tr><td><strong>Developer docs</strong></td><td>Build you own GitBook integration!</td><td><a href="https://developer.gitbook.com/">https://developer.gitbook.com/</a></td><td><a href="/files/E0kdUrJTlzpisarQS1EN">/files/E0kdUrJTlzpisarQS1EN</a></td><td></td><td><a href="/files/bUixHIAEp0eN14FD5yjX">/files/bUixHIAEp0eN14FD5yjX</a></td><td><a href="/files/bUixHIAEp0eN14FD5yjX">/files/bUixHIAEp0eN14FD5yjX</a></td></tr><tr><td><strong>Sign up to GitBook</strong></td><td>Click here to get started for free.</td><td><a href="https://app.gitbook.com/join">https://app.gitbook.com/join</a></td><td><a href="/files/oVPX37No5jwWdJjJ6R8P">/files/oVPX37No5jwWdJjJ6R8P</a></td><td></td><td></td><td><a href="/files/nGNQbAPi1b7xLU187PjQ">/files/nGNQbAPi1b7xLU187PjQ</a></td></tr></tbody></table>

### Adding links <a href="#adding-links-and-images-to-your-cards" id="adding-links-and-images-to-your-cards"></a>

Hover over a card and open its **Options menu** <picture><source srcset="/files/QLUQj6waZRiK6FpSqrt6" media="(prefers-color-scheme: dark)"><img src="/files/mmXesAh49D5J1O4wUAyK" alt="The Options menu icon in GitBook"></picture>. Here you can add a target link, so users can jump directly to a location when they click the card.

{% hint style="success" %}
When creating cards, we recommend you use **target links instead of hyperlinks**. With a target link, your readers can click anywhere on the card to access the linked URL.
{% endhint %}

### Adding images

Hover over a card and open its **Options menu** <picture><source srcset="/files/QLUQj6waZRiK6FpSqrt6" media="(prefers-color-scheme: dark)"><img src="/files/mmXesAh49D5J1O4wUAyK" alt="The Options menu icon in GitBook"></picture>. Here you can add a cover image to your card. Alternatively, just click the **Add cover image** option on the card itself.

This will open the **Select file** modal. Here you can drag and drop a new image into this, or use an image file you’ve previously uploaded to your space.

#### Adding images for dark mode

You can also add cover images that will only show in dark mode.

To do this, open the card’s **Options menu** <picture><source srcset="/files/QLUQj6waZRiK6FpSqrt6" media="(prefers-color-scheme: dark)"><img src="/files/mmXesAh49D5J1O4wUAyK" alt=""></picture> and choose **Cover** > **Edit cover** > **Add cover for dark mode**. This will open the **Select file** modal, where you can drag and drop a new image or select a previously-uploaded image.

#### Choosing the right image size

GitBook will automatically crop landscape images to a 16:9 ratio on desktop and mobile. If the images you upload are portrait or have a 1:1 ratio, they will be cropped to 16:9 on desktop and display as square or portrait on mobile.

<figure><img src="/files/0bovkl3ues2XDv3omusO" alt="A GitBook screenshot showing card images on desktop"><figcaption><p>On desktop, all card images will display in a landscape 16:9 ratio, regardless of their dimensions. We recommend using the same dimensions for consistency.</p></figcaption></figure>

<figure><img src="/files/iXACbeWzg8NpORjZnthT" alt="A GitBook screenshot showing card images on mobile"><figcaption><p>On mobile, square or portrait images will displayed as shown on the left. Landscape images will be displayed as shown on the right.</p></figcaption></figure>

To keep things consistent across desktop and mobile, we recommend uploading all the images for your cards in a 16:9 format (e.g. 1920px x 1080px).

If you want your cards to adapt their layout depending on the screen size, we’d recommend uploading images with a 1:1 ratio, and the content of your image centered.

### Changing the size of cards

You can select the card size by opening the **Options menu** <picture><source srcset="/files/QLUQj6waZRiK6FpSqrt6" media="(prefers-color-scheme: dark)"><img src="/files/mmXesAh49D5J1O4wUAyK" alt="The Options menu icon in GitBook"></picture> to the left of your card block. The **Medium** option creates three cards in one horizontal line, while the **Large** option shows two larger cards on each line.

### Representation in Markdown

```markdown
<table data-view="cards">
  <thead>
    <tr>
      <th></th>
      <th></th>
      <th data-hidden data-card-target data-type="content-ref"></th>
      <th data-hidden data-card-cover data-type="files"></th>
    </tr>
  </thead>
  <tbody>
    <tr>
      <td><strong>Example title 1</strong></td>
      <td>Example description 1.</td>
      <td><a href="https://example.com">https://example.com</a></td>
      <td><a href="https://example.com/image1.svg">example_image1.svg</a></td>
    </tr>
    <tr>
      <td><strong>Example title 2</strong></td>
      <td>Example description 2.</td>
      <td><a href="https://example.com">https://example.com</a></td>
      <td><a href="https://example.com/image2.svg">example_image2.svg</a></td>
    </tr>
    <tr>
      <td><strong>Example title 3</strong></td>
      <td>Example description 3.</td>
      <td><a href="https://example.com">https://example.com</a></td>
      <td><a href="https://example.com/image3.svg">example_image3.svg</a></td>
    </tr>
  </tbody>
</table>
```


# Tabs

Add tabs so you can display large blocks of related information without creating a long, hard-to-navigate page

A tab block is a single block with the option to add multiple tabs.

Each tab can contain multiple other blocks, of any type. So you can add code blocks, images, integration blocks and more to individual tabs in the same tab block.

### Add or delete tabs

To add a new tab to a tab block, hover over the edge of a tab and click the `+` button that appears. To delete a tab, open the tab’s **Options menu** <picture><source srcset="/files/QLUQj6waZRiK6FpSqrt6" media="(prefers-color-scheme: dark)"><img src="/files/mmXesAh49D5J1O4wUAyK" alt="The Options menu icon in GitBook"></picture> then select **Delete**.

### Add, change, or delete tab item icons

To set an icon associated with a tab, open the tab's **Options menu** <picture><source srcset="/files/QLUQj6waZRiK6FpSqrt6" media="(prefers-color-scheme: dark)"><img src="/files/mmXesAh49D5J1O4wUAyK" alt="The Options menu icon in GitBook"></picture> then select **Set icon**. Select the icon from an icon picker.

To change an icon, open the tab's **Options menu** <picture><source srcset="/files/QLUQj6waZRiK6FpSqrt6" media="(prefers-color-scheme: dark)"><img src="/files/mmXesAh49D5J1O4wUAyK" alt="The Options menu icon in GitBook"></picture> then select **Change icon**. Then, select the icon from an icon picker.

To remove an icon, open the tab's **Options menu** <picture><source srcset="/files/QLUQj6waZRiK6FpSqrt6" media="(prefers-color-scheme: dark)"><img src="/files/mmXesAh49D5J1O4wUAyK" alt="The Options menu icon in GitBook"></picture> then select **Remove icon**.

### Example

Here is an example that lists instructions relevant to specific platforms:

{% tabs %}
{% tab title="Windows" icon="windows" %}
Here are the instructions for Windows
{% endtab %}

{% tab title="macOS" icon="apple" %}
Here are the instructions for macOS
{% endtab %}

{% tab title="Linux" icon="linux" %}
Here are the instructions for Linux
{% endtab %}
{% endtabs %}

### Representation in Markdown

```markdown
{% tabs %}

{% tab title="Windows" icon="windows" %} Here are the instructions for Windows {% endtab %}

{% tab title="macOS" icon="apple" %} Here are the instructions for macOS {% endtab %}

{% tab title="Linux" icon="linux" %} Here are the instructions for Linux {% endtab %}

{% endtabs %}
```


# Expandable

Add an expandable block to a page to keep your pages shorter, hide longer content, or create FAQs

Expandable blocks are helpful in condensing what could otherwise be a lengthy paragraph. They are also great in step-by-step guides and FAQs.

By default, expandable blocks will be collapsed on your published docs site. If you want an expandable block to be expanded by default, open the block’s **Options menu** <picture><source srcset="/files/QLUQj6waZRiK6FpSqrt6" media="(prefers-color-scheme: dark)"><img src="/files/mmXesAh49D5J1O4wUAyK" alt=""></picture> and choose **Expanded by default**.

### Example

<details open>

<summary>Step 1: Start using expandable blocks</summary>

To add an expandable block hit `/` on an empty block, or click the `+` on the left of the editor, and select **Expandable**.

Optionally, you can set expanded blocks to be **Expanded by default** in the block’s **Options menu** <picture><source srcset="/files/QLUQj6waZRiK6FpSqrt6" media="(prefers-color-scheme: dark)"><img src="/files/mmXesAh49D5J1O4wUAyK" alt=""></picture> — just like this block.

</details>

<details>

<summary>Step 2: Add content to your block</summary>

Once you’ve inserted an expandable block, you can add content to it — including lists and code blocks.

</details>

## Representation in Markdown

{% code overflow="wrap" %}

```markdown
# Expandable blocks

<details open>

<summary>Add your expandable title here</summary>

Add your expandable body text here. This expandable is expanded by default.

</details>

<details>

<summary>Add your expandable title here</summary>

Add your expandable body text here. This expandable is collapsed by default.

</details>
```

{% endcode %}

### Limitations

There are some limitations on which blocks you can create inside of an expandable block. You can check the full list by starting a new line in an expandable block and pressing `/` to bring up the insert palette.


# Stepper

Add a step-by-step guide to a page — perfect for guides, walkthroughs and technical troubleshooting processes

Stepper blocks let you break down a tutorial or guide into separate, but clearly linked steps. Each step can contain multiple different blocks, allowing you to add detailed information.

### Example

{% stepper %}
{% step %}

#### Add a stepper block

To add a stepper block, hit `/` on an empty line or click the `+` on the left of the editor and select **Stepper** from the insert menu.
{% endstep %}

{% step %}

#### Add some content

Once you’ve inserted your stepper block, you can start adding content to it — including code blocks, drawings, images and much more.
{% endstep %}

{% step %}

#### Add more steps

Click the `+` below the step numbers or hit `Enter` twice to add another step to your stepper block. You can remove or change the style of the step header or step body if you wish.
{% endstep %}
{% endstepper %}

## Representation in Markdown

<pre class="language-markdown"><code class="lang-markdown"><strong>## Example
</strong>


### Step 1 title
Step 1 text


### Step 2 title
Step 2 text


</code></pre>

### Limitations

There are some limitations on which blocks you can create inside of a stepper block — for example, you cannot add expandable blocks or another stepper block. See all the blocks you can add by starting a new line within a stepper block and pressing `/` to bring up the insert palette.


# Updates

Add one or more updates to a page — perfect for adding a changelog to your site

An updates block lets you add a changelog to any page. Each update has a date, optional tags, and supports any block content inside it — text, images, code blocks, lists, and more.

### Adding updates

Insert an updates block on any page. Once it's on the page, hover above or below an existing update to add another in sequence.

To change the date format, click the date in the block. You can display the full date, a shortened version, or numbers only (for example, 12/25/2025).

### Tags

Each update can have its own tags. Use the tag picker below the date to add, remove, or reorder them.

### RSS feed

Any page with an updates block automatically gets an RSS feed — no extra setup required.

Your readers can open the feed from the button at the top of the page, copy the URL, and add it to their preferred reader. New updates you publish are pushed to that reader automatically.

If a page doesn't have an updates block, it won't have an RSS feed. Adding one to the page is all you need to generate it.

#### Plan availability

The updates block is available on \[paid plans]. If you don't see the option to add an updates block, check that your plan includes access to it.

#### If your feed isn't appearing

If the RSS button isn't showing on a published page, confirm that the page includes at least one updates block. The feed is tied to the presence of that block — if it's missing, the feed won't generate. If the block is in place and the feed still isn't appearing, contact [GitBook support](https://www.gitbook.com/contact).

### Example

{% updates format="full" %}
{% update date="2025-12-25" tags="beta" %}

## A brand new update

Use this block to tell users about a new update. Add any additional blocks you need inside it — images, code, lists, and more.
{% endupdate %}
{% endupdates %}

{% code overflow="wrap" %}

```markdown
{% updates format="full" %}
{% update date="2025-12-25" tags="beta" %}
## A brand new update

This block is perfect for telling users all about a brand new update to your product. You can easily add other blocks within this update block, including images, code, lists and much more.
{% endupdate %}
{% endupdates %}
```

{% endcode %}


# Drawings

Create drawings within GitBook and add them to your page

You can create a drawing or sketch directly though GitBook using the integrated [Excalidraw](https://excalidraw.com/) editor, then add it right into your GitBook page.

To create a drawing, press `/` on an empty line to bring up the insert palette and choose **Drawing**. This will open a popover with Excalidraw tools — simply close the popover when you’re done and your diagram will appear on your GitBook page.

GitBook stores drawings as special SVG files in the space. Those files have an extension of `drawing.svg`.

### Example of a drawing block

<img src="/files/VgD87O7uQ5Qi6lLCWTWA" alt="A diagram drawn in GitBook" class="gitbook-drawing">

### Draw with GitBook AI

{% hint style="info" %}
This feature is available on [Pro and Enterprise plans](https://www.gitbook.com/pricing).
{% endhint %}

When using drawing block, you can ask GitBook AI to generate an illustration by specifying a prompt. Simply type in a prompt and hit **Generate**, or choose one of the suggested prompts to get started.

Once GitBook AI has finished the drawing, you can double-click to open the full drawing palette and edit it however you like.

When editing a drawing, click the **Use AI to generate** button to bring up GitBook AI’s prompt editor again and generate a new drawing.

### Representation in Markdown

```markdown
<img src="https://example.com/file.svg" alt="Example diagram description" class="gitbook-drawing">
```


# Math & TeX

Add a mathTeX block to a page when you want to display a mathematical formula in your documentation

You can use the mathTeX format to include mathematical formulae in your documentation. We offer this through the [KaTeX](https://katex.org/docs/supported.html) library.

You can also add mathTeX [as inline content](/docs/creating-content/formatting/inline#math-and-tex).

### Example of Math & TeX block

$$
s = \sqrt{\frac{1}{N-1} \sum\_{i=1}^N (x\_i - \overline{x})^2}
$$

### Representation in Markdown

$$f(x) = x \* e^{2 pi i \xi x}$$

```markdown
# Math and TeX block

$$f(x) = x * e^{2 pi i \xi x}$$
```


# Page links

Add a page link block to show relations between pages in your space.

Page link blocks are the best way create relations between different pages within your content. Page links stand out on the page as they fill their own block — compared to a hyperlink added to some text.

### Example of page link block

The links below point to [blocks](/docs/creating-content/blocks) and [inline content](/docs/creating-content/formatting/inline):

{% content-ref url="/pages/xm6T8EpV4FqtdPLzZ8qN" %}
[Blocks](/docs/creating-content/blocks)
{% endcontent-ref %}

{% content-ref url="/pages/DfnNkU49mvLe2ythHAyx" %}
[Inline content](/docs/creating-content/formatting/inline)
{% endcontent-ref %}

## Representation in Markdown

```markdown
{% content-ref url="./" %} . {% endcontent-ref %}
```


# Columns

Add a column to create different layouts in your documentation.

Columns are a great way to create different layouts for your documentation. You can add many different types of blocks inside a column, and adjust the width of each side to customize it to the design you need.

{% columns %}
{% column width="50%" %}
**Create a seamless experience between your docs and product**

Integrate your documentation right into your product experience, or give users a personalized experience that gives them what they need faster.

<a href="https://www.gitbook.com/#alpha-waitlist" class="button primary">Learn more</a>
{% endcolumn %}

{% column %}

<figure><img src="/files/3YbJfAJhg1D2qpziKEbQ" alt="An image of GitBook icons demonstrating side by side column functionality"><figcaption></figcaption></figure>
{% endcolumn %}
{% endcolumns %}

## Representation in Markdown

<pre class="language-markdown" data-overflow="wrap"><code class="lang-markdown"><strong>## Example
</strong>


### Create a seamless experience between your docs and product

Integrate your documentation right into your product experience, or give users a personalized experience that gives them what they need faster.

&#x3C;a href="https://www.gitbook.com/#alpha-waitlist" class="button primary">Learn more&#x3C;/a>


&#x3C;figure>&#x3C;img src="../../.gitbook/assets/GitBook vision post.png" alt="An image of GitBook icons demonstrating side by side column functionality">&#x3C;figcaption>&#x3C;/figcaption>&#x3C;/figure>


</code></pre>


# Conditional content

Conditional content blocks let you control who can see a given block of content on your page based on user data and variables. These variables can be passed in via cookies, feature flags, authenticated access, or URL parameters.

### Create conditional content

To add a conditional block, begin a new line in the editor, type <kbd>/</kbd>, then select <picture><source srcset="/files/QtQtLiYwc1oJj119cgUz" media="(prefers-color-scheme: dark)"><img src="/files/8HufkkEJzusqztntQZnK" alt="The Page condition icon in GitBook"></picture> **Conditional content**.

After inserting the block, click the red condition badge in the top right of the block.

Clicking this will allow you to add a condition through the [condition editor](/docs/site-access/adaptive-content/adapting-your-content#working-with-the-condition-editor). You’ll be able to write your condition as an [expression](https://gitbook.com/docs/creating-content/variables-and-expressions) that will run against data defined in your site. You can reference data from [variables](/docs/creating-content/variables-and-expressions), or data coming from visitors through their [claims](/docs/site-access/adaptive-content/enabling-adaptive-content#set-your-visitor-schema).

See [adaptive content](/docs/site-access/adaptive-content) for more details.

### Example

The examples below use a URL parameter linked from the button to control which conditional content block is visible.

{% if visitor.claims.unsigned.example\_attribute\_A %}
This block is only visible to users **with** attribute A.

<a href="https://gitbook.com/docs/creating-content/blocks/conditional-content?visitor.example_attribute_A=false" class="button primary">View without attribute A</a>
{% endif %}

{% if !visitor.claims.unsigned.example\_attribute\_A %}
This block is only visible to users **without** attribute A.

<a href="https://gitbook.com/docs/creating-content/blocks/conditional-content?visitor.example_attribute_A=true" class="button primary">View with attribute A</a>
{% endif %}

## Representation in Markdown

```markdown
## Example

{% if visitor.claims.unsigned.example_attribute_A %}
This block is only visible to users **with** attribute A.
<a href="https://gitbook.com/docs/creating-content/blocks/conditional-content?visitor.example_attribute_A=false" class="button primary">View without attribute A</a>
{% endif %}

{% if !visitor.claims.unsigned.example_attribute_A %}
This block is only visible to users **without** attribute A.
<a href="https://gitbook.com/docs/creating-content/blocks/conditional-content?visitor.example_attribute_A=true" class="button primary">View with attribute A</a>
{% endif %}
```


# Snippets

Add a snippet block to reference a specific snippet on your page, and highlight it as important

{% hint style="warning" %}
The Snippets feature is no longer maintained in GitBook and is subject to change. We recommend to structure your content a [space](/docs/creating-content/content-structure/space) instead.
{% endhint %}

Snippet blocks are a great way to reference a snippet in your content. Snippet blocks help make the link to your snippet stand out on the page compared to [an inline link](/docs/creating-content/formatting/inline#relative-links).

You can only use snippet blocks for internal pages. If you add a snippet block to a page in a published space, the public documentation will show the block as a broken link.

{% hint style="warning" %}
**Note:** If you use a snippet block, but then [convert your snippet into a page](/docs/snippets/snippets-beta#convert-a-snippet-to-a-page) in your documentation, your snippet block will still link back to the original snippet, which will be archived.
{% endhint %}

### Representation in Markdown

```
{% content-ref url="./" %} . {% endcontent-ref %}
```


# AI coding assistants and skill.md

Use GitBook’s official skill.md file to give your AI coding assistants knowledge of GitBook’s features and blocks

GitBook provides a [skill.md](https://gitbook.com/docs/skill.md) file that teaches AI coding assistants how to properly edit GitBook documentation. Use it as “project rules” when editing GitBook docs locally.

This fits well with [Git Sync ](/docs/getting-started/git-sync)workflows where you edit your docs locally and then commit your changes to update your docs site. The reference file covers GitBook's markdown extensions, custom blocks, configuration files, and best practices.

#### Download

{% file src="/files/rIzl1Xj5uiYHRZh8EAaG" %}

{% hint style="info" %}
**Prefer writing with AI in the GitBook editor?**

GitBook also offers [GitBook Agent](/docs/gitbook-agent/what-is-gitbook-agent) for AI-assisted documentation right from your editor. This guide is for teams who prefer to use external coding assistants like Claude Code or Cursor.
{% endhint %}

### What skill.md contains

* Complete syntax reference for all custom blocks
* Configuration file formats (`.gitbook.yaml`, `SUMMARY.md`, `.gitbook/vars.yaml`)
* Frontmatter options and layout controls
* Variables and expressions syntax
* Decision tables for choosing the right block type
* Common pitfalls and best practices

Adding this file to your AI coding assistant provides the information it needs about creating, editing and formatting content for your GitBook docs. This means that the assistant will follow established frameworks and best practices for GitBook's features.

### Using skill.md via URL

Most AI coding assistants support project-specific instructions. You can reference the skill file in your project configuration by providing the URL for the skill file so the assistant knows how to work with GitBook syntax.

### Using skill.md locally

You can also download the skill file and include it in your repository. First, download the skill.md to your repository root, and then reference it in the rules file for your coding assistant: `"Read skill.md in the repo root for GitBook syntax and best practices"` .

This approach works offline and allows team-specific modifications.

{% hint style="warning" %}
Remember to update your local repository with the latest skill.md file as GitBook adds new features.
{% endhint %}

### Testing AI-generated content

It’s important that you always review and test content generated by AI assistants — both for technical accuracy and proper formatting.

When working with AI assistants trained on the skill file, you should:

* Verify that any custom blocks render correctly in GitBook
* Check that all the internal links work
* Confirm that the frontmatter is valid YAML
* Test that variables reference the correct scope

{% hint style="warning" %}
**Note:** AI assistants may occasionally generate incorrect syntax or forget to close custom blocks. Always review changes before committing.
{% endhint %}

### GitBook Agent

Prefer working directly in GitBook? [GitBook Agent](/docs/gitbook-agent/what-is-gitbook-agent) gives you an AI-assisted workflow in the GitBook editor — regardless of whether you use Git Sync.

The Agent has the full context of your docs, and is already trained on how to use GitBook’s blocks and features in the best possible ways. The Agent helps you draft content, make updates, and optimize your docs for different use-cases all from within the GitBook app.

<a href="/pages/KHHFlE1MtpVIaZboN8b2" class="button primary">Discover GitBook Agent</a>


# Variables and expressions

Create reusable variables that can be referenced in pages and spaces

With variables you can create reusable text that can be conditionally referenced in [expressions](/docs/creating-content/formatting/inline#expressions) and [conditions for adaptive content](/docs/site-access/adaptive-content/adapting-your-content#working-with-the-condition-editor).

If you repeat the same name, phrase or version number multiple times within your content, you can create a **variable** to help keep all those instances in sync and accurate — which is useful if you ever need to update them, or they’re complex and often mistyped.

You can create variables that are scoped to a single page, or a single space.

### Create a new variable

To create a new variable, click the **Library** in your Table of Contents when editing an open [change request](/docs/collaboration/change-requests). Then, click **Variables**.

You can use the toggle at the top to view and create variables scoped either to the current page you’re on, or all pages within the current space.

Clicking **Create a variable** will launch a modal where you can give your variable a name and a value.

Click **Add variable** to save your variable.

<figure><img src="/files/Z0HAtWNJAF7G7XjhDiqQ" alt="A GitBook screenshot showing the Add variables screen. The variable Name box has been filled with the text ‘latest_version’ and the Value box has been filled with the text ‘v3.04.1’"><figcaption><p>You can add variables to a single page or an entire space. When you update the value of a variable, every instance of it will update.</p></figcaption></figure>

{% hint style="info" %}
Variable names must start with a letter, and can contain letters, numbers and underscores.
{% endhint %}

### Use variables in your content

Variables can be referenced and used within an [expression](/docs/creating-content/formatting/inline#expressions) — which you can insert into your content inline. After inserting an expression, double click it to open the expression editor.

{% hint style="info" %}
Expressions can only be used in the page content of a document. They don’t work in page titles or page metadata.
{% endhint %}

Variables defined under your page are accessible under the `page.vars` object. Similarly, variables defined across your entire space are accessible under the `space.vars` object.

<figure><img src="/files/dQHtDzBVgHIX9GZ503Q8" alt="A GitBook screenshot showing an expression block within the editor. The expression editor is open below it and the ‘space.vars.latest_version’ variable has been selected"><figcaption><p>You can add variables to your content within expresions. The expression editor offers autocomplete options to help you find the variable you need.</p></figcaption></figure>

### Update a variable

You can update a variable at any point when within a change request. Updating its value will update the value across any expression blocks referencing it. The changed variable will go live to any published site once the change request is merged.


# Reusable content

Create reusable blocks of content that can be used across spaces, and all updated at once when you change an instance

{% hint style="info" %}
This feature is available on [Pro and Enterprise plans](https://www.gitbook.com/pricing).
{% endhint %}

Reusable content lets you sync content across multiple pages and spaces, so you can edit all instances of the block at the same time.

<figure><img src="/files/pX0EhpD2w2YsFybeTFfO" alt="A GitBook screenshot showing reusable content"><figcaption><p>Create reusable content within a space.</p></figcaption></figure>

## Fundamentals

Reusable content works just like any other content—you can modify it via change requests, include it in review workflows, and it will render correctly on any published site.

While reusable content can be referenced across multiple spaces, it belongs to a single *parent space*.

### The "parent space" concept

The parent space is the space that owns the reusable content. It’s the only place where that content can be edited.

Even though updates to reusable content will appear instantly in all instances, all changes must originate from the parent space—either as a direct edit or through a change request.

Spaces are a core concept in GitBook, supporting both editorial workflows and security. Because GitBook enforces permission-based editing, reusable content can only be changed from its parent space. This ensures that editing rights are respected, even when the content is reused across the organization.

### Known limitations

#### Integrations

Blocks provided by integrations are not supported in reusable content. This is because integrations in GitBook are installed per space, and limiting access ensures that third-party integrations only have the permissions you grant. Referencing reusable content across spaces would break this security boundary.

#### Search

Currently, reusable content only appears in search results within its parent space. We’re actively working to remove this limitation so that reusable content shows up in search results wherever it’s referenced.

## In the app

### **Create reusable content**

To create reusable content, [select one or more blocks](/docs/creating-content/blocks#selecting-blocks-and-interacting-with-selected-blocks), then open the **Actions menu** <picture><source srcset="/files/YjlF3Z9KMYv9aQiFzZKD" media="(prefers-color-scheme: dark)"><img src="/files/Zw9q37vPYF03vQIqywTy" alt="The Actions menu icon in GitBook"></picture> , select **Turn into**, and choose **Reusable content**. You can also give your block a name to make it easier to find and reuse later.

Alternatively, you can select one or more blocks and then hit **Cmd + C** to open a prompt asking if you want to create reusable content.

### **Insert reusable content**

You can insert reusable content as you would with any other block. Hit `/` on an empty line to open the **Insert palette** and search for your content by its name or simply searching for “reusable”. Alternatively, click the `+` on the left of any block or empty line.

You will also find the reusable content panel in the pages sidebar, where you can find a list of previously created content blocks in your current space.

### **Edit reusable content**

Reusable content is like any other content — you can edit any instance directly if [live edits](/docs/collaboration/live-edits) are enabled, or through [a change request](/docs/collaboration/change-requests) if not. Any changes you make will be synced everywhere the content is used.

If you’re making changes inside a change request, the content will be synced to all other instances once that change request is merged.

### **Detach reusable content**

You can detach reusable content by opening the **Actions menu** <picture><source srcset="/files/YjlF3Z9KMYv9aQiFzZKD" media="(prefers-color-scheme: dark)"><img src="/files/Zw9q37vPYF03vQIqywTy" alt="The Actions menu icon in GitBook"></picture> and selecting **Detach**. Detaching will convert the content back to regular blocks.

Once detached, any changes you make to the block(s) will not be reflected across the other instances, and changes you make in those instances will not be reflected in the detached block(s). All other instances of the reusable content remain synced together.

### Delete reusable content

You can delete reusable content from your space entirely, if you wish. Find the reusable content in the page’s table of contents, then open the **Actions menu** <picture><source srcset="/files/YjlF3Z9KMYv9aQiFzZKD" media="(prefers-color-scheme: dark)"><img src="/files/Zw9q37vPYF03vQIqywTy" alt="The Actions menu icon in GitBook"></picture> next to the content you’d like to delete, and select **Delete**.

Deleting reusable content will **delete it from all pages it is used in**. This action cannot be undone.

## Syncing with GitHub & GitLab

Reusable content is fully supported when syncing to GitHub & GitLab. Your reusable content will be exported to a dedicated `includes` folder, each content being a separate Markdown file.

Your content is then referenced in your other pages using the `includes` directive.

{% hint style="info" %}
When syncing, the `.gitbook/includes` directory is created in the root of each synced space (which may not be the root of the whole repository). If your `.gitbook/includes` folder or its files appear in your space’s table of contents, you may need to hide them manually from the TOC.
{% endhint %}

#### Example

{% hint style="success" %}
If you're writing on the GitHub side, ensure the path to the include is relative to the file containing the reference (not the root of the repository).
{% endhint %}

```markdown
{% include "../../.gitbook/includes/reusable-block.md" %}
```


# Searching internal content

Find what you’re looking for faster with keyword search and AI-powered smart search

<figure><img src="/files/fJ5goV6PJKZCjfIAooWE" alt="A GitBook screenshot showing the search bar"><figcaption><p>Ask questions or search through your content using the built in search bar.</p></figcaption></figure>

Whether you’re working within the GitBook app or your visitors are reading your published content, GitBook’s search functions help to make it easy to find what you’re looking for.

You can use quick find to look for specific words or phrases, or you can ask GitBook AI a question. It’ll scan through your docs and summarize an answer in seconds, with references to help you find out more.

{% hint style="success" %}
**Global search**

If you’re publishing your documentation on [an Ultimate site plan](/docs/account-management/plans#site-plans), and add multiple spaces as [site sections](/docs/docs-site/site-structure/site-sections), your users will be able to use the **Ask or search** bar to find information across all your site sections.
{% endhint %}


# Search & Quick find

Search and navigate your documentation fast with quick find

GitBook’s **Quick find** palette lets you search for content in your current organization, and jump to pages fast.

### Use Quick find

**​**You can open the **Quick find** palette by hitting the **Quick find** <picture><source srcset="/files/zQV3twxlViZn2AoK3a7F" media="(prefers-color-scheme: dark)"><img src="/files/fXpZU3E0y1Ovr4xJ6O1g" alt=""></picture> button at the top of the sidebar or by pressing **⌘ + K** on Mac or **Ctrl + K** on PC.

### Search results <a href="#display-of-results" id="display-of-results"></a>

Results from the space you’re currently in appear at the top, followed by results from other spaces in the organization you’re currently working in.

To search another organization, switch organizations first using [the organization switcher](/docs/resources/gitbook-ui#the-sidebar).

{% hint style="info" %}
We do not currently support the ability to prioritize certain content in Quick find results.
{% endhint %}

### Permissions <a href="#team-permissions" id="team-permissions"></a>

**Quick find** is compliant with your team’s permission settings, meaning that users will only be able to search the content they have permission to access.‌

### Content indexing <a href="#indexation" id="indexation"></a>

We index your content by grouping it into sections. Sections are denoted using [H1, H2 or H3 Headings](/docs/creating-content/blocks/heading), with the content that follows them forming part of a section.

Each result shows the first three lines of information below the section header. If your section is too big, your keyword match may not appear in the preview — but don’t worry, quick find still found a match!


# GitBook AI

GitBook uses AI to help you find the knowledge you need within your organization, faster

When engaging with GitBook AI, you have the ability to ask questions or elaborate on specific requirements. This AI-driven tool is designed to review your documentation in real-time, providing you with quick, direct answers.

{% hint style="info" %}
GitBook AI search is available both within the GitBook app to search internal content, and [in published content to search that specific docs site](/docs/docs-site/ai-search).
{% endhint %}

## GitBook AI helps you find answers in the GitBook app

{% hint style="info" %}
This feature is available on [Pro and Enterprise plans](https://www.gitbook.com/pricing).
{% endhint %}

You can enable GitBook AI for your organization’s internal content, allowing you to ask questions and get semantic answers about your internal knowledge base.

Head to the **Organization settings** page and, in the **General** tab, toggle the **Enable GitBook AI** setting on.

### Using GitBook AI search <a href="#how-do-i-use-gitbook-ai" id="how-do-i-use-gitbook-ai"></a>

Once GitBook AI is enabled, open the **Ask or search** <picture><source srcset="/files/zQV3twxlViZn2AoK3a7F" media="(prefers-color-scheme: dark)"><img src="/files/fXpZU3E0y1Ovr4xJ6O1g" alt=""></picture> menu from the left sidebar and simply type out a question. GitBook AI will take a few seconds to scan your documentation and summarize the results.

### FAQs

#### How long does it take for GitBook AI to index changes?

When someone makes a change to your content — such as a merged [change request](/docs/collaboration/change-requests) — it can take **up to one hour** for GitBook to index the changes to and reflect them in AI search results.

#### How does GitBook AI handle my data?

We pass your content to OpenAI to index and process data. OpenAI **does not** use this content for service improvements (including model training). You can find out more about how OpenAI handles data [here](https://openai.com/blog/introducing-chatgpt-and-whisper-apis#developer-focus).

#### How do I prevent hallucinations with GitBook AI search?

If you’re seeing GitBook produce answers that are incorrect, the best method for correcting this is write explicit content around the topic so the AI does not have to guess.


# Version control

Keep track of changes, roll back to a previous version and more

You can easily monitor all the changes people have made to your content using to the **Version history** side panel.

### Version history <a href="#see-the-activity-of-a-specific-draft" id="see-the-activity-of-a-specific-draft"></a>

In the Version history of a space, you can see a list of all the actions that changed the content within it. These include:

* When someone made [live edits](/docs/collaboration/live-edits) to the space.
* When someone merged a [change request](/docs/collaboration/change-requests).
* When someone performed a [Git Sync](/docs/getting-started/git-sync) operation.

### View historical versions of content

To view past versions of your content and see the changes that were made, click the **Version history** <picture><source srcset="/files/WVfSPMgIbWWq12Hy83TC" media="(prefers-color-scheme: dark)"><img src="/files/UgB7xRBQuyhQLYUS0Xz5" alt="The Version history icon in GitBook"></picture> button in the [space header](/docs/resources/gitbook-ui#space-header), or open the **Actions menu** <picture><source srcset="/files/HXFvPsjDqbaBEhpH0WKJ" media="(prefers-color-scheme: dark)"><img src="/files/NHMhGPTU1i5O6tIApq9t" alt="The Actions menu icon in GitBook"></picture> next to the space or change request title and choose **Version history**.

Click on any item in the list to see how your content looked at the point this change was made. This is very similar to how you view [change requests](/docs/collaboration/change-requests).

### Show changes

When you are viewing an old version of your content, you can choose to highlight the differences between the old and current content — similar to [diff view in a change request](/docs/collaboration/change-requests#diff-mode).

To enable or disable this, use the **Show changes** toggle at the bottom of the **Version history** side panel.

With show changes enabled, content that has changed will be highlighted by an icon on the left of its content block.

### Viewing historical published versions

If you're investigating the version history of a published space, you can also view previews of what the previous versions looked like in the published context (i.e. what the end user would see).

You can do this by:

{% stepper %}
{% step %}
From the version history side panel, select the revision
{% endstep %}

{% step %}
Copy the ID at the end of the URL
{% endstep %}

{% step %}
Add it at the end of your published docs URL as `/~/revisions/<id>`
{% endstep %}
{% endstepper %}

### Roll back to a previous version

Rolling back allows you to revert a space’s content to the way it was at a previous point in time. This is helpful if you’ve accidentally made a breaking change or deleted content and need to quickly get back to a previous version of the space.

To roll back to a previous version of your space, hover over the version in the side panel, click the **Actions button** <picture><source srcset="/files/YjlF3Z9KMYv9aQiFzZKD" media="(prefers-color-scheme: dark)"><img src="/files/Zw9q37vPYF03vQIqywTy" alt="The Actions menu icon in GitBook"></picture> and select **Rollback**.


# Inviting your team

Learn how to invite teammates and other stakeholders to your GitBook organization as members or guests so they can collaborate on your content

<figure><img src="/files/IPycIrwPM4vD1iNQsIVU" alt="A GitBook screenshot showing the invite team dialog"><figcaption><p>Invite your team to GitBook to collaborate on pages, spaces, and published sites.
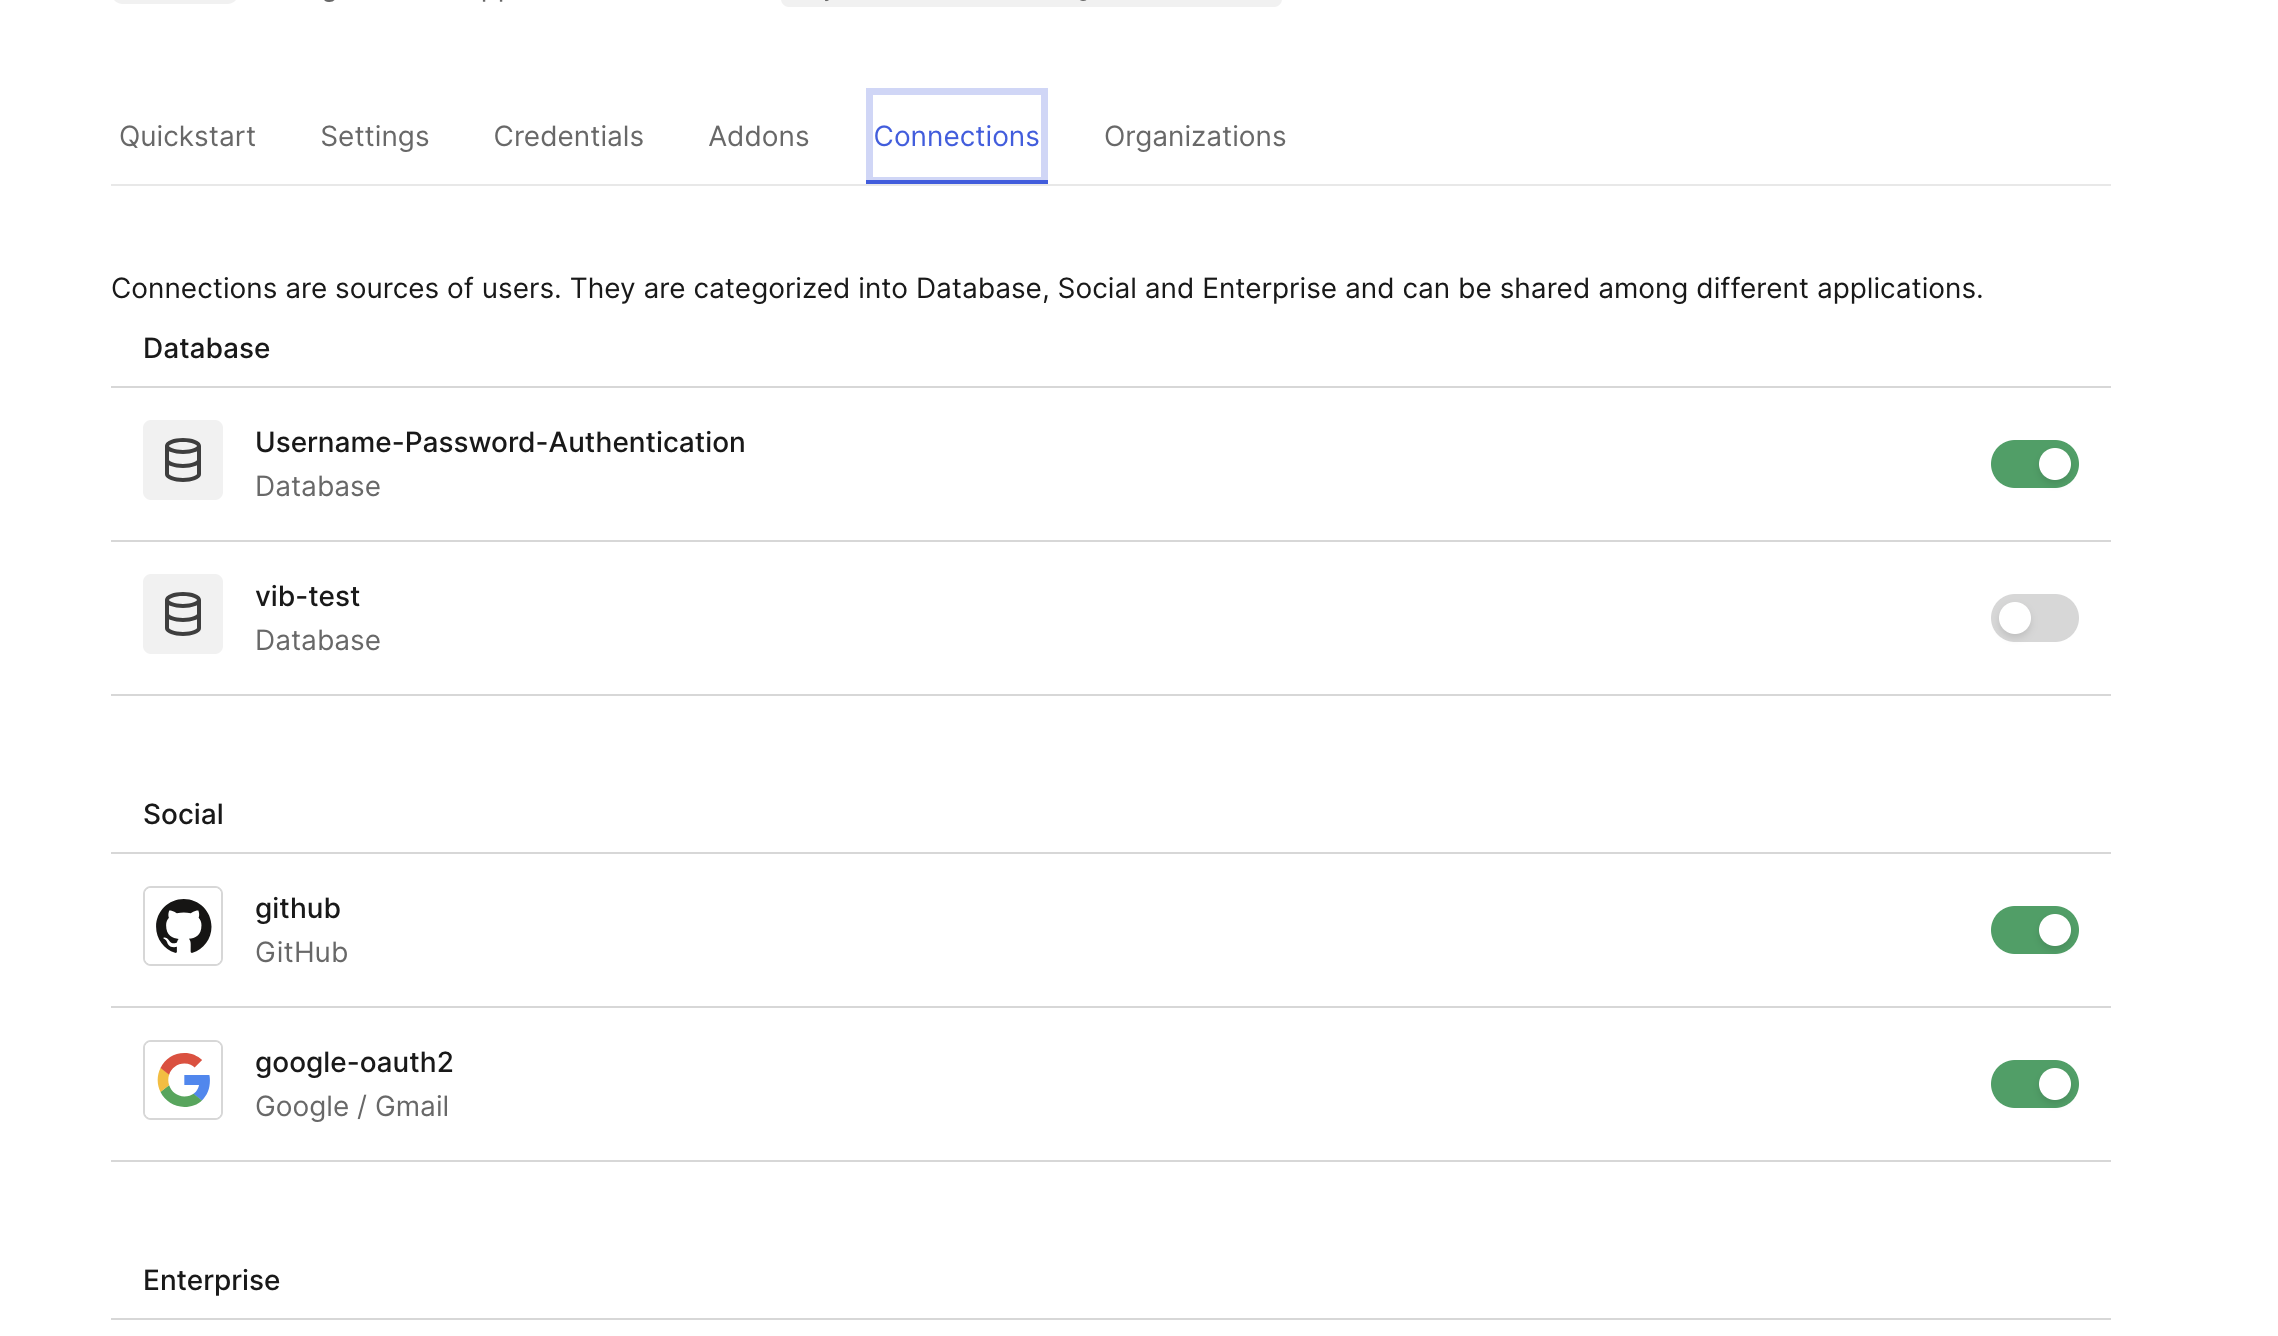
</p></figcaption></figure>

{% hint style="warning" %}

### All additional members will be added to your subscription

Inviting additional members to your organization — regardless of their role or how you add them — will immediately impact the price of your subscription. Take a look at our [billing policy](/docs/account-management/plans/billing-policy) for the details.
{% endhint %}

### Invite someone to join your organization via email <a href="#inviting-someone-to-your-organization-via-email" id="inviting-someone-to-your-organization-via-email"></a>

You can directly invite members through your [organization settings](/docs/account-management/organization-settings). In the **Members** section of the **Settings** screen, click **Invite new members**, then add email(s), select their default role, and click **Invite**.

Each member will receive an email that will allow them to sign up to GitBook and instantly join your organization.

{% hint style="info" %}

### Email domain

You can allow all users with a specific email domain to join your organization if you wish. To do this, open your organization’s **Settings** page, choose the **Members** option, click **Invite new members** and enable the toggle at the bottom of the modal.
{% endhint %}

### Invite someone to join your organization via invite link <a href="#creating-and-managing-invite-links" id="creating-and-managing-invite-links"></a>

Invite links in GitBook allow you to maintain a list of links that members can use to sign up and quickly join your organization.

Invite links are tied to specific [roles](/docs/collaboration/member-management/roles), and you can create — and revoke — as many invite links as you like.

Here’s how to create an invite link to your organization:

1. Open your [organization settings](/docs/account-management/organization-settings), then choose the **Members** section.
2. Click **Invite new members**, then click the **Invite by links** button at the bottom of the modal.
3. Use one of the existing links, or click **Create multiple links** to add a new link.
4. Select the [role](/docs/collaboration/member-management/roles) you want for the new user, copy the link, and share it with your new member.

To revoke an invite link, follow the same steps as above, then find the link, open the **Actions menu** <picture><source srcset="/files/YjlF3Z9KMYv9aQiFzZKD" media="(prefers-color-scheme: dark)"><img src="/files/Zw9q37vPYF03vQIqywTy" alt=""></picture> and choose **Revoke**.

## Invite someone to a single space or collection <a href="#sharing-a-space-or-collection" id="sharing-a-space-or-collection"></a>

To share a single [space](/docs/creating-content/content-structure/space), click the **Share** button in the top-right corner of the space. To share a [collection](/docs/creating-content/content-structure/collection), open its **Actions menu** <picture><source srcset="/files/HXFvPsjDqbaBEhpH0WKJ" media="(prefers-color-scheme: dark)"><img src="/files/NHMhGPTU1i5O6tIApq9t" alt=""></picture> and choose **Permissions**. This will open the **Share** modal.

### Invite a member or team from your organization <a href="#invite-members" id="invite-members"></a>

Some people in your team may not have access to a specific space in your GitBook organization due to their [role](/docs/collaboration/member-management/roles) or specific [permissions settings](/docs/collaboration/member-management/permissions-and-inheritance).

To invite someone who’s already a member of your organization:

1. Open the space or collection’s **Share** modal
2. Type their name, choose their role for this space, and hit **Invite**.

You can also add an entire [team](/docs/collaboration/member-management/teams) by typing the team name and hitting **Invite**.

### Invite someone from outside your organization <a href="#invite-someone-from-outside-your-organization" id="invite-someone-from-outside-your-organization"></a>

To invite someone from outside your organization to a space or collection:

1. Open the space or collection’s **Share** modal
2. Add the person’s email address, choose their role for this collection, and hit **Invite**.

By default, people you add will be a [guest](/docs/collaboration/member-management/roles#the-guest-role) in the space or collection. Guests only have access to the individual spaces that you invite them to, and can be given a specific [role](/docs/collaboration/member-management/roles) within that space — whether it’s to edit the content, or only view and comment on it.

Alternatively, you can also choose to enable the **Invite as an organization member** toggle, which will give the new member access to all your team’s content with the permissions of the role you’ve selected.

{% hint style="warning" %}

### All additional members will be added to your subscription

Inviting additional members to your organization — either as a full member or a guest — will immediately impact the price of your subscription. Take a look at our [billing policy](/docs/account-management/plans/billing-policy) for the details.
{% endhint %}

### Invite guests via link

If you don’t want to use email to invite someone to your content, or want to invite a number of people as guests quickly, you can create a secret link. You can also set the role of guests that join using the link, so you have control over who can do what to your content.

When you share this link, anyone who clicks on it will be able to sign up, join your organization as a guest, and get access to just this single space and its content.

You can revoke the link at any time by opening the **Actions menu** <picture><source srcset="/files/YjlF3Z9KMYv9aQiFzZKD" media="(prefers-color-scheme: dark)"><img src="/files/Zw9q37vPYF03vQIqywTy" alt="The Actions menu icon in GitBook"></picture> next to the link and choosing **Revoke**.


# Member management

Learn how to manage access to content for members of your organization

You can [invite and remove members](/docs/collaboration/member-management/invite-members-to-your-organization) from your organization, manage members’ content access through [roles](/docs/collaboration/member-management/roles), and manage [teams](/docs/collaboration/member-management/teams) of members from the members’ page in your organization’s settings.

## Members & permissions

Shows each person’s role, last seen date, and SSO status, if applicable. You’ll also see an overview of the [spaces](/docs/creating-content/content-structure/space) they can access and, if you’re on the Pro plan, how many [teams](/docs/collaboration/member-management/teams) they’re part of.

Click the **Teams** or **Access** listings for any member to jump to a list of all those teams and spaces.

You can also click on any member to open their **individual member page**. Here, you can see more information about them, including their join date and active status.

Select the **Teams** and **Spaces** tabs to see a list of the [teams](/docs/collaboration/member-management/teams) they’re a member of, and the spaces they have access to — as well as their access level for those specific spaces.


# Manage or remove members

Learn how to manage the members of your organization, including adding new admins and what to do if the only admin leaves your organization

{% hint style="info" %}
If you’re looking for information about inviting members to your org, read [Inviting your team](/docs/collaboration/share)
{% endhint %}

### Manage member roles <a href="#manage-member-roles" id="manage-member-roles"></a>

You can view and manage your organization’s members from the **Members** section of your [organization settings](/docs/account-management/organization-settings) page.

Here you can change a member’s role, see when they were last active, and view their teams and the content they have access to. You can also use the **Actions menu** ![](https://sites.gitbook.com/preview/site_p4Xo4/~gitbook/image?url=https%3A%2F%2F1050631731-files.gitbook.io%2F%7E%2Ffiles%2Fv0%2Fb%2Fgitbook-x-prod.appspot.com%2Fo%2Fspaces%252FNkEGS7hzeqa35sMXQZ4X%252Fuploads%252F89MTSo5XRpPMVr1T0rxS%252Factions.svg%3Falt%3Dmedia%26token%3D2b5d001e-560a-4f29-8d22-de8163725ca1\&width=300\&dpr=3\&quality=100\&sign=d841db7e\&sv=2) to copy their name, email or user ID, or to remove them from the organization.

Click any user to see more details about them in a dedicated screen.

### Remove members <a href="#removing-members" id="removing-members"></a>

#### Leaving an organization <a href="#leaving-an-organization" id="leaving-an-organization"></a>

To leave a GitBook organization:

1. Open your **Settings** page and choose the **Organizations** section.
2. Hover over the organization you want to leave and click the **Leave** button that appears.

{% hint style="danger" %}
It is not possible to rejoin an organization you have left unless you are invited to it again.
{% endhint %}

If you are an organization administrator and wish to leave an organization, ask another admin in the organization to remove you.

#### Removing a member <a href="#removing-a-member" id="removing-a-member"></a>

To remove a member of your organization:

1. Open your organization’s **Settings** page and open the **Members** section.
2. Find the member you want to remove.
3. Open the **Actions menu** ![](https://sites.gitbook.com/preview/site_p4Xo4/~gitbook/image?url=https%3A%2F%2F1050631731-files.gitbook.io%2F%7E%2Ffiles%2Fv0%2Fb%2Fgitbook-x-prod.appspot.com%2Fo%2Fspaces%252FNkEGS7hzeqa35sMXQZ4X%252Fuploads%252F89MTSo5XRpPMVr1T0rxS%252Factions.svg%3Falt%3Dmedia%26token%3D2b5d001e-560a-4f29-8d22-de8163725ca1\&width=300\&dpr=3\&quality=100\&sign=d841db7e\&sv=2) and choose **Remove member**.

### Transfer ownership of an organization <a href="#transferring-ownership" id="transferring-ownership"></a>

Nobody “owns” your GitBook organization, but you do need at least one an admin in any organization. If you prefer to have only one user in charge of the billing and member management, we recommend downgrading other admin users to [the Creator role](/docs/collaboration/member-management/roles#creator).

You can add a new admin to your organization at any time. If your admin has left the organization, [see the related section in the FAQs](#how-do-i-add-and-manage-admin-roles-in-my-gitbook-organization) for next steps.

### FAQs <a href="#faqs" id="faqs"></a>

<details>

<summary>How do I add and manage admin roles in my GitBook organization?</summary>

[Administrators](#admin) play a crucial role in managing your organization’s settings, billing, and member permissions.

**Adding a new admin**

To add a new admin, first invite [invite them to your organization](/docs/collaboration/share), making sure to select **Administrator** as their role.

Once they accept the invitation, the new admin will gain access to administrative settings, including billing.

**Steps when the only admin leaves your organization**

If the sole admin of a GitBook organization has removed themself from your organization, our support team can assist in transitioning admin rights to another person. Here’s what to do:

1. [Contact the GitBook support team](https://www.gitbook.com/contact) to request an update of organization admin permissions.
2. Complete the required identity verification process. This typically involves confirming details linked to the account, such as payment card information.

{% hint style="info" %}
**Identity verification and security measures**

To ensure security and protect sensitive information, **we must verify your identity** when administrative roles are modified. This step is critical to confirm the requesting party’s association and authority within the organization.
{% endhint %}

</details>

<details>

<summary>How do I downgrade my organization to a free single-user plan?</summary>

GitBook’s free plan only allows a single user without any docs sites. If you want to downgrade to this plan, you will need to remove all other members.

The admin who will remain as the owner can remove other users completely, blocking their access to collaboration and editing features. ​﻿﻿You can also ensure that the right person receives any future bills and receipts by updating their details in [the Billing section](/docs/account-management/organization-settings#billing) of your [organization settings](/docs/account-management/organization-settings). ​

</details>


# Permissions and inheritance

Understand how permissions work in GitBook and how to control who can access and edit your content

GitBook has a flexible permissions model that lets you have as much, or as little, control over permissions as you need. The permission model in GitBook is a [**role-based**](/docs/collaboration/member-management/roles#roles-in-gitbook)**, cascading** model. This means that you set defaults and then, at any level of content, decide whether to inherit those defaults or not.

You can set permissions at four levels: **organization**, **site**, **collection**, and **space**.

### Organization default roles

When you add a member to your organization, you set [their default role](/docs/collaboration/member-management/roles). This role applies to any piece of content that inherits its permissions from the organization defaults.

### How permissions cascade

Permissions in GitBook resolve by **precedence**, not by the highest role across every level.

For spaces in inherited mode, GitBook resolves access in this order:

* **Space** — direct member and team overrides on the space
* **Site** — permissions from the parent site
* **Collection** — permissions from the parent collection, if there is one
* **Organization** — the default role set for each member

This means site permissions override organization defaults and parent collection defaults for linked spaces in inherited mode. Direct space-level overrides still take precedence over everything else.

Here are two examples of how this works in practice:

<details>

<summary><strong>Example 1</strong></summary>

A member has a Creator role at the organization level. A linked space is in inherited mode, and the parent site sets that member to Commenter. The member gets Commenter access in that space, because the site takes precedence over the organization default.

</details>

<details>

<summary><strong>Example 2</strong></summary>

A collection sets a space to Reader, and the parent site sets it to Commenter. The space uses Commenter, because site permissions take precedence over the parent collection in inherited mode. If you then give one member direct Creator access on the space, that direct override wins for that member.

</details>

{% hint style="info" %}
**Note:** Site permissions only apply to spaces in inherited mode. If a space has its own permissions configured — meaning it is not in inherited mode — those take precedence and site-level permissions will not affect it.
{% endhint %}

### Managing inheritance

Any time you create a collection or a space, you’ll be able to set the type of inheritance you want. You have three broad options when setting the inheritance for a piece of content:

### Inherit

Setting the inheritance to **inherit** will make the space or collection inherit the roles assigned in the **parent level content**. For top-level spaces or collections, this parent is the organization, so they would inherit the organization default roles. For spaces or sub-collections inside a collection, the parent will be the collection the content sits within.

When a space is linked to a site and stays in inherited mode, GitBook resolves access in this order: direct space overrides, then the parent site, then the parent collection, and finally the organization. Site permissions take precedence over organization and collection defaults, but they do not change direct space-level overrides.

### Specific role access

Selecting a specific role when setting a collection or space’s permission inheritance will **reset** the organization default roles and assign every **non-admin** to that role within the collection or space. For example, if you set the inheritance to **reader**, everyone in the organization would have read-only access to the space or collection, regardless of their default role.

Direct member or team access on that collection or space can still override this inherited setting. If you set a specific role on the space itself, the space is no longer using inherited mode, so site permissions do not affect it.

### No access

You can also completely revoke access for any non-admin organization members at a space or collection level. This will hide the content from everyone except for admins and whomever created the space or collection.

{% hint style="info" %}
The default inheritance option for any newly-created space or collection is **inherit**. This means that whenever a piece of content is created, it’ll inherit permissions from its parent by default.
{% endhint %}

### Setting content specific permissions

Once you’ve decided on the permission inheritance for your space or collection, you can further customise access by giving teams or members **direct access**.

### Giving a team direct access

You can add a team directly to a collection or space with a specific role. This will give anyone in that team the specified access to the content.

{% hint style="info" %}
Team access is a great way to ensure that the right people have access to the right content; any time someone is added to or removed from a team, they’ll gain or lose, respectively, the permissions set on the content.
{% endhint %}

### Giving a member direct access

Similarly to teams, you can also give members direct access. This is the most granular way of managing permissions. When giving single members direct access to a collection or space, you override any inherited permissions they might have. Direct member access is great if you need very specific control over collaborators.

Members with direct access at the space level are removed from the inheritance pattern entirely. Their role is set explicitly, and is not affected by org, site, or collection-level permissions.

### Keeping on top of permissions

While this might seem pretty complex at first, GitBook’s permission model gives you control if you need it, and gets out of the way if you don’t. For many teams, a **set-and-forget** approach to permission management is all they need. For other teams, especially larger organizations, this level of control over access and workflow is essential.

#### Set and forget

If you just want to get your teammates onboarded and editing content with you, then you might never even need to look at permissions. Invite folks, set their default role, and any content you create will default to inheriting these roles. No need to get into the weeds!

#### Control over access and workflow

For larger organizations, teams that split their organization up into discrete collections, or teams that need very granular control over workflow; then getting into the weeds is exactly what’s needed. Using a combination of inheritance, overriding, direct team access and direct user access, you can create workflows and access models that keep you in control.


# Roles

A breakdown of every role in GitBook — what each one can do, and how to use them to control access across your organization

When adding members to your organization, you can give them a **default role**. This role will apply to any content that inherits its permissions from the organization.

{% hint style="info" %}
Understanding default roles is key to getting the most out of how GitBook handles permission management.

See our documentation on [**permissions and inheritance**](/docs/collaboration/member-management/permissions-and-inheritance) for a full overview of how permissions cascade throughout content in GitBook.
{% endhint %}

### Roles in GitBook

Roles are how you define the level of access and control that members have over content (and the organization, in the case of admins).

{% hint style="warning" %}
Regardless of role, ***every*** ***single member*** of an organization ***counts toward*** the total number of members for ***billing*** purposes.\
\
You might also like to learn more about [inviting and removing members](/docs/collaboration/member-management/invite-members-to-your-organization).
{% endhint %}

Each role gets progressively higher levels of access as you move up the list. Let’s start at the lowest access and work our way up:

<details>

<summary>Guest role</summary>

The guest role is a very specific role in GitBook. Guests are members that have **no default organization role**. A guest acts as a standard user in every other regard, they just need to have their permissions set explicitly at a content level.

Inviting a guest to the organization means that they’ll only ever see content they’ve been directly added to. This is great if you want to add external stakeholders or contractors to your organization, but don’t want to worry about giving them access to any content by default.

**Guest members count toward the total number of members in an organization for billing purposes.**

</details>

<details>

<summary>Reader</summary>

A reader is the most basic role in GitBook: it gives read-only access.

**Reader seats are paid for organizations on all plans**.

</details>

<details>

<summary>Commenter</summary>

Commenters have the same read-only access as readers, but they’re also able to leave comments against content and spaces (find out more about how that works in our [comments](/docs/collaboration/comments) documentation).

**Commenter is one of our two advanced member roles, available only on the Pro or Enterprise plan.**

</details>

<details>

<summary>Editor</summary>

Editors are able to read and comment, just like a commenter, but they’re also able to edit content in a couple of ways. Firstly, for spaces that are **open** for [live edits](/docs/collaboration/live-edits), editors can edit the content directly. Secondly, for spaces that have live edits **locked**, editors can create and submit [change requests](/docs/collaboration/change-requests). Editors cannot merge change requests.

</details>

<details>

<summary>Reviewer</summary>

Reviewers have all the same permissions as an editor however, they can also merge their own and others’ change requests.

**Reviewer is one of our two advanced member roles, available only on the Pro or Enterprise plan.**

</details>

<details>

<summary>Creator</summary>

Creators are essentially content-level admins. They have all the same permissions as a reviewer, however they can also create and delete spaces, collections and sites, merge change requests and manage permissions at a content level.

If a creator is also a creator or admin in another GitBook organization, they have the ability to [move content between organizations](/docs/creating-content/content-structure/space#move-a-space).

</details>

<details>

<summary>Admin</summary>

An admin is like a super-user for your organization — they have full access! Set someone as an admin if you’re comfortable with them making changes that can impact billing, managing members, and generally just being in control of all areas of the organization.

If an admin is also a creator or admin in another GitBook organization, they have the ability to [move content between organizations](/docs/creating-content/content-structure/space#move-a-space).

</details>

### Roles on a docs site

When roles are applied at the [site level](/docs/collaboration/member-management/permissions-and-inheritance), only **Administrators** can change site settings. All other roles can still contribute to and edit content in the spaces they have access to — they just can't manage the site itself. The table below shows how each role maps to its site permissions.

| Permission level | Permissions on the site |
| ---------------- | ----------------------- |
| Administrator    | Edit and view           |
| Creator          | View                    |
| Reviewer         | View                    |
| Editor           | View                    |
| Commenter        | View                    |
| Reader           | View                    |
| No access        | Cannot view             |

### **Reader role and public docs reader**

The Reader role is an invited organization member with a paid seat. A public docs reader is a site visitor who doesn't need an invitation or a paid seat.

<table><thead><tr><th width="198.80078125"></th><th>Reader role (your organization)</th><th>Public docs reader (site visitor)</th></tr></thead><tbody><tr><td><strong>Invitation required</strong></td><td>Yes</td><td>No</td></tr><tr><td><strong>Paid seat</strong></td><td>Yes</td><td>No</td></tr><tr><td><strong>Content access</strong></td><td>Published and unpublished (with permission)</td><td>Published only</td></tr></tbody></table>


# Teams

Teams are a great way of grouping members within your organization

Teams allow you to manage user access at scale. By creating a specific team, consisting of multiple members, you can grant or remove their access to spaces or collections. Read more about [permissions and inheritance](/docs/collaboration/member-management/permissions-and-inheritance).

### Creating and managing teams

You can create, edit, and remove teams in the **Teams** section of your organization settings.

To find this, click on settings icon in the bottom of your window. Choose organization settings for your desired organization, then click the Teams option in the sidebar.

On this page, you can view and search your current teams, or click one to open the team details page and see more information about it and its members.

### Managing team members

You can manage team members in two ways:

1. Click on a specific member in **Members & permissions** to open their member page, and select the **Teams** tab. Click the vertical ellipsis and you can remove them from the team immediately, or choose **Manage team.**
2. In the **Teams** section, click on the number of members in the list to open the team details page. You can then use multi-select on the member list to select and remove team members or add more with the button at the top.

### Team owners

Team owners (available only in Enterprise plans) allow you to hand over management of a specific team to a selected member. Team owners can add and remove members from the team they are an owner of by clicking on the organization settings, then teams. They will not have access to any other organization settings, including managing other teams.


# Change requests

Collaborate on content edits through change requests

A change request is a copy of your main content. It comes from the simple concept of [**branching**](https://git-scm.com/book/en/v2/Git-Branching-Branches-in-a-Nutshell), and will feel familiar to anyone who uses pull requests in GitHub or merge requests in GitLab.

In a change request, you can edit, update and delete elements of your content, request reviews on your changes, then merge them back into your main version to apply all the changes you made.

To learn more about managing open change requests, head to [reviewing change requests](/docs/collaboration/change-requests/change-requests-screen).

<figure><img src="/files/X1Yu5sAwadfJc89m6asf" alt="A GitBook screenshot showing the change requests panel"><figcaption><p>Edit your content through change requests.</p></figcaption></figure>

{% stepper %}
{% step %}

#### Open a change request

To start editing content, you’ll need to start by creating a change request. Change requests can be opened:

* By [pressing the **Edit** button in the top right corner](/docs/collaboration/change-requests/change-requests-in-a-space#creating-a-change-request) when viewing a space
* By [implementing a new change request with GitBook Agent](/docs/gitbook-agent/write-and-edit-with-ai)
* [Automatically by GitBook Agent](broken://pages/zuuDoIkzNmXS3fXZv3PG)
  {% endstep %}

{% step %}

#### Make your changes

After a change request is opened, you’re free to make any edits or changes. Changes can be made by working [directly in the editor](/docs/creating-content/formatting), or by [working with Docs Agent](/docs/gitbook-agent/write-and-edit-with-ai).
{% endstep %}

{% step %}

#### Request a review

Once your changes are ready to go, you can request a review from your team in the **Overview** tab. Tagging reviewers in a change request will notify them, and allow you to further collaborate in the change request by directly making more changes in the editor, or discussing changes in [comments](/docs/collaboration/comments). If you don’t tag anyone, everyone with reviewer permissions in the space gets a notification. If the space has no reviewers, the next role above reviewer gets the notification.

You can request Docs Agent for any reviews, or anyone on your team with the right [permissions](/docs/collaboration/member-management/permissions-and-inheritance).
{% endstep %}

{% step %}

#### Merge

After your reviews are done, you’ll be able to [merge your changes](#merge) to publish them to your live docs site immediately!
{% endstep %}
{% endstepper %}

### Working with change requests

<table data-card-size="large" data-view="cards"><thead><tr><th></th><th></th><th data-hidden data-card-target data-type="content-ref"></th></tr></thead><tbody><tr><td><strong>Change request screen</strong></td><td>View and manage change requests across your entire organization</td><td><a href="/pages/RtzwHmNAAMW6pYmEJshK">/pages/RtzwHmNAAMW6pYmEJshK</a></td></tr><tr><td><strong>Change requests in a space</strong></td><td>Create and review change requests in a single space</td><td><a href="/pages/QahtV4lWA3JQnbMAvNKG">/pages/QahtV4lWA3JQnbMAvNKG</a></td></tr></tbody></table>


# Change requests screen

Learn about the dedicated change requests screen, which helps you browse, manage and review change requests before merging them and publishing them in your documentation

The change requests screen in GitBook makes it easy to view and manage active change requests in your organization.

In this screen, you can see open change requests, merge finished ones, and even collaborate with GitBook Agent to work on updates — all from a single, unified page.

<div data-with-frame="true"><figure><img src="/files/0W44hltZQcQhN3g0fTWR" alt=""><figcaption><p>View active change requests from the change requests screen.</p></figcaption></figure></div>

### Navigating the change request screen

Every change request within your organization will appear in the change requests screen, and can be filtered by drafts, in review, merged, and archived.

Additionally, you can filter change requests [created by GitBook Agent](broken://pages/zuuDoIkzNmXS3fXZv3PG).

Clicking into a change request will open it in an expanded view, allowing you to review, edit, merge, and even [continue working on changes with GitBook Agent](/docs/gitbook-agent/review-change-requests-with-gitbook-agent#update-change-requests-with-docs-agent). This section also shows information about the change request, including the participants and reviewers, the description, and the changes highlighted using diff view.

To view more detailed information about a change request, click the **Edit** button in the upper right to jump straight to the [change request’s space](/docs/collaboration/change-requests/change-requests-in-a-space).

### Reviewing a change request

When someone requests your review on a change request, you can edit the content and leave feedback right from the change requests screen.

You can either request changes if you think it still needs work, or approve the change request, to signal it's ready to merge.

Most reviews will take place in the change request’s [comments](/docs/collaboration/comments), where collaborators can share feedback and have discussions about specific content blocks, or the change request as a whole.

Additionally, you can [review a change request with GitBook Agent](/docs/gitbook-agent/review-change-requests-with-gitbook-agent), allowing you to plan, check, and continue working on changes.


# Change requests in a space

Learn about collaborating on a single change request in a space — including how to review, resolve conflicts and merge

When you’re within a [space](/docs/resources/concepts#space), you can make changes by opening a new change request, or browse existing change requests to see what other people are working on.

### Creating a change request

Click the **Edit** button in the [space header](/docs/resources/gitbook-ui#space-header) to start a new change request.

This will open a new change request, where you can edit or delete content as needed. Your changes are saved automatically, and other people can join you in a change request to collaborate in real-time.

When creating a change request, you can add a title and description to provide more context about the changes you’re making.

You can also link the change request to a source, including:

* Linear issues
* GitHub pull requests or issues
* Jira tickets
* General URLs

These links appear on the change request, so reviewers can trace the work back to its origin.

Once you’re happy with your changes, you can use the button in the header bar to [**Request a review**](#request-a-review-on-a-change-request) of your change request, or [**Merge**](#merging-a-change-request) it directly into the main branch.

#### Creating a change request with GitBook Agent

[GitBook Agent](/docs/gitbook-agent/what-is-gitbook-agent) is an AI teammate that can [plan and implement change requests](/docs/gitbook-agent/write-and-edit-with-ai#implement-a-change-request-with-gitbook-agent) based on any instructions you give it.

To open a new change request with GitBook Agent, click the GitBook Agent icon in the upper right corner next to the “Edit” button, and ask GitBook to implement any changes you want.

Some things you can ask it to do include:

* Add usage examples
* Improve page SEO
* Enhance clarity
* Check for consistency
* Fix typos and spelling errors
* Link related content
* \+ more

Head to [Writing with GitBook Agent](/docs/gitbook-agent/write-and-edit-with-ai) to learn more.

### Previewing a change request

You can preview the changes you’ve made in a change request by clicking the **Preview** option in the [space header](/docs/resources/gitbook-ui#space-header). This will switch to a preview of your published docs with the proposed changes included, so you can see your changes in the entire context of your published documentation.

Below the **Preview** button is a URL for your site preview. Click this and your site preview will open in full in a new tab.

When you open a preview URL in a new tab, you will also see [the Preview toolbar](/docs/resources/gitbook-ui/toolbar-on-published-sites-and-site-previews) at the bottom of the browser window. This toolbar lets you quickly jump back into GitBook to view, edit, or comment on the change request, or open the live version of your site.

{% hint style="info" %}
You can only preview change requests for spaces added to a [published docs site](/docs/docs-site/publish-a-docs-site).
{% endhint %}

{% hint style="warning" %}
If your content is published using share links or authenticated access, the preview function won't appear.
{% endhint %}

### Request a review on a change request

Request a review on your change request when you want to ask members of your team to check your content before you merge the changes into the main branch.

Select the **Overview** tab in the space header bar to open an overview of your change request — including all the changes you’ve made in diff view.

Here you can add a description to your change request to give your reviewers some context, and tag specific people that you want to check your work.

When you click **Request a review**, the change request’s status will change to **In review**, and anyone you tagged in your review request will get a notification.

If your changes don’t require a review, you have the appropriate [permissions](/docs/collaboration/member-management/roles), and you don’t have any blocking [merge rules](/docs/collaboration/merge-rules), you can merge your changes into the main version directly instead.

{% hint style="info" %}
[Add GitBook Agent as a reviewer](/docs/gitbook-agent/review-change-requests-with-gitbook-agent) to your change request and it can check your content for spelling, grammar and style guide errors, suggest improvements and more.
{% endhint %}

{% hint style="warning" %}
If you don’t tag anyone in your review request, everyone with reviewer permissions in the space gets a notification. If the space has no reviewers, the next role above reviewer gets the notification.
{% endhint %}

#### Diff view <a href="#diff-mode" id="diff-mode"></a>

When you open the **Changes** tab in the space header, the diff view will appear. Diff view highlights every page and block that’s been edited in a change request. It will highlight any edited pages in the table of contents, and on the pages it will show the specific blocks that have been added, edited or removed.

There are two options when using diff view:

1. **Show all pages** – This is the default mode for diff view, which will show both modified and non-modified pages in the table of contents. This is good for seeing which pages have been edited in the context of the entire space.
2. **Show only changed pages** – This mode will show only the modified pages in the table of contents, which helps you focus on the changed content. This is particularly helpful in larger spaces with many pages and sub-pages.

You can switch to the **Changes** tab to check the diff view in any change request.

### Merging a change request

Merging a change request will add the change request’s changes into the main branch of content, creating an updated version and a new entry in the space’s [version history](/docs/creating-content/version-control#see-the-activity-of-a-specific-draft).

You might not be able to merge a change request if you don’t have the right [permissions](/docs/collaboration/member-management/permissions-and-inheritance), or if your change request hasn’t passed your organization or space’s [merge rules](/docs/collaboration/merge-rules).

### Updating a change request

As you're working inside a change request, other contributors may be modifying the main branch of the space. When this happens, your change request is considered "out of date" - there is content on the main branch that you don't see inside your change request.

You may want to pull in this new content into your change request. This can be useful if:

* You want to see how your changes and the content on main look once everything is together.
* You need to make changes to the pulled content as part of your change request.

You can do this by pressing **Update** in the header of the change request screen.

Once you press **Update**, all content from the main branch is pulled into your change request. You may get conflicts when you update - you'll be able to resolve them inside the change request. Once conflicts have been resolved, the change request is considered up-to-date and the Update button disappears.

If the main branch changes again, your change request will again be out-of-date and the Update button will appear.

Asking editors to have their change requests up-to-date before merging is a good quality control - it helps authors check the exact content that will go into the main branch once their change request is merged. You can enforce this with a [merge rule](/docs/collaboration/merge-rules).

### Resolving merge conflicts

Sometimes, when you want to merge a change request, you may discover conflicts between the main content and the content you’re trying to merge. In the simplest form, a conflict is a piece of content that could not be merged automatically.

If this happens, you’ll be presented with a conflict alert, and a list of the conflicts you’ll need to resolve before continuing the merge.

You have two options when it comes to resolving a merge conflict — **selecting a version to merge** or **manually** **editing the content**.

#### Selecting a version to merge

You can resolve a merge conflict by selecting a version you want to merge — either your incoming content, or the content that was previously there. This allows you to choose between one change and another — either your recent work, or the original content.

If you’re dealing with a merge conflict that can be resolved this way, you can select the version you want to keep, and the other version will be deleted.

#### Manually editing

If you don’t want to choose between versions, you can resolve a merge conflict by manually editing the conflict. You’ll be able to delete the blocks you don’t need, or even rewrite them entirely. Once you’re happy with the changes, you can move on to the next conflict until they’re all resolved.

### Archiving a change request

You can't delete a change request in GitBook, but you can archive it instead.

To archive a change request:

1. Open the **Change requests** tab.
2. Select the change request you want to archive.
3. Click the **Actions** menu  <picture><source srcset="/files/HXFvPsjDqbaBEhpH0WKJ" media="(prefers-color-scheme: dark)"><img src="/files/NHMhGPTU1i5O6tIApq9t" alt="The Actions menu icon in GitBook"></picture>  next to the change request's title and choose **Archive**.

To find and reopen an archived change request, open the **Change requests** menu and select the **Archived** tab.


# Merge rules

Define requirements that must be met before change requests can be merged

{% hint style="info" %}
This feature is available on [Pro and Enterprise plans](https://www.gitbook.com/pricing).
{% endhint %}

Merge rules allow you to define requirements that must be met before change requests can be merged, such as needing a review from a specific user, or requiring a subject or description for the change request.

These rules help maintain content quality and ensure proper review processes across your documentation workflow.

When you have merge rules configured, they’ll automatically evaluate change requests before they can be merged. If a rule isn’t satisfied, the merge will be blocked until the requirements are met.

This provides an automated way to enforce your team’s collaboration and review standards.

## Using merge rules

You can configure merge rules at different levels to match your team’s workflow:

### Organization-level configuration

Organizations can set default merge rules that all spaces inherit. This provides consistency across multiple spaces while still allowing individual spaces to customize their rules as needed.

To configure merge rules for your organization, open the organization menu at the top of the sidebar and choose **Settings** <picture><source srcset="/files/CG9bVSmdbJnQxrYiNbRI" media="(prefers-color-scheme: dark)"><img src="/files/Z6mVPT1qwXi4oXlarEpK" alt=""></picture>. In the Settings screen, select **Merge rules** under the **Organization** section of the sidebar. Here you can specify merge rules for your entire organization.

Choose between unrestricted merging, or select from the list of presets to apply to change requests across your entire organization.

### Space-level configuration

Whether or not you have enabled organization-wide merge rules, each space can have its own merge requirements tailored to its content and team structure.

This gives you the flexibility to have stricter rules for important documentation and more relaxed rules for draft content.

When setting up merge rules for a space, you can choose to:

* **Inherit** merge rules from your organization
* **Define custom rules** specific to that space
* **Disable merge rules** entirely

{% hint style="info" %}
If you inherit organization rules, any changes to the organization’s merge rules will automatically apply to the space.
{% endhint %}

To configure merge rules for your organization, open the **Actions menu** <i class="fa-ellipsis">:ellipsis:</i> in the top left of the editor, and then select **Merge rules**. Here you can specify whether to inherit the merge rules from your organization or configure new ones specific to that space.

## Rule evaluation

### How rules work

When someone wants to merge a change request, GitBook will evaluate all the configured rules in order:

* All rules in a configuration must pass for a merge to be allowed
* Rules are evaluated in the order they appear in your configuration
* If any rule fails, the merge is blocked with an appropriate error message
* Rules with bypass capabilities can override previous failures

### Bypass rules

Some rules have bypass capabilities (like **Allow specified actors to bypass requirements**). These special rules can override other rule failures. If a bypass rule evaluates to true, the merge will be allowed even if other rules have failed.

## Best practices

When setting up merge rules, consider these recommendations:

* **Start simple**: Begin with basic rules like requiring at least one review.
* **Scale gradually**: Add more specific requirements as your team grows and workflows mature.
* **Use bypass carefully**: Only grant bypass permissions to trusted administrators.
* **Review regularly**: Adjust rules based on your team’s actual workflow patterns.
* **Test first**: When possible, test rule changes in a test space before applying to production spaces.

## Available rule types

### Review requirements

<table><thead><tr><th width="279.703125">Rule</th><th>Description</th></tr></thead><tbody><tr><td><strong>Require at least one review</strong></td><td>Ensures that at least one team member has reviewed the change request before it can be merged.</td></tr><tr><td><strong>Require all reviews approved</strong></td><td>All <strong>completed</strong> (not requested) reviews must be approvals. If any reviewer has requested changes or rejected the change request, the merge will be blocked.</td></tr><tr><td><strong>Require review by specified actors</strong></td><td>Requires approval from all specified users. You can select specific team members who must review and approve the change request before it can be merged.</td></tr><tr><td><strong>Require review by one of specified actors</strong></td><td>Requires approval from at least one of the specified users. This is useful when you have multiple qualified reviewers but only need one approval from the group.</td></tr><tr><td><strong>Require Docs Agent review (coming soon)</strong></td><td>Requires a review from the GitBook AI agent. This ensures automated quality checks are performed on content changes before merging.</td></tr></tbody></table>

### Change request requirements

<table><thead><tr><th width="279.703125">Rule</th><th>Description</th></tr></thead><tbody><tr><td><strong>Require up to date change request</strong></td><td>The change request must be current with the primary content branch. If the primary content has been updated since the change request was created, you’ll need to rebase or update it before merging.</td></tr><tr><td><strong>Require subject</strong></td><td>The change request must have a descriptive subject/title. Empty subjects will block the merge.</td></tr><tr><td><strong>Require description</strong></td><td>The change request must include a description explaining what changes were made and why.</td></tr></tbody></table>

### Advanced options

<table><thead><tr><th width="279.703125">Rule</th><th>Description</th></tr></thead><tbody><tr><td><strong>Allow specified actors to bypass requirements</strong></td><td>You can designate specific users who are allowed to bypass all other merge rule requirements. This is useful for administrators or emergency situations where rules need to be overridden.</td></tr><tr><td><strong>Custom expression</strong></td><td>You can create advanced merge rules using custom JavaScript expressions. This allows you to define complex logic based on the evaluation context, with access to properties of the change request, reviews, and the user attempting to merge.</td></tr></tbody></table>

#### Custom Expressions

When you create a custom expression, it will be evaluated each time someone tries to merge a change request. If the expression returns `true`, the merge is allowed. If it returns `false`, the merge is blocked.

{% hint style="info" %}
Custom expressions support standard JavaScript syntax (ES2022) and have a maximum length of 1024 characters.
{% endhint %}

**Available context variables:**

* `changeRequest.subject` - The subject/title of the change request
* `changeRequest.description` - The description of the change request
* `changeRequest.outdated` - Whether the change request is outdated (boolean)
* `changeRequest.createdBy.id` - ID of the user who created the change request
* `reviews` - Array of review objects, each containing:
  * `reviews[].status` - Review status (`"approved"` or `"changes_requested"`)
  * `reviews[].reviewer.id` - ID of the reviewer
* `actor.id` - ID of the user attempting to merge

**Common expression examples:**

{% code title="Require multiple approved reviews" %}

```javascript
reviews.filter(r => r.status === "approved").length >= 2
```

{% endcode %}

{% code title="Require approval from specific user" %}

```javascript
reviews.some(r => r.reviewer.id === "harry" && r.status === "approved")
```

{% endcode %}

{% code title="Require description for urgent changes" %}

```javascript
!changeRequest.subject.includes("[URGENT]") || !!changeRequest.description
```

{% endcode %}

{% code title="Allow self-merge only for minor changes" %}

```javascript
changeRequest.createdBy.id === actor.id ? changeRequest.subject.startsWith("[minor]") : true
```

{% endcode %}


# Comments

Ask questions to your team or receive feedback on the content you create

Comments allow you to provide feedback around specific pieces of content — without switching out of context from GitBook.

### Add a comment <a href="#comment-within-your-content" id="comment-within-your-content"></a>

You can open the comments panel by clicking on the **Comments** button <picture><source srcset="/files/pDeFaKnBm2RYQrk7saJ9" media="(prefers-color-scheme: dark)"><img src="/files/8vlo89BQHX7mRQxXid28" alt="The Comments button icon in GitBook"></picture> in the [space header](/docs/resources/gitbook-ui#space-header).

Adding a comment here will attach a comment to the entire page. You can also comment on a specific block by hovering over a block and clicking the content icon that appears on the right.

You can tag teammates by typing the `@` symbol followed by their name.

{% hint style="info" %}
Guests will be able to make comments but they will not be able to see or mention other users in the organization.
{% endhint %}

### Comment threads

You can reply to any comment to start a conversation with your teammates, turning it into a discussion thread.

You can also leave an emoji reaction on any comment by clicking the emoji button on the message or thread you’d like to react to.

### Resolving comments

If you’re done working through a comment thread or idea, you can **resolve** a comment at any time. Resolving a comment will hide it in the interface, but still keep it accessible in the ’Resolved’ tab of the space’s comments section.


# Notifications

Receive notifications about new content, updates to your spaces or changes in visibility

Notifications provide updates about the activity on GitBook that comes from spaces owned by you or an organization that you are a member of.

You can receive notifications inside the GitBook app and/or via email. We support [several types of notifications](#notification-types) which you can disable or enable in your notification settings.

### App notifications

You can find app notifications at the top of the [sidebar](/docs/resources/gitbook-ui#the-sidebar).

Within the notifications pop-up, you’ll see two icons in the top-right corner. You can either mark all of your notifications as read, or head to your notification settings to update your preferences.

### Email notifications

Email notifications are enabled by default, and can be disabled in your notifications settings. When enabled, GitBook will send one email per notification type. This will be sent to the email address associated with your personal GitBook account.

These email will appear to be sent from `no-reply@gitbook.io via sendgrid.net`

#### Possible issues

As with all email delivery, there’s a chance that you might not receive the email. Possible reasons include but are not limited to:

* Our email ends up in your spam folder or caught by another protection mechanism.
* Emails sent from GitBook to your email address have bounced many times, and therefore further sending has been automatically blocked by our mail service.
* There could be a temporary delivery problem that will resolve on its own.
* A wrong expectation about the notifications you should be receiving.
* A wrong expectation about the email address to which we would be sending the notification.

If you think you might be running into any of these issues, here are some things you can try:

* Check your spam or other protection mechanism and make sure our email address (`no-reply@gitbook.io`) is not blocked on your end.
* Wait it out if you are aware of any temporary issue with your mail provider.
* Check [your settings](https://app.gitbook.com/account/notification) to ensure that you have enabled email notifications for the type of notification you are expecting.
* Make sure you are checking the correct email address. You can see the email address of your personal account in [your account settings](https://app.gitbook.com/account).
* [Contact support](https://gitbook.com/docs/help-center/support/how-do-i-contact-support) if all other things fail. If you do, please make sure to include as much information as possible. For example, this might include the email address you expect to receive the notification to, the type of the notification (you can see that in the [settings](https://app.gitbook.com/account/notification)), and the exact details of what you feel should have triggered that notification for you. Please include links to anything relevant, as well.

### Notification settings

For both app and email notifications, [you can configure](https://app.gitbook.com/account/notification) which notifications you would like to receive.

#### Notification types

We currently offer notifications for the following areas:

* Spaces and collections
* Change requests
* Mentions in comments
* Organizations


# Live edits

Edit pages in real-time with other collaborators

With live edits enabled, members in your org can edit a space without creating [a change request](/docs/collaboration/change-requests). When editing content, you can see the avatars of anyone currently viewing the space in the top-right corner.

GitBook supports live collaboration, meaning you’ll be able to work on the same document with multiple members at the same time.

{% hint style="info" %}
**Live edits are locked** by default in any newly created space. To edit the content, you will either need to [create a change request](/docs/collaboration/change-requests), or toggle live edits on.
{% endhint %}

### Toggling live edit mode

You can toggle live edit mode in a space by selecting **Lock live edits** or **Unlock live edits** from the [space header’s](/docs/resources/gitbook-ui#space-header) **Actions menu** <picture><source srcset="/files/HXFvPsjDqbaBEhpH0WKJ" media="(prefers-color-scheme: dark)"><img src="/files/NHMhGPTU1i5O6tIApq9t" alt="The Actions menu icon in GitBook"></picture>.

When a space is in **Live edits** mode, the space header will show the **Editor** tab. When it is in **Locked live edits** mode, the space header will show a **Read-only** tab. When the Read-only tab appears in the space header, you will need to open a change request to edit the content of the page, or unlock live edits.

### When is live editing *not* available?

You cannot unlock live editing if:

1. a space is published with the **In collection**, **Public**, or **Unlisted** visibility option.
2. a space has [GitHub or GitLab Sync](/docs/getting-started/git-sync) enabled.

{% hint style="info" %}
Only [administrators and creators](/docs/collaboration/member-management/roles) can lock or unlock live edits.
{% endhint %}


# Authenticated access

Set up custom authentication for your published content

{% hint style="info" %}
This feature is available on the [Ultimate site plan](https://www.gitbook.com/pricing).
{% endhint %}

Authenticated access allows you to publish your content while requiring authentication from any visitors who want to view it. When enabled, GitBook lets your authentication provider handle who has access to the content.

<figure><img src="/files/ktOIUY0prmjC0FPR5IcM" alt="A screenshot showing a login screen for docs behind authenticated access"><figcaption><p>Add a sign in to your published documentation.</p></figcaption></figure>

### Use cases

Common use cases for authenticated access include:

* Publishing sensitive product documentation that should only be accessible to paying customers, sales prospects or partners.
* Publishing internal knowledge base content that should only be accessible to employees of your company.

### How it works

There are two methods you can choose from when setting up authenticated access:

1. Installing one of our authentication integrations — we currently support Okta, Azure, and Auth0. We **highly recommend** this option if you’re using an authentication provider we support.
2. Create and host your own server to handle the authentication. Many different technologies can be used, but it’s up to you to code and maintain the solution you choose.

### Built-in login and logout URLs

GitBook gives you built-in URLs for sign-in and sign-out on your published site:

* `<publishedSiteURL>/~gitbook/auth/login`
* `<publishedSiteURL>/~gitbook/auth/logout`

Use the login URL anywhere you want a sign-in link, such as a header link on your site.

When a visitor opens the login URL, GitBook redirects them to the authentication backend configured for that site. This works with integration backends and custom backends.

GitBook also adds a `location` query parameter that matches the page the visitor started from. Your backend can use that value to send them back to the same page after sign-in.

Use the logout URL to sign a visitor out of their GitBook session.

Head to [Enabling authenticated access](/docs/site-access/authenticated-access/enabling-authenticated-access) to start setting up protected access for your site.


# Enabling authenticated access

To protect your docs behind a sign-in screen, you’ll need to first enable authenticated access for your site.

### Enable authenticated access

Head to your [site’s settings](/docs/docs-site/site-settings), and choose **Authenticated access** from your site’s audience settings. Once selected, you’ll see a few options you’ll need to continue configuring your site. You’ll also see a generated "**Private key**", which you’ll need at a later point in the authenticated access setup.

### Choose an authentication method

Depending on your setup, we have integrations and guides on setting up authenticated access for different tools.

Head to the relevant guide to continue setting up authenticated access for your site.

<table data-view="cards"><thead><tr><th></th><th data-hidden data-card-cover data-type="image">Cover image</th><th data-hidden data-card-target data-type="content-ref"></th><th data-hidden data-card-cover-dark data-type="image">Cover image (dark)</th></tr></thead><tbody><tr><td>Setting up Auth0</td><td><a href="/files/gLopKD4HiKNlvhgvyriF">/files/gLopKD4HiKNlvhgvyriF</a></td><td><a href="/pages/R83a8Qh2WeO7IV5QLQpp">/pages/R83a8Qh2WeO7IV5QLQpp</a></td><td><a href="/files/4Gm6ZsEYHJiikjjQG6xM">/files/4Gm6ZsEYHJiikjjQG6xM</a></td></tr><tr><td>Setting up Azure AD</td><td><a href="/files/za4aHvr2NRbfbdpEJ0q0">/files/za4aHvr2NRbfbdpEJ0q0</a></td><td><a href="/pages/bExJU6ah6xJ85CGUxXpW">/pages/bExJU6ah6xJ85CGUxXpW</a></td><td><a href="/files/i99ytQBwFy39Xmd922zg">/files/i99ytQBwFy39Xmd922zg</a></td></tr><tr><td>Setting up Okta</td><td><a href="/files/sDfnjrOdPzbgBJcFAIw6">/files/sDfnjrOdPzbgBJcFAIw6</a></td><td><a href="/pages/hIfRqIeX6S7SMk12buNt">/pages/hIfRqIeX6S7SMk12buNt</a></td><td><a href="/files/YZKI5GDRbOvPCNV2JBky">/files/YZKI5GDRbOvPCNV2JBky</a></td></tr><tr><td>Setting up AWS Cognito</td><td><a href="/files/8V36WDKt7ynoizwxbSD1">/files/8V36WDKt7ynoizwxbSD1</a></td><td><a href="/pages/PyRnT9Rl3B2XzMHTrNEY">/pages/PyRnT9Rl3B2XzMHTrNEY</a></td><td><a href="/files/YyDsrlH2cjqkb1UZycdR">/files/YyDsrlH2cjqkb1UZycdR</a></td></tr><tr><td>Setting up OIDC</td><td><a href="/files/7tvUt0D1Lt2xH021tyBj">/files/7tvUt0D1Lt2xH021tyBj</a></td><td><a href="/pages/tGPdipCjrVfRiibfR2kc">/pages/tGPdipCjrVfRiibfR2kc</a></td><td><a href="/files/an2wBPnTxg9LoioO6FWs">/files/an2wBPnTxg9LoioO6FWs</a></td></tr><tr><td>Setting up a custom backend</td><td><a href="/files/1dEAlQu1ERR5BQPCGZT3">/files/1dEAlQu1ERR5BQPCGZT3</a></td><td><a href="/pages/1Z06lRawG4maeQOYXHnm">/pages/1Z06lRawG4maeQOYXHnm</a></td><td><a href="/files/h5zjuSICVyqGmyjhPcN4">/files/h5zjuSICVyqGmyjhPcN4</a></td></tr></tbody></table>


# Setting up Auth0

Set up an Auth0 login screen for visitors to your docs

{% hint style="info" %}
Head to our guides to find a [full walk-through](https://gitbook.com/docs/guides/product-guides/how-to-personalize-your-gitbook-site-using-auth0-and-adaptive-content) on setting up authenticated access and adaptive content with Auth0.
{% endhint %}

{% hint style="warning" %}
This guide takes your through setting up a protected sign-in screen for your docs. Before going through this guide, make sure you’ve first gone through [Enabling authenticated access](/docs/site-access/authenticated-access/enabling-authenticated-access).
{% endhint %}

To setup your GitBook site with authenticated access using Auth0, the process looks as follows:

{% stepper %}
{% step %}
[**Create a new application in Auth0**](#id-1.-create-a-new-application-in-auth0)

Create an Auth0 application in your Auth0 dashboard.
{% endstep %}

{% step %}
[**Install and configure the Auth0 integration**](#id-2.-install-and-configure-the-auth0-integration)

Install the Auth0 integration and add the required configuration to your GitBook site.
{% endstep %}

{% step %}
[**Configure Auth0 for Adaptive content (optional)**](#id-3.-configure-auth0-for-adaptive-content-optional)

Configure Auth0 to work with adaptive content in GitBook.
{% endstep %}
{% endstepper %}

### 1. Create a new application in Auth0

Start by creating a new application in your Auth0 platform dashboard. This application will allow the GitBook Auth0 integration to request tokens to validate user identity before granting them access to your site.

1. Sign in to your Auth0 [dashboard](https://manage.auth0.com/dashboard/).
2. Head to **Applications > Applications** section from the left sidebar.
3. Click on the **+ Create Application** button, and give your app a name.
4. Under the **Choose an application type,** select **Regular Web Applications**.
5. In the **Quickstart** screen of the newly created app, select **Node.js (Express)** and then **I want to integrated my app**.
6. You should then see a configuration screen like below.\
   Click **Save Settings And Continue**.<br>

   <figure><img src="/files/JYxIKj3bCcEyLOfp0zso" alt=""><figcaption></figcaption></figure>
7. Click on the **Settings** tab.
8. Copy and make note of the **Domain**, **Client ID** and **Client Secret**.

{% hint style="warning" %}
Please ensure that you have **at least one connection enabled** for your Auth0 application under the **Connections** tab.
{% endhint %}

### 2. Install and configure the Auth0 integration

Once you've created the Auth0 application, the next step is to install the Auth0 integration in GitBook and link it with your Auth0 application using the credentials you generated earlier:

1. Navigate to the site where you've enabled authenticated access and want to use Auth0 as the identity provider.
2. Click on the **Integrations** button in the top right from your site’s settings.<br>

   <figure><img src="/files/P8a4o6FRqFBwtpbRJJ95" alt=""><figcaption></figcaption></figure>
3. Click on **Authenticated Access** from the categories in the sidebar.
4. Select the **Auth0** integration.
5. Click **Install on this site**.<br>

   <figure><img src="/files/iNBvkgggq26UVHUG2iK8" alt=""><figcaption></figcaption></figure>
6. After installing the integration on your site, you should see the integration's configuration screen:<br>

   <figure><img src="/files/BWsjpHsTiBiN8kDijRqr" alt=""><figcaption></figcaption></figure>
7. Enter the **Domain**, **Client ID** and **Client Secret** values you copied after creating the Auth0 application earlier. For Auth0 Domain, enter the Domain copied from Auth0 (make sure to prefix it with `https://`).
8. **(optional)** Enable the **Include claims in JWT token** option at the bottom of the dialog if you have enabled your site for [adaptive content](/docs/site-access/adaptive-content/enabling-adaptive-content).
9. Copy and make note of the **Callback** **URL** displayed **at the bottom of the dialog**.
10. Click **Save**.
11. Head back to the Auth0 application you created earlier in the Auth0 dashboard.
12. Browse to **Applications > Applications** in the sidebar and select the **Settings** tab.
13. Scroll down to the **Application URIs** section of the settings
14. Paste the **Callback URL** you copied earlier from the GitBook integration dialog into the **Allowed Callback URL** input field.
15. Click **Save.**
16. Head back to **Auth0 integration** installation screen **in GitBook**.
17. Close the integration dialogs and click on the **Settings** tab in the site screen.
18. Browse to **Audience** and select **Authenticated access** (if not already selected).
19. Select **Auth0** from the dropdown in the **Authentication backend** section.
20. Click **Update audience**.
21. Head to the site's overview screen and click **Publish** if the site is not already published.

Your site is now published behind authenticated access using your Auth0 as identity provider.

To test it out, click on **Visit**. You will be asked to sign in with Auth0, which confirms that your site is published behind authenticated access using Auth0.

### 3. Configure Auth0 for Adaptive content (optional)

{% embed url="<https://www.youtube.com/embed/uhWeQkgyg8Y?si=7_kD3RF-Is_MnYhZ>" %}

To leverage the Adaptive Content capability in your authenticated access site, [configure the Auth0 application](https://auth0.com/docs/secure/tokens/json-web-tokens/create-custom-claims) to include additional user information in the authentication token as claims.

These claims, represented as key-value pairs, are passed to GitBook and can be used to [adapt content](/docs/site-access/adaptive-content/adapting-your-content) dynamically for your site visitors.


---

[Next Page](/docs/llms-full.txt/1)

